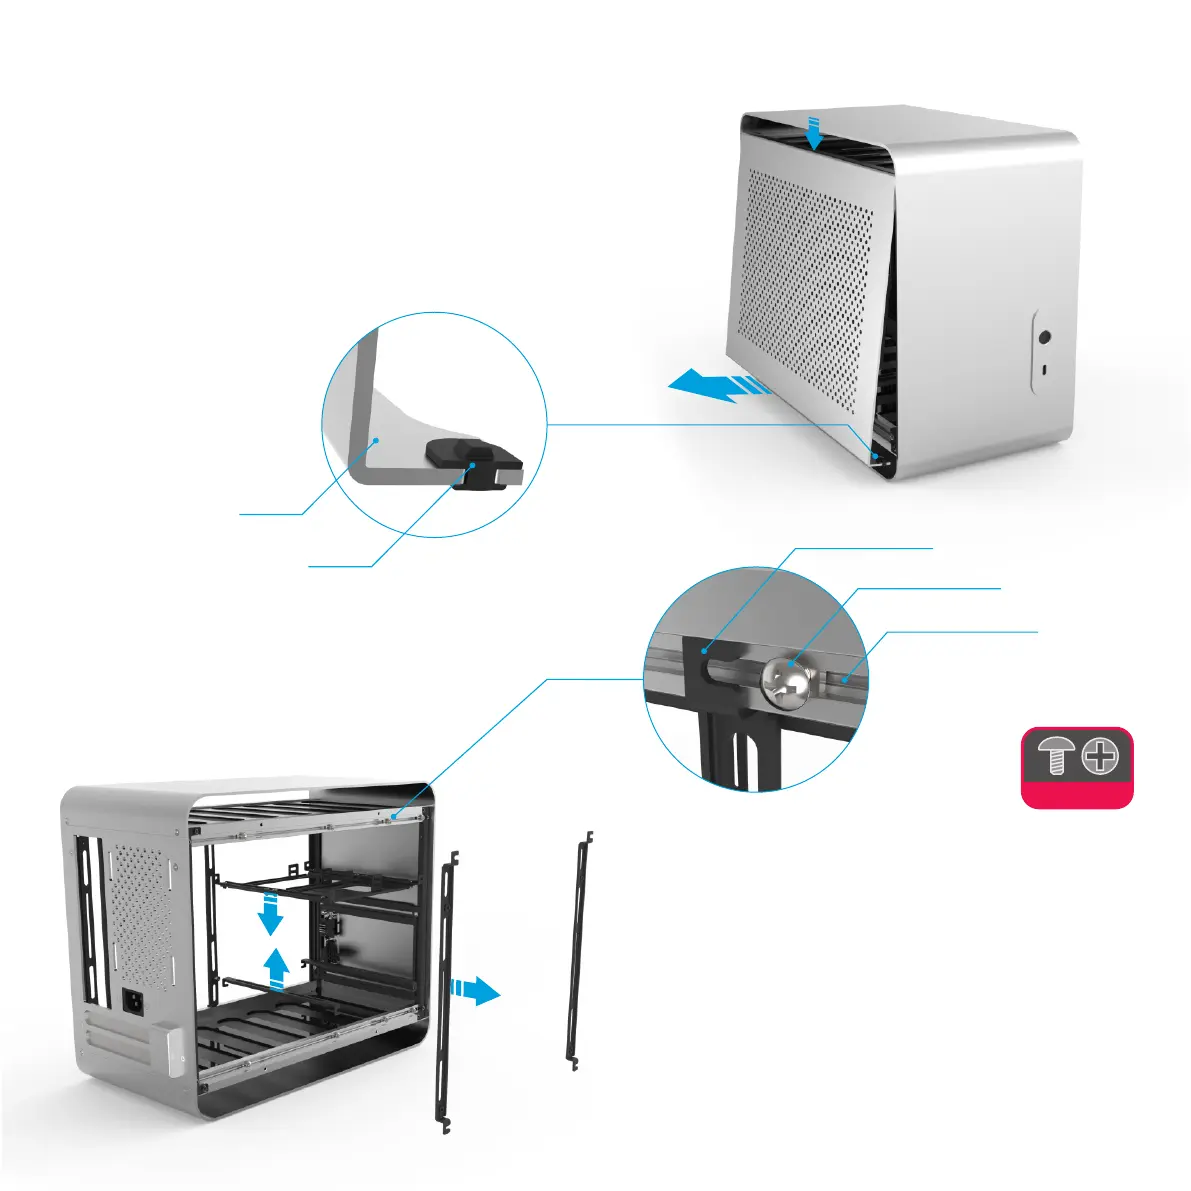
The side panels are held in place with a simple rubber catch located on
each edge (4 per side panel) that locks against the upper and lower frame
of the case. To remove the side panel, pull the lower edge away from the
case whilst applying pressure downwards to the upper edge. Once the
lower edge has cleared the frame, the side panel will be loose and free to
pull away from the case. The key point to note when removing the side
panel is to only pull against one edge of the panel and not both at the same
time. Both side panels are symmetrical and interchangeable.
Remove the Side Panels
Each bracket is secured using a single screw and nut, one on either side,
simply loosen the screw to release the bracket. Note that the screws do
not need to be removed but just loosened and should remain attached to
the frame. They can be lightly re-tightened once the brackets are
removed so that they do not slide around or come free from the frame.
Remove Brackets
All hardware will be fitted using brackets that mount along the frame of the
case. Their usage will be covered in more detail later in the guide, but for
now they should be removed in order to install the motherboard.
Make sure NOT to remove the motherboard brackets! They should be
easy to distinguish as HEX, not Philips screws are used to secure them.
4
Rubber Catch
Side Panel
Universal Bracket
Screw+Nut
Frame / Track