6
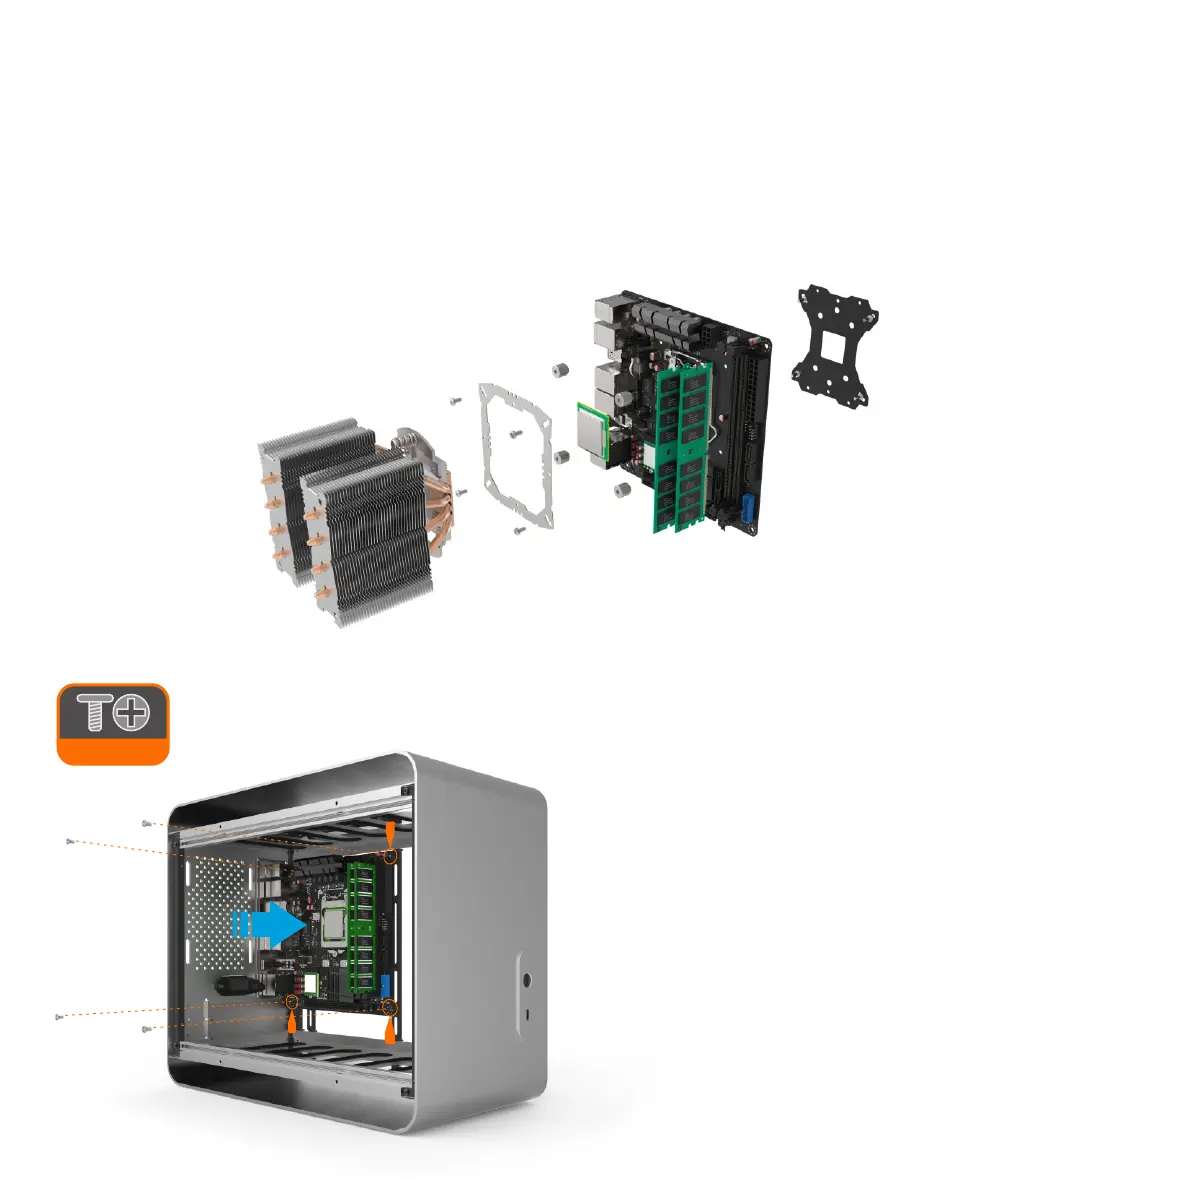
Install the Motherboard
Note that the use of universal brackets means there is almost no
obstruction to the back of the motherboard so M.2 cards, for example,
can be added or changed with ease.
When the motherboard is correctly in position, secure it to the stand-offs
on the universal brackets using the screws provided. Ensure that all the
holes correctly align before fully tightening the screws.
Carefully lower the motherboard into the case, with the rear I/O port side
first so that the ports align with the matching cutouts on the I/O shield.
Whilst it is possible to populate the motherboard with components once it’s fitted inside the case, it is generally easier to fit the CPU, RAM and cooler prior to this.
Please refer to the user guides supplied with each component for exact installation procedure as the image below is just for reference.
If using an AIO water cooler, we recommended installing it after all the other hardware has been fitted to the case. The tubing and radiator will make working with
the case more difficult and as the radiator will typically be mounted to the side, fitting it will obstruct the installation of other components. You can still fit the
mounting mechanism but even if you don't, there is unobstructed access to the back of the motherboard so this can be done later.
Prepare the Motherboard