Revised 4/23/2021
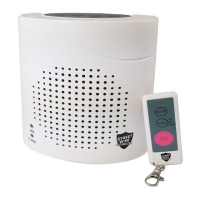
The diagram below illustrates the detection range based on open space with no obstructions. As you can see the longest detection
range is on the back side of the unit so this side should face toward the area you want to monitor. Detecting through a wall will
shorten the “open space” range shown below depending upon the thickness of the wall. For example, the range when going through a
4-inch wall is reduced from 40 feet to about 13 feet.
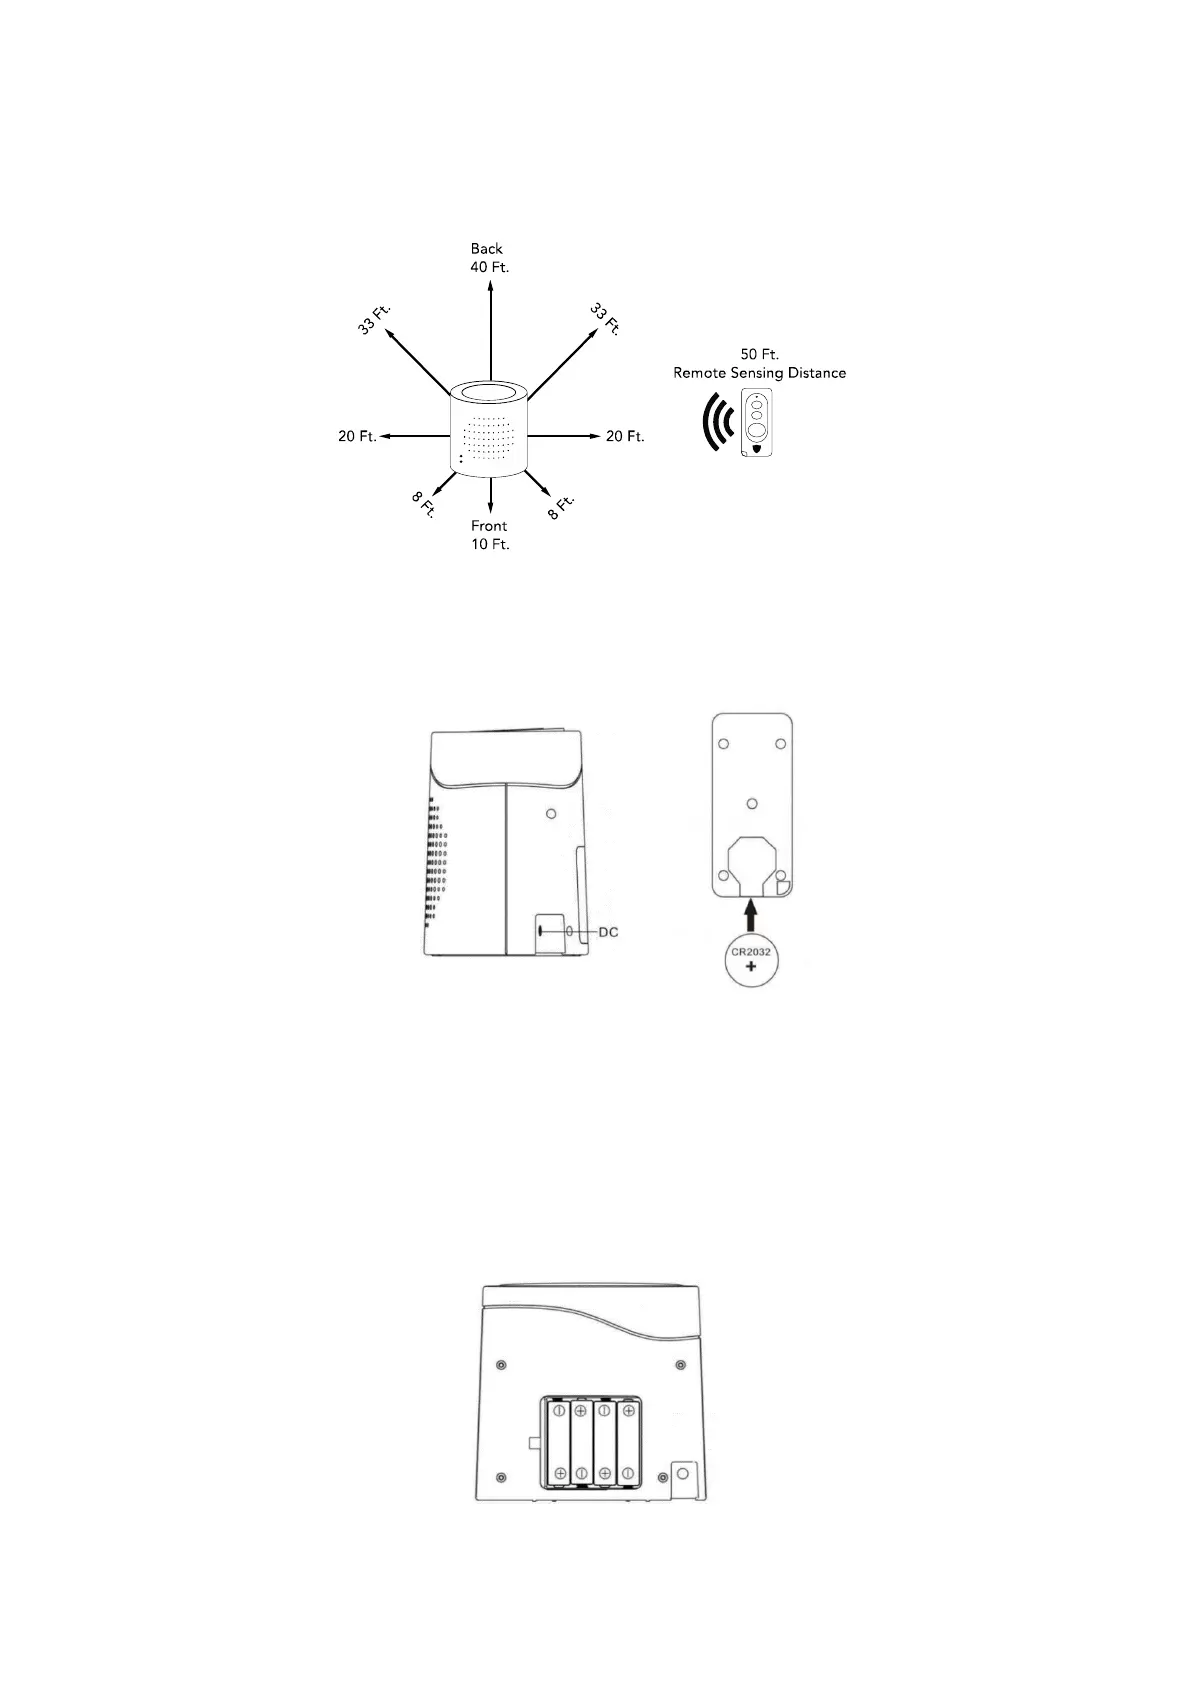
POWERING THE REMOTE CONTROL AND THE UNIT
1. Open the battery cover (located on the back side of the remote control) by lifting the outside edge of the cover. Insert the included
CR2032 battery. The “+” side of the battery should face up. To prolong the battery life, remove it when not in use.
2. Plug the AC adapter into the port located on the back side of the unit marked “DC” and plug it into a standard wall outlet. As soon
as the unit is plugged in it will turn on. To turn the unit off press the ON/OFF button on the remote or on the top of the unit.
3. In the event of a power outage, it can also be battery powered. To install the batteries, open the battery cover on the back of the
unit and insert 8 AA batteries (not included) following the polarity diagram on the back of the battery compartment. To prolong the
battery life, remove the batteries when not in use. The batteries will last about 10 hours.
(side view)
 Loading...