SICHERHEIT / SAFETY
IV
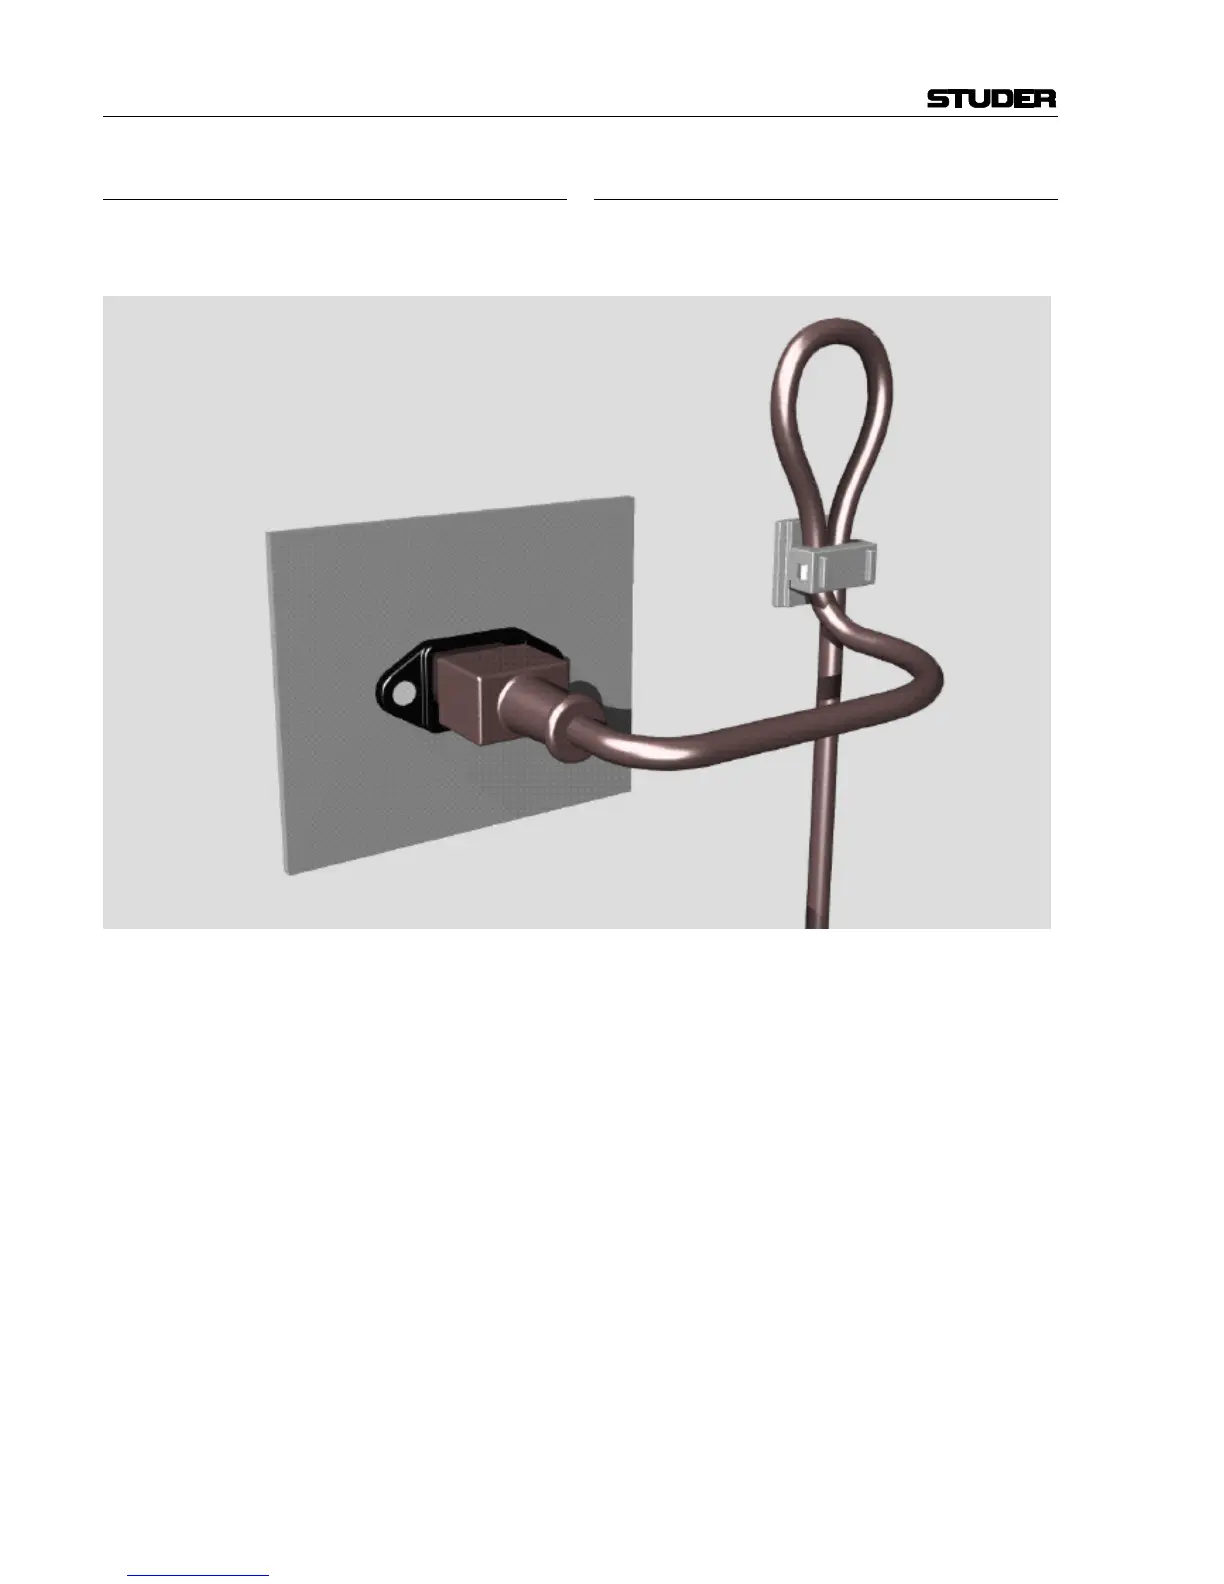
Zugentlastung für den Netzanschluss
Zum Verankern von Steckverbindungen ohne mechani-
sche Verriegelung (z.B. IEC-Kaltgerätedosen) empfeh-
len wir die folgende Anordnung:
Vorgehen: Der mitgelieferte Kabelhalter ist selbstkle-
bend. Bitte beachten Sie bei der Montage die folgenden
Regeln:
1. Der Untergrund muss sauber, trocken und frei von
Fett, Öl und anderen Verunreinigungen sein. Tempe-
raturbereich für optimale Verklebung: 20...40° C.
2. Entfernen Sie die Schutzfolie auf der Rückseite des
Kabelhalters und bringen sie ihn mit kräftigem
Druck an der gewünschten Stelle an. Lassen sie ihn
unbelastet so lange wie möglich ruhen – die maxi-
male Klebekraft ist erst nach rund 24 Stunden er-
reicht.
3. Die Stabilität des Kabelhalters wird erhöht, wenn
Sie ihn zusätzlich verschrauben. Zu diesem Zweck
liegen ihm eine selbstschneidende Schraube sowie
eine M4-Schraube mit Mutter bei.
4. Legen Sie das Kabel gemäss Figur in den Halter ein
und pressen Sie die Klemme kräftig auf, bis das Ka-
bel fixiert ist.
Mains connector strain relief
For anchoring connectors without a mechanical lock
(e.g. IEC mains connectors), we recommend the fol-
lowing arrangement:
Procedure: The cable clamp shipped with your unit is
auto-adhesive. If mounting, please follow the rules be-
low:
1. The surface to be adhered to must be clean, dry, and
free from grease, oil or other contaminants. Best ap-
plication temperature range is 20...40° C.
2. Remove the plastic protective backing from the rear
side of the clamp and apply it firmly to the surface
at the desired position. Allow as much time as pos-
sible for curing. The bond continues to develop for
as long as 24 hours.
3. For improved stability, the clamp can be fixed with
a screw. For this purpose, a self-tapping screw and
an M4 bolt and nut are included.
4. Place the cable into the clamp as shown in the illus-
tration above and firmly press down the internal top
cover until the cable is fixed.