25
8
9 8
25
9
19 25
10
1
19 1925
24 24 2424
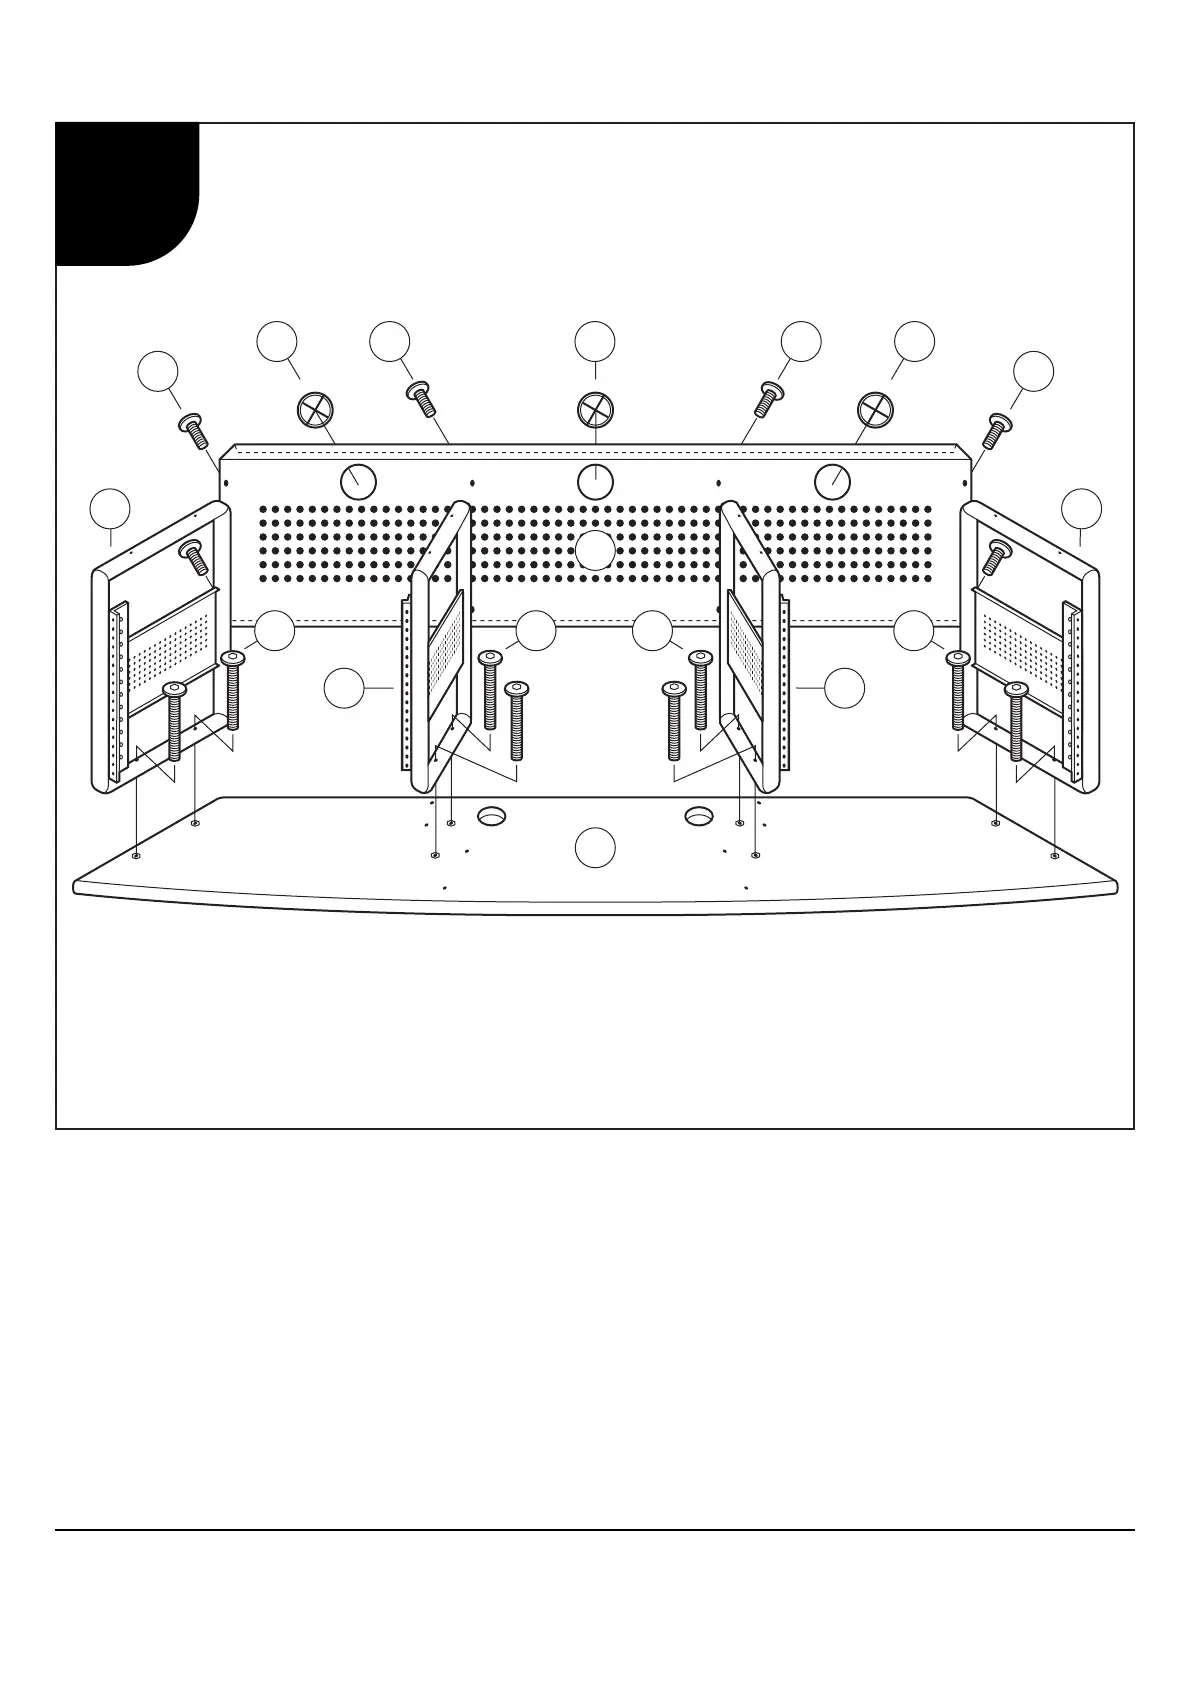
Warning: Do not fully tighten Bolts and Screws until you have completed assembly.
1. Lay Desktop (1) on a smooth, flat surface with holes facing up.
2. Attach Frames A and B (8 and 9) to Desktop (1) using Allen Bolts (24).
3. Attach Rear Panel (10) to Frames (8 and 9) using Allen Bolts (25).
4. Insert Cord Management Clips (19) into holes in Rear Panel (10).
Important: Ne serrez pas complètement les Boulons et les Vis avant d’avoir terminé l’assemblage.
1. Placez la Table (1) sur un surface lisse et plat avec des trous faisant face vers le haut.
2. Attachez les Cadres A et B (8 et 9) au Table (1) à l'aide des Boulons Allen (24).
3. Attachez le Panneau Arrière (10) aux Cadres (8 et 9) à l'aide des Boulons Allen (25).
4. Insérez les Anneaux de Gestion de Câble (19) dans des trous dans le Panneau Arrière (10).
Importante: No apriete completamente los Pernos y Tornillos hasta no haber completado el ensamblaje.
1. Coloque la Mesa (1) sobre una superficie lisa y plana con los agujeros hacia arriba.
2. Fije los Marcos A y B (8 y 9) a la Mesa (1) usando los Pernos Allen (24).
3. Fije el Panel Trasero (10) a los Marcos (8 y 9) usando los Pernos Allen (25).
4. Inserte los Anillos de la Gestión de Cable (19) en los agujeros en el Panel Trasero (10).
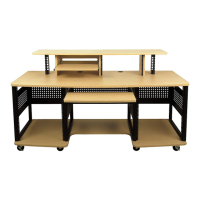
Producer Station 50041 50043
1
 Loading...