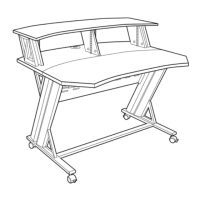
STLD46 ASSEMBLY INSTRUCTIONS
IMPORTANT ASSEMBLY TIPS
Tip 1: Having a second person or “helper” makes assembling the desk much easier.
Tip 2: Be sure to assemble your desk on a soft, flat surface. If you have hardwood floors, use a
blanket or the packing materials as a working surface to protect the desk and floor.
Tip 3: We include two wrenches, however you’ll also need a Phillips-head screw driver.
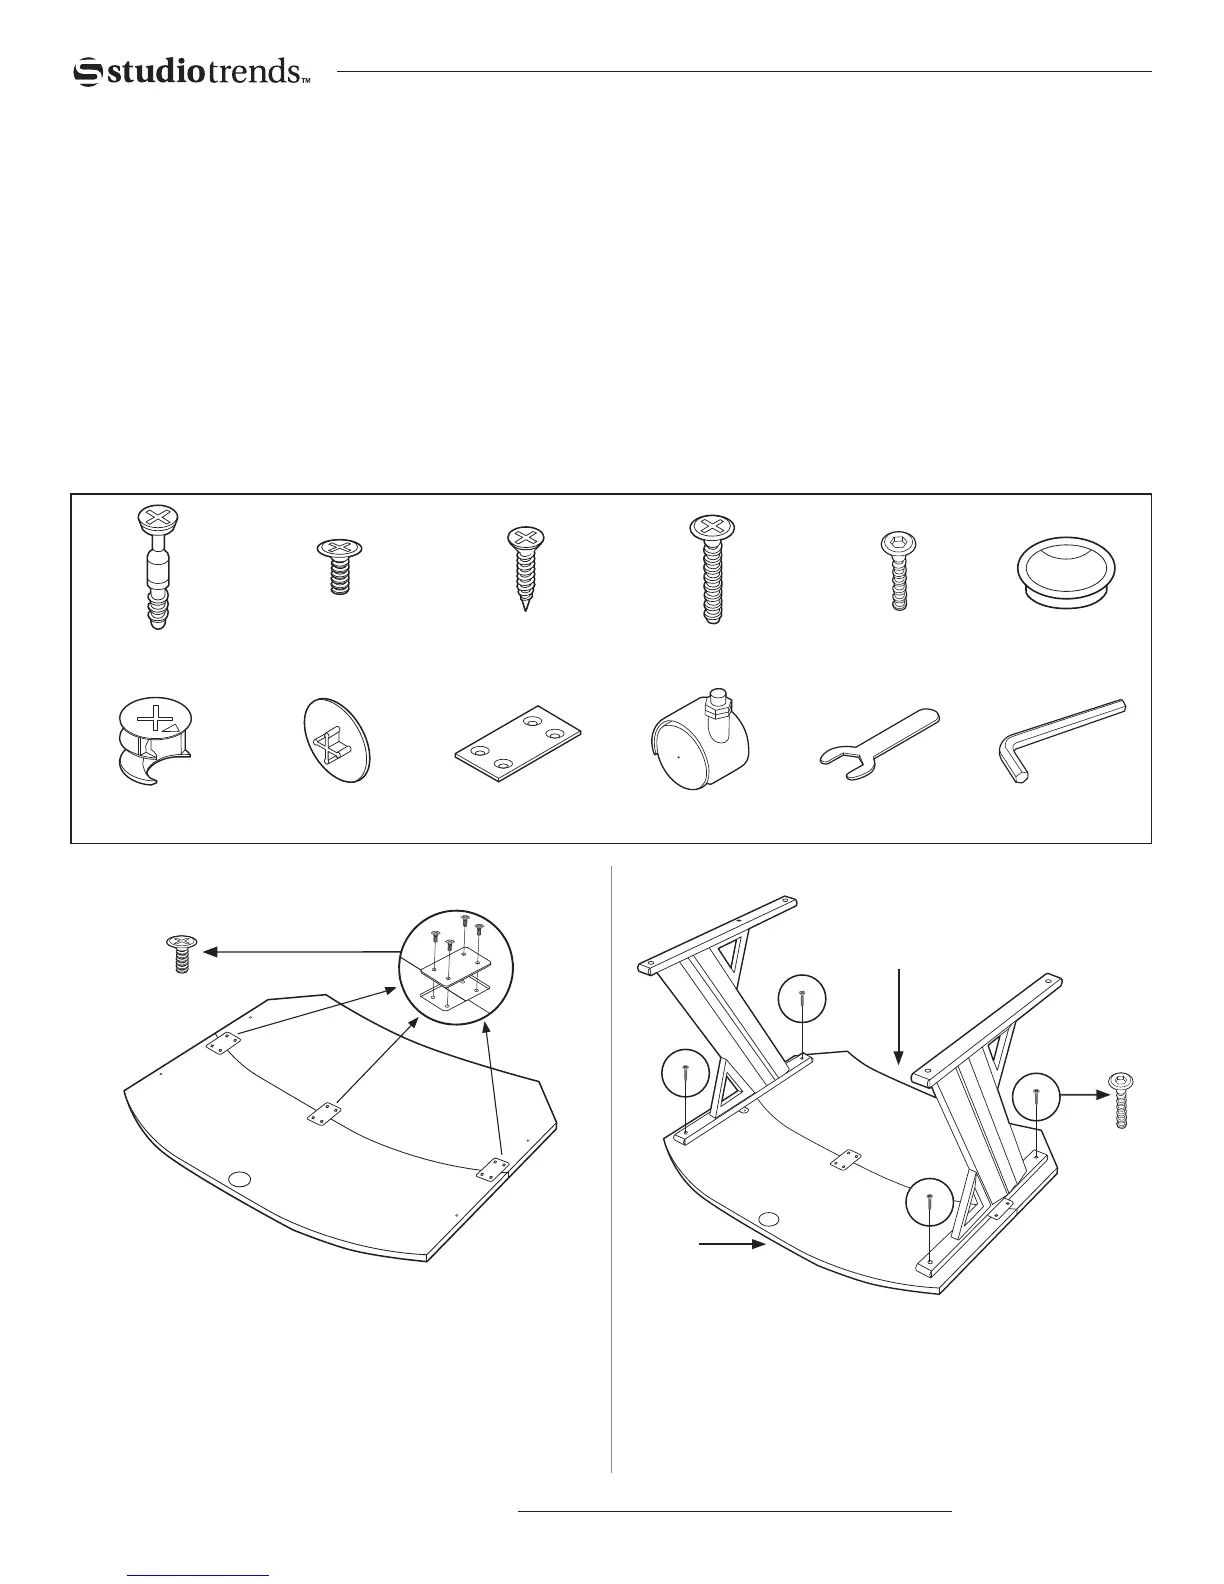
NOTE: The included hardware parts are illustrated below.
½” Phillips Screw
1½” Phillips
Screw
Cam Lock (12x)
½” Phillips Screw (12x)
I-Bracket (3x)Klix Cam (12x)
⅝” Phillips Screw (6x)
Caster (4x)Cam Cover (12x)
1 ½” Phillips Screw (4x)
Open Wrench (2x) Hex Wrench (1x)
Grommet (1)½” Hex Screw (6x)
Place the two sections of the tabletop face down. Be sure to
align the edge and seam so they are flush. Attach the three
I-brackets using the ½” Phillips screws (12x). Tighten all
the screws finger tight. Check the alignment, then tighten
screws fully using a Phillips-head screwdriver.
Attach the two legs to the bottom of the desk with the 1½”
Phillips-head screws (4x). Tighten screws only finger tight
for now.
1. 2.
Congratulations on your purchase of this quality Studio Trends™ product. By following the easy
assembly instructions found in this manual, you’ll have your new desk built and ready for use in
very little time.
www.studiotrendsdesign.com
Back of
Desk
Front of
Desk
 Loading...