Instructions:
3-speed
Internal
Gear
Hubs
-t
indicator cover
(2
ll
(22)
/
(22
At.)
on
1.1
Scope of this leaflet
Congratulations on
your purchase
of
a
Sturmey-Archer intemal
gear
hub. For
the best
performance, please
follow instructions in this leaflet. Please
contact
your
dealer
ifany
problems
are
elperienced with
these products.
ARiAing\ttre
gear
hub out
of the adjustment may cause damage
to
the
internal
parts
and
possible
malfunction
!
This leallet
refers
to
the following 3-speed
gear
hubs:
@Gear
llubs
with
Drum Brake
:
AB3,
SAB3, X-RD3, XL-RD3
@Gearllubs
:
AW S-RF3
@Gear
Hubs
with Coas&r Brake
:
AWC([), S-RC3(II)
@Gear
Hubs for Band
Breke
:
AWB, S-RB3
1.2
Lubrication
No
routine
lubrication is required. During
a major service, the hub
greases
should be replenished or
replaced
especially for transmission
parts
of internal
hub.
Please
contact
your
Sturmey-666o
dealer
who is
equipped to
carry
this
out.
Aunder
no circumstenccs should
any lubricant be apptied to the
brake
drum and brake
shoes,
as this
may
prevent
the brake
from
functioning!
13 Geer
Chenging
Continue
pedaling,
but
ease
pressure
on
the
pedals
and select
tle
gear
required. Ifthe bicycle
is
stationary
simply select
gear
required.
1.4 Gear Ratio
l't Gear
0.75
ll
2d
Gear
1.0
ll
}u
Cear
1.33
9. Ensure components are fitted to the
right side of axle. Unscrew
the indicator
by up to half
a tum
if necessary to
ensure easy
fitment over
the guide
unit.
Connect
the indicator
(10)
to the
cable connector
(19).
AThe
brake
adjustment should
be checked
or
replaced if
necessary before
first using the bicycle
and
after
removing
or replacing
the
whegl.
Notice: During the
first few miles
6616 linings
"bed-in'
and mayrrequire
re-adjustsnent.
Should braking
efticiency become impaired beyond
adjustment,
the
brake may need replacement.
Contact
your
Sturmey-Archer
dealer who
is equipped to replace these.
4.2 AW S-Rtr'3,
AWB, S-RB3
Check and adjust according
to
brake
manufacturers manual.
2.2AW,
S-RF3,AWB, SRB3
See section
2. I .
Step 5 does not apply.
2.3AWC([),
S-RC3(rr)
See section
2.
l. Step 5 is shown
as diagram.
{O'-,'
)' rlgnretrrnetocKnur(z)''
i
ii-
CI
\ :--/l
1.5 Brake Operation
_
.;-t
\
1.5.1AB, SAB3,
X-RD3, n-RD3
::r.
i/,1 .)i,,_t-,,,)
i0. :
To
activate
the
brake.
pull
the appropriate
brake lever
on the handlebar.
If the
-
\..
lll
ii
|1-'
,
i-
"
s'heeldoesnotrunfree.orcannotbelockedbyafirllapplicationofthebrake,
-
'.d,;,-
-t:|-)rifi
fuadjusr'rpatisnecessary.
--
)1,r.-,
'-
:'!
''1J
l.52AwbGD,$RC3(tr)
,Dii,'
,.
()
The coaster brake is
activated by
back-pedaling. To apply
maximum
braking (;l
--
-
-,.;o
efort,
begin brake
application when the
pedals
are
horizontal. When
'descending
down'a
long steep
slope it is advisable to
apply front and rear
brakes altemately
to
prevent
the
coaster brake
from overheating.
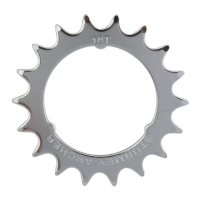
sprocket
(4)
and
circlip
(5)
onto the
hub
driver.
connector
(19)
until
the end
of the
-
1.
Move
the
indicator cover
(21)l(22)
for
, ffiil"':1T?*TJT:"h".. than
lsmm or
Make sure that no more than 25nm
of
ti't
axle
protrudes
from the
axle
hex
nut.
i
fi I
Sftt f
gear
and tum
the
pedat
crank
N
2.1
AB3, sAB3,
x-RD3,
XL-RD3
z 1'r6s
sure LraL
'u
,ors L'il
,* oI
,,i.fr{
!
ra*eit"
I BuilC
Bh
plo
comlrlete
u.heet
set-
axle
protrudes
from the
axle
hex
nut.
-l$
I
u''
-'i"jEr
2. Frt rhe ilu3t-cup
(2)
.
spacer
(3)
.
sprocker
(4)
.
circlip
(5)
onto fte #ver. F6;
-3'
sftt f
gear
and tum
fte
pedat
crank
W';
i-
'
hrrhc olraq;v nra_firarr si+rr a
-rac+ia
,{,,.+
^^-
.,,i+L L,,:rr :-
--^^^-
^:-_r..
c+
rorward tJensure
the
gear
is
engaged.
\'-.'
ll
_ ._
.
*5*':*rr.,lixlxl'y.r,:*t 1":::1t
witrr i,iit-in,pu..,,
.i,pry ru
ixxT"T;T.jl:"?'trT
:lr::;l;
.;'
.,;..;E-
-
,
i:..-.-=
.,,
.
,.-
|
Circtip must
be fitted
I
indicator-rod is level
with the
end of the
. ''r
.-,t
.
ia,l
I
into
groove
entirely.
I
uxle, as
show in diagram.
-
,
)'-
ffi
4.
i,d;;"-Ji"*aiirut
e
locknut
,.-j
:
:i:r";i;:.J
,
,
,-..
\
, A{!,:},
fJ6--el
*a indicator
locknut
(10-A)
to lock in adjustment.
:\
z
'
\=r1
,
5.
Select 3d
gear position,
rotate the
pedal
crank, change back to 2'd
gear
and
'.--:
"Ti" '
,_):....
_
.-
,_.
i.rr
!,er
*€)-a ,l
L...j
'l
gtrect
adjustrnent.
Retry the stages
description above when
the
gear
changing
\*-]
'
.
isnotcorrect'.
'
6.
If
there
is an indicator
covet
(2ll(221(22A),
fit it firmly onto the
guide
nul
3. Put the hub axle
into
the rear
fork end and
place
fts
ghain
amund the
sprocket
(16)
or the
guide pulley
set
(9)'
(4).
4. Fit the
lock-washer
(6)
.
dome
nut
(12)
or hex
nut
(8)
or flange
nut
(13)
on
the
2.
Slacken
the
brake adjuster
locknut
(25).
2
f
3. Tum
the
adjuster
(26)
counterclockwise
until the
brake
is applied.
\
-.
.:
"
4. Rotate the
idjuster
(26)
clockwise
(about
four
revolutions) until the
Jheeljust
'r\-''.0}-
--,i=:\;-"
_"
-
?TfrTtv..
rightsideoftheaxle.S*r*Ch€*tE
F.#
4.1 AB3'SAB3'X-RD3'XL-RD3
'
frmruH,y
".m
"rip
(r4)
;th
oit
(r+e)
and
bort
(r4B)
g.a-
: [:'tr"hti;:'.:i3H!
I'J|,9?].T[,:ffirffi;
B::'.:-
the
brake rever
l'i
nrizra*'+/rr\^-L--
e
"j:
oi+
l,
6.
Locate
the lock-washer
(6)
.
fulcrum lever
(7/(15)
and
guide
nut
(16)
or hex
'-"..
.-1
.-
nut
(8)
and
guide
pulley
."t
tsl,
pq,midffi,-ii6:+E;t{
.
i,,* ii"
.ri.,$fl:
?'-"
*f:,
,01ff
?l
.-\
\t_1
7.
Tighten
both
axle
nuts to
2Slfiii
and the brake
arm ctip
(14)
nut to
SIlt.
8. Fit the indicator
rod
(10)
into the axle
and screw it
finger tight. Put the
wheel,tensionthechainandensurethinLrumfe""ilil(l5iijparallelwith
rrr:r'-
-r-\"'-.=-:---.-
I
oI'
\
?.r\\
';
^,
u*)$i
-
-
b(tN
'H.
P
r,-
--,.,r
L it!
.?
tsJ
3810.0405.017 LrE
@ July. 2010
Sun Race Sturmey-Archer lnc.