4
3/
8 in.
3
4
ASSEMBLY INSTRUCTIONS
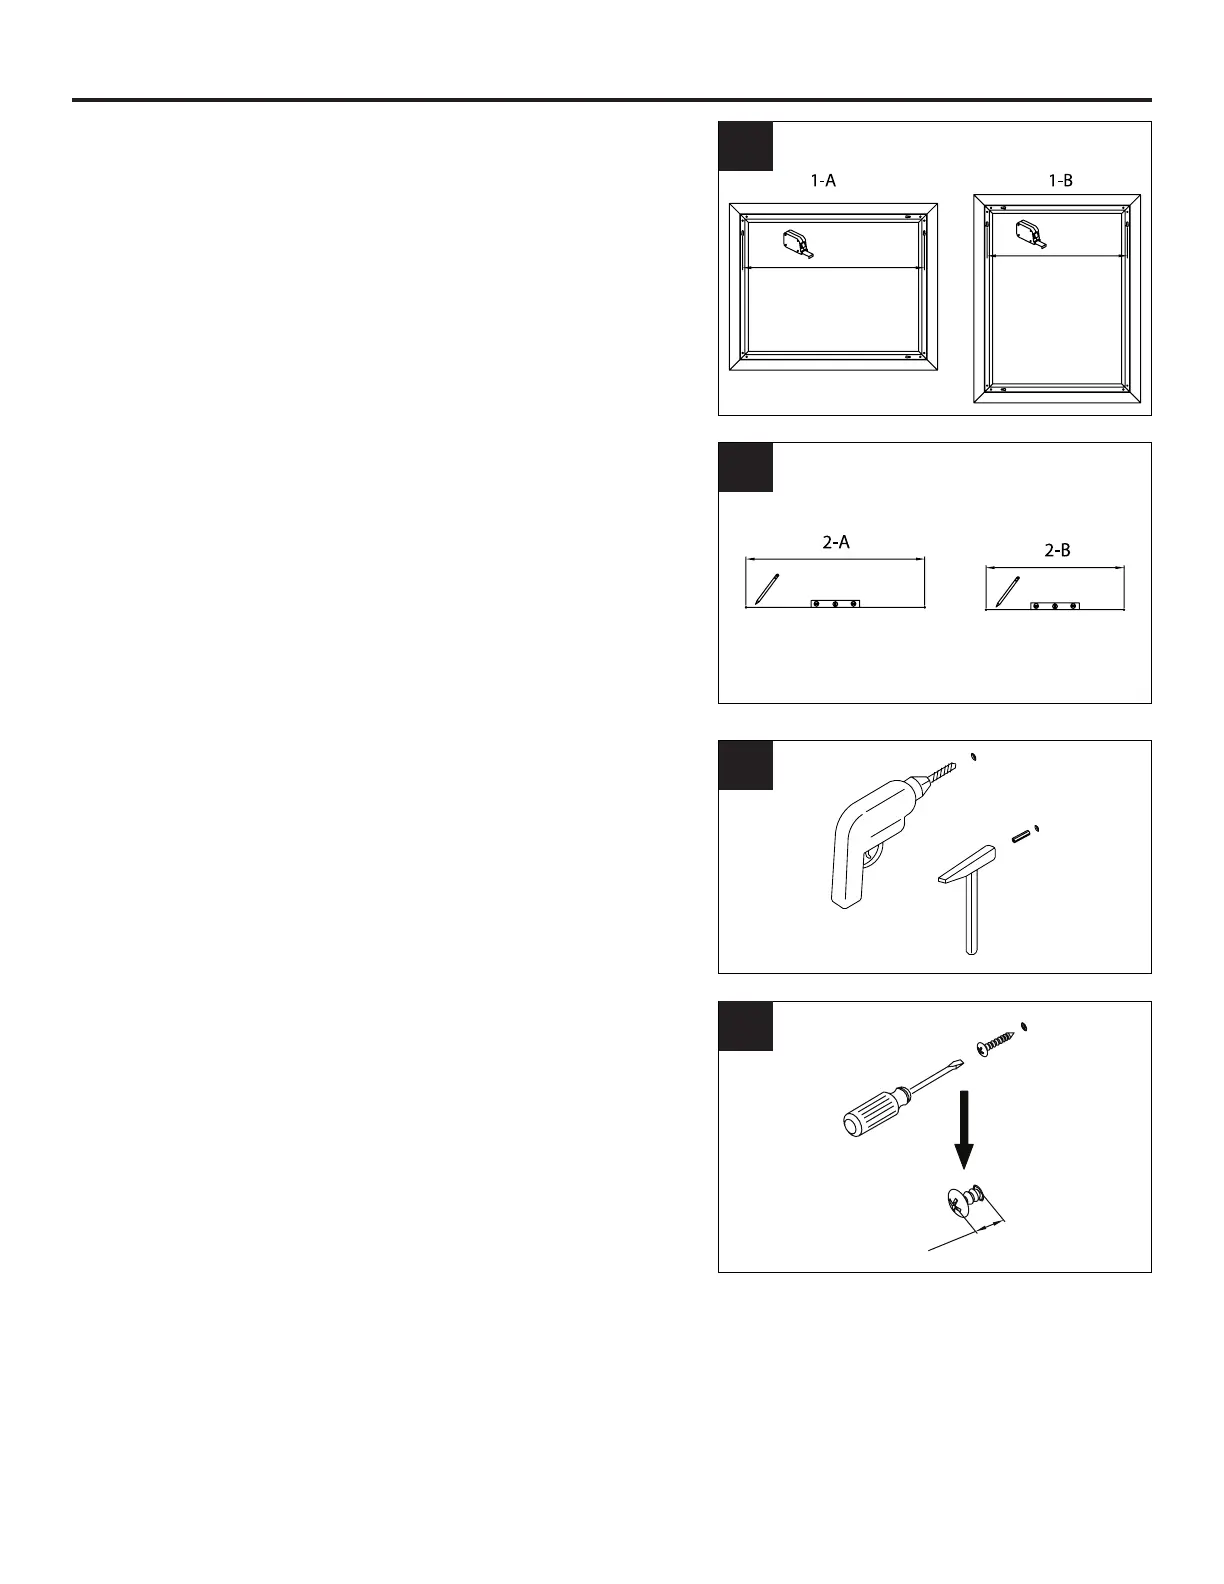
1. Choose to mount your mirror in either a vertical or horizontal
orientation. When orientation is chosen, measure the distance
between the key holes, as in gure 1A or 1B.
2. After measuring the distance between the keyholes on the mirror,
mark mounting points on the wall in the appropriate spots (same
distance apart as measured in step 1), as in gure 2A or 2B.
Use a level to ensure that the points are straight.
3. Using a 7/32 in. drill bit (not included), drill holes where marked
in step 2 and insert included wall anchors.
4. Screw included screws into the wall anchors, leaving 3/8 in.
space between the screw head and the wall.
Backside
Backside
1
2