99
All Sub-Zero undercounter units are manufactured in a
manner to achieve a total built-in appearance.This allows
you to choose the decorative material and color application
for the front of your refrigerator/freezer. To install front
panel on all Sub-Zero undercounter models:
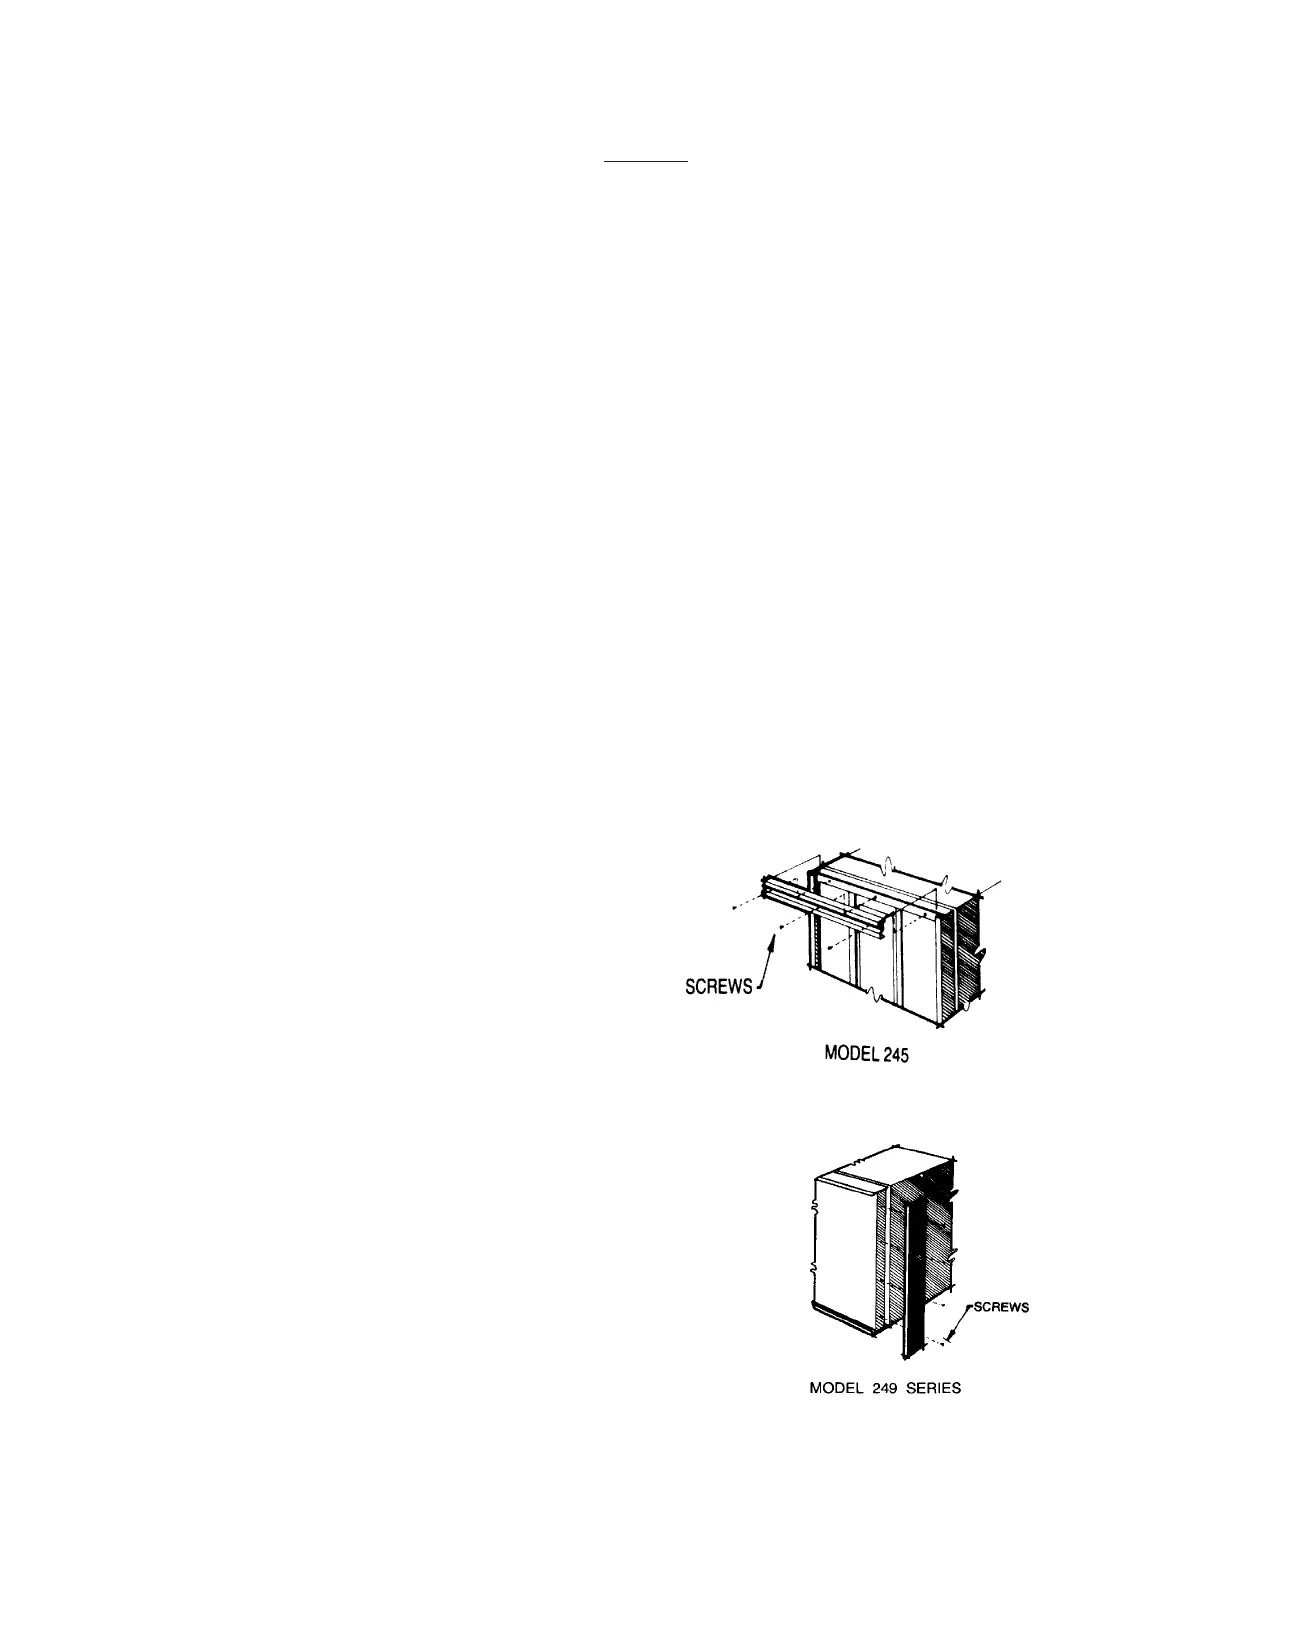
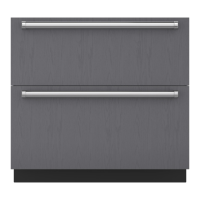
1)Remove door handle. Handle is located on the top on the
245 model, and on the side on other models. Handle is held
on with phillips head screws. (See illustrations 3 and 4.)
2) Slide 1/4 (6) thick panel into frame on door. Door must be
opened 90° on 245 models.If a thinner panel is used, install
chipboard filler panels behind the trim panel for proper fit.
IMPORTANT: Routing may be required on some raised
panels for finger clearance under handle.
3) With panel in position, replace handle. Replace and tight-
en all screws. Do not overtighten and “strip”screws. Refer
to pages 4 & 5 for installation dimensions. NOTE: 20# per
door panel maximum weight limit.
INSTALLING PANELS
Before you begin installing panels, refer to the Panel
Specifications Dimensions on page 5, and be sure you are
working with the Sub-Zero panel design called for in your
installation plans. No panels or handle hardware are nec-
essary to install.
ACCOMMODATIONS FOR RAISED
PANELS
You may have to rout, recess some door panel designs to
allow for finger clearance. This is particularly true if your
unit has raised panels greater than 1/4"(6) total thickness.
Check the location of offset when you’re using specific rout-
ing for the grip area only. Refer to the 200 Series section of
the Sub-Zero Design Guide for additional information.
NOTE: Dimensions in parentheses are in millimeters.
200
SERIES
Illus. 3
Illus. 4
200 IG 3758400 1-04.qxd 1/2/2004 7:55 AM Page 9