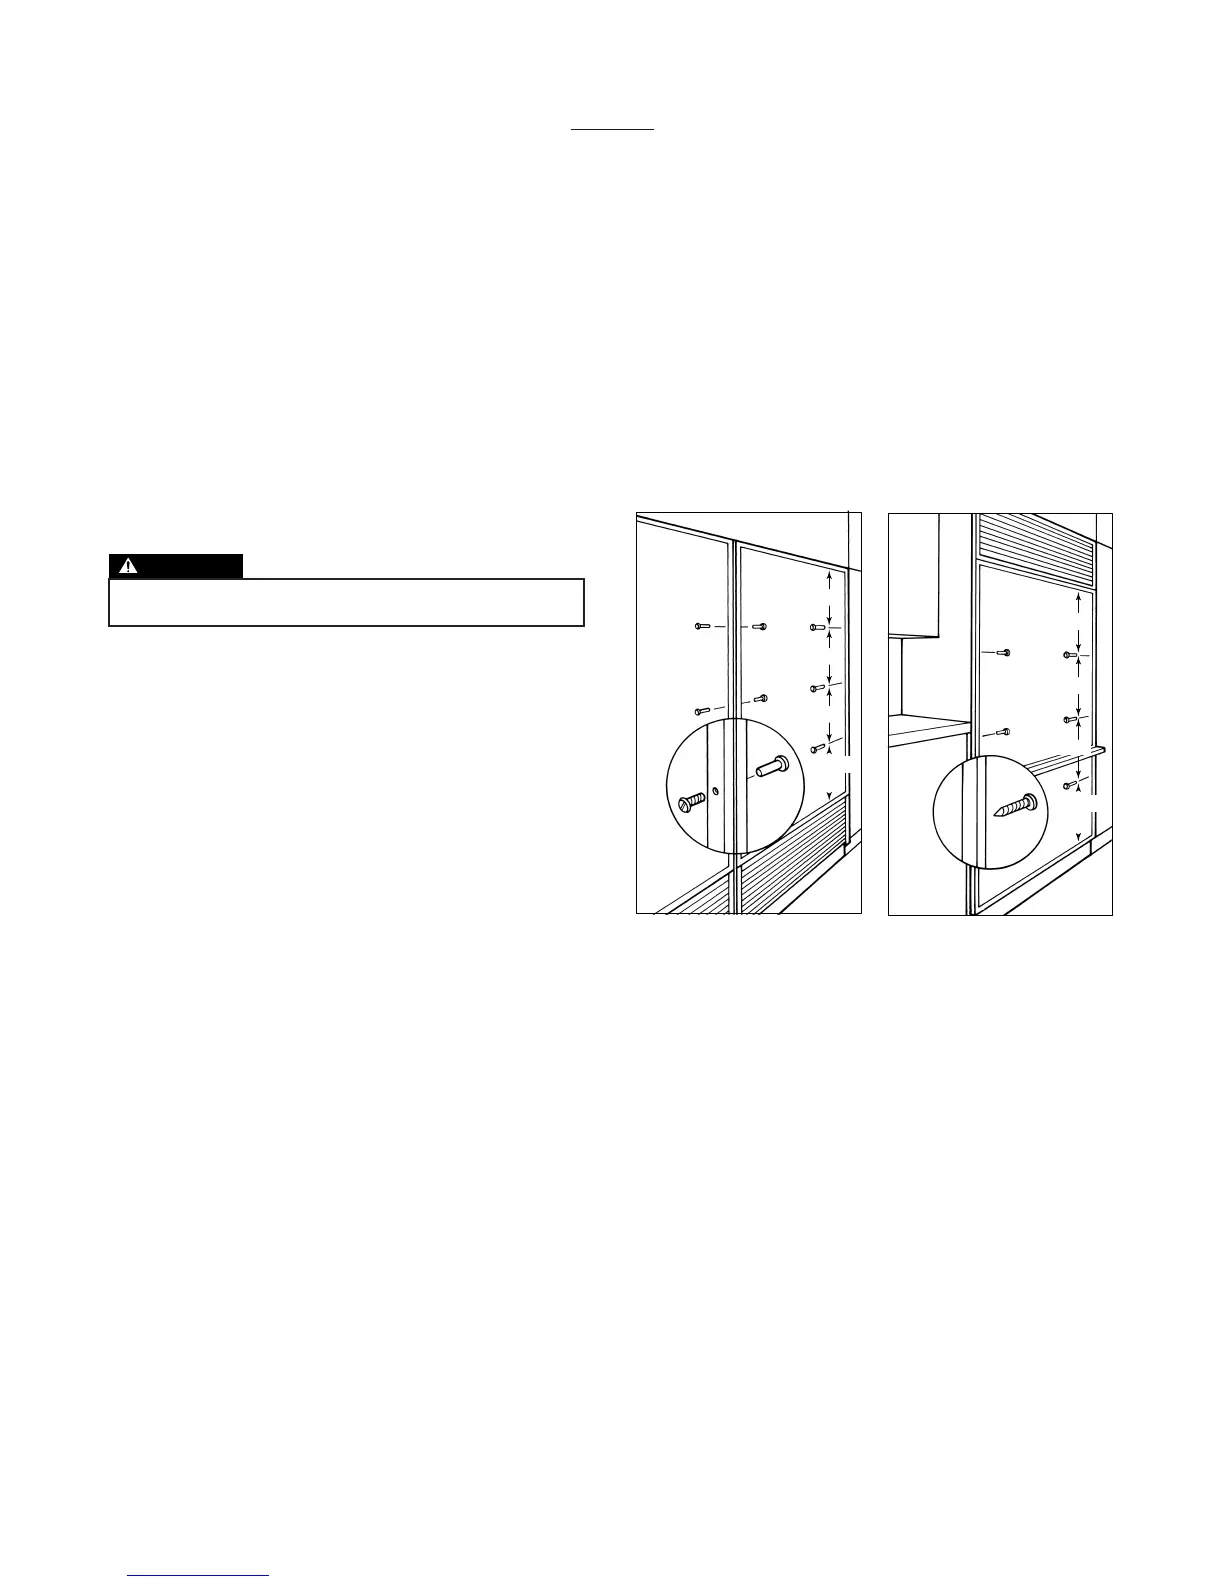
If you are fastening units to cabinetry:
• First, make sure units have been leveled and aligned, and
doors adjusted.
• Drill three 3/16" (5) holes through both outer trims as
shown in illustration 24.
• Drill a 1/8" (3) pilot hole into the cabinetry.
• Install all six Sems.
ANCHORING THE UNIT
Step 17: After installing front and side panels, leveling,
alignment and door adjustment, anchor the unit to the
opening to assure a proper fit. The Sub-Zero Anchoring Kit
(part #4200900) is available from your Sub-Zero dealer. Be
sure to level and square the unit before anchoring it.
If two units are being tied together:
• Drill three 13/64" (5) holes through the middle trim of
both units.
• Using the Loctite on the screws, install the three Chicago
screw posts.
• Recheck the units for level.
• Drill three 3/16" (5) holes through both outer trims. See
illustration 23.
• Using a 1/8" (3) drill bit, drill into the cabinetry for a pilot
hole.
• Install all six Sems to the cabinetry.