Suburban DynaPack H Series Owner's Manual 10/2017 Rev.4 2
INSTALLING AND SECURING UNIT
TO WALL SLEEVE
Before installing and securing the unit to the wall sleeve, make sure that the
proper grille kit is installed. Due to the temperatures of the combustion products
released from the gas vent, DynaPack gas package units require the use of an
aluminum grille kit (see ACCESSORIES on page 7).
1. Double check the installation of the wall sleeve to make sure it is securely
attached to the wall opening. Inspect the wall sleeve drain for proper
installation if an inside drain is being used.
2. Examine the gaskets on the wall sleeve to make sure there is a continuous
seal between the wall sleeve and the unit.
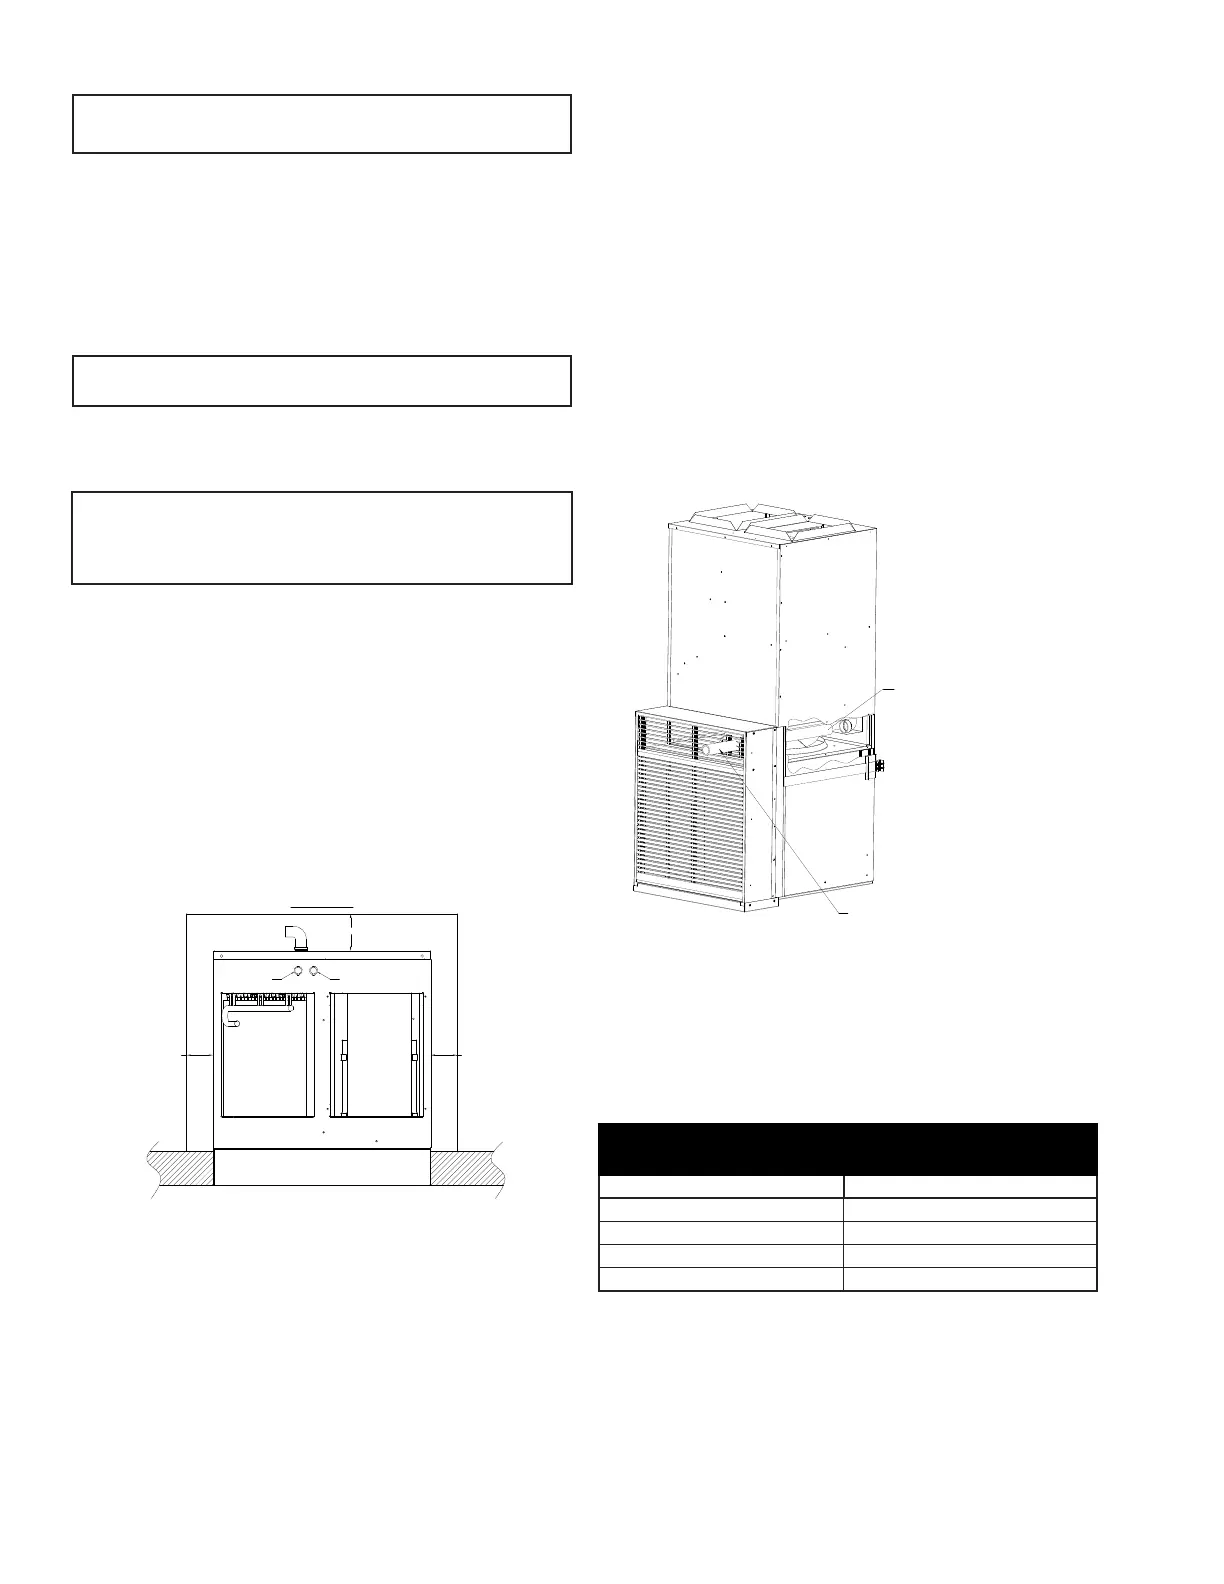
3. Place DynaPack unit onto the wall sleeve. Lift the unit 3/4" and place over
the wall sleeve base (see Figure 4). A PALLET JACK works well for this.
Temporarily block the unit up and install front leveling bracket (see Figure
4). Adjust leveling legs to level.
4. Use the two retaining straps to secure the unit to the wall sleeve (see Figure
4). Verify that the gaskets of the wall sleeve make a complete seal to the
unit paying particular attention to top and bottom corners of the unit to
sleeve seal. Caulk if needed.
DUCT WORK
The duct work for the dwelling should be designed for the lowest possible static
pressure to reduce energy usage and noise. Table 3 lists the approximate cfm
delivery of the units on each of the indoor blower speeds. Table 4 lists the
recommended heating and cooling speeds with its approximate cfm delivery. Use
both tables to properly design the duct system for both heating and cooling cfm.
AIR FILTER
The Dynapack unit is equipped with a permanent, cleanable air lter. This lter
can be used if the unit is installed so that the lter is accessible to the homeowner.
The permanent lter installed inside the unit must be removed and discarded if a
disposable lter is installed in the return air duct. See Table 2 for the minimum lter
area required for the Dynapack unit based on unit capacity. It is recommended
that air lters be cleaned or replaced monthly to keep the cooling coil and interior
duct surfaces clean and able to operate most efciently. Optional MERV 13 lters
are available.
MINIMUM REQUIRED SURFACE AREA FOR
DISPOSABLE FILTERS
MODEL NUMBER FILTER AREA
DYPA12 288 square inches
DYPA18 288 square inches
DYPA24 480 square inches
DYPA30 & DYPA36 480 square inches
TABLE 2
CONDENSATE DRAIN - COOLING
The Dynapack unit and wall sleeve each have their own drain. The unit drain is
for the condensate developed by the evaporator coil. It needs to be trapped and
routed to the building drain system. Use ¾” pvc pipe and ttings (eld supplied).
The wall sleeve is equipped with a drain pan that collects rain water entering the
wall sleeve and the unit condenser coil area. At the time of installation of the wall
sleeve, this drain can be directed directly outside or turned inside and routed to
the building drain system. If the wall sleeve drain is routed to the building sewer
system, then it must be trapped to prevent sewer gasses from escaping. The
top of the sewer trap must be no higher than 18 inches above the bottom of the
furnace. See Figure 5.
INSTALLATION
WARNING! Installation of this appliance must be made in accordance with the written
instructions provided in this manual. No agent, representative or employee of Suburban or
other person has the authority to change, modify or waive any provision of the instructions
contained in this manual.
The Dynapack units are vertical package units featuring gas red heating with
electrical air conditioning. The Dynapack unit has been safety certied by Intertek
Testing Services to comply with the national safety codes of the USA and Canada.
The Dynapack unit is certied to operate on natural gas.
The Dynapack unit is NOT certied for installation in a mobile home.
Installations in the USA must be in accordance with city, county, or state codes
and regulations. If local codes do not apply then the installation must be made
in accordance with the National Fuel Gas Code and the National Electrical Code.
Installations made in Canada likewise must be in accordance with city, provincial,
or national codes or the current version of CANI-B149 Installation Code.
WARNING! In the state of Massachusetts: This product must be installed by a licensed
Plumber or Gas Fitter. When exible connectors are used, the maximum length shall not
exceed 36". When lever-type gas shutoffs are used, they shall be T-handle type.
The outdoor fan discharge or the condenser air intake cannot be connected to
eld fabricated ducting. This unit can only be installed using the factory supplied
wall sleeves.
LOCATION
IMPORTANT: The Dynapack condensate drain system is designed to be installed in a
conditioned space. To prevent freezing of the drain condensate in the P-Trap, the installation
location should not be exposed to freezing conditions. In installations where the drain system
is exposed to freezing conditions, we offer an optional heated P-Trap which is available for
purchase. The part number for the heated P-Trap installation kit is K/10348 and the steps for
installation are outlined in Appendix A.
The Dynapack unit is approved for indoor installation only and must be installed
with one of the factory supplied wall sleeves. The unit is intended to be installed
in a closet or equipment room. The unit is certied for 0” clearance to the cabinet
sides, cabinet back and the rst 3 feet of the supply duct. However for accessibility
reasons it is recommended to maintain at least 1” clearance on the sides for
proper installation and servicing. For closet installations allow 4” clearance from
the unit door panels to the closet door. For equipment room installations allow
24”clearance from the unit door panels to a wall for servicing.
The wall sleeve and grille is intended to be installed ush with the exterior wall.
The unit, wall sleeve, and grille are required to be installed certain distances from
adjacent doors, operable windows and shrubbery. See Figure 9.
CAUTION: The unit must be installed level front to back and side to side. Adjust
front leveling legs as necessary.
WALL SLEEVE AND GRILLE INSTALLATION
Refer to installation instructions included with the wall sleeve kit for guidance in
assembling and installing the wall sleeve and grille.
4" MIN. TO DOOR
1" RECOMMENDED 1" RECOMMENDED
CONTROL WIRES ELECTRICAL POWER
Figure 1
CAUTION: The sleeve will support the back of the unit.
VENTING
The Dynapack unit uses outside air for combustion and vents the exhaust products
directly outside. The Dynapack unit cannot be vented with other appliances.
The venting system of the Dynapack unit cannot be modied or adjusted in any
manner other than what is specied in these instructions.
The installation must be planned before hand so that the unit exhaust vent
location complies with local or national codes in regards to distances between the
unit vent and doors, operable windows, side walks, balconies, and patios. See
the National Fuel Gas Code Z223.1 for the USA or Installation Code CANI-B149
for Canada. See Figure 9.
The venting system for the Dynapack 90% condensing furnace must be completed
in the eld using 1 1/2 inch PVC schedule 40 DWV pipe. The vent pipe will be
straight for the full unit width wall sleeves. See Figure 2 for the typical full unit
width vent pipe installation. The vent pipe must terminate approximately two
inches outside the exterior grille.
INSERT STRAIGHT 1 1/2" SCHEDULE 40 PVC VENT
1.
PIPE THROUGH OPENING IN GRILLE. IN CANADA,
PIPE MUST BE SYSTEM 636 MATERIAL
APPLY PVC PIPE CEMENT TO PIPE AND INSERT2.
INTO ELBOW.
3. SEE TABLE 1 FOR PIPE CUT LENGTH.
*CURTAIN WALL
WHEN INSTALLED, PIPE SHOULD
EXTEND PAST GRILLE 2"±1/2"
Figure 2
 Loading...