2-14
7040127 - Revision C - May, 2015
Installation Information
Built-In (BI) Series
Built-In (BI) Series
(SWS #4250000)
(SWS #4250000)
Glasswell - Door Dispenser Assembly
If attempting to remove and/or install a door panel on the refrigerator door of a door dispenser model, note that the
procedure is the same as that listed on the previous pages. However, the dispenser control panel and glasswell
bezel will also need to be removed.
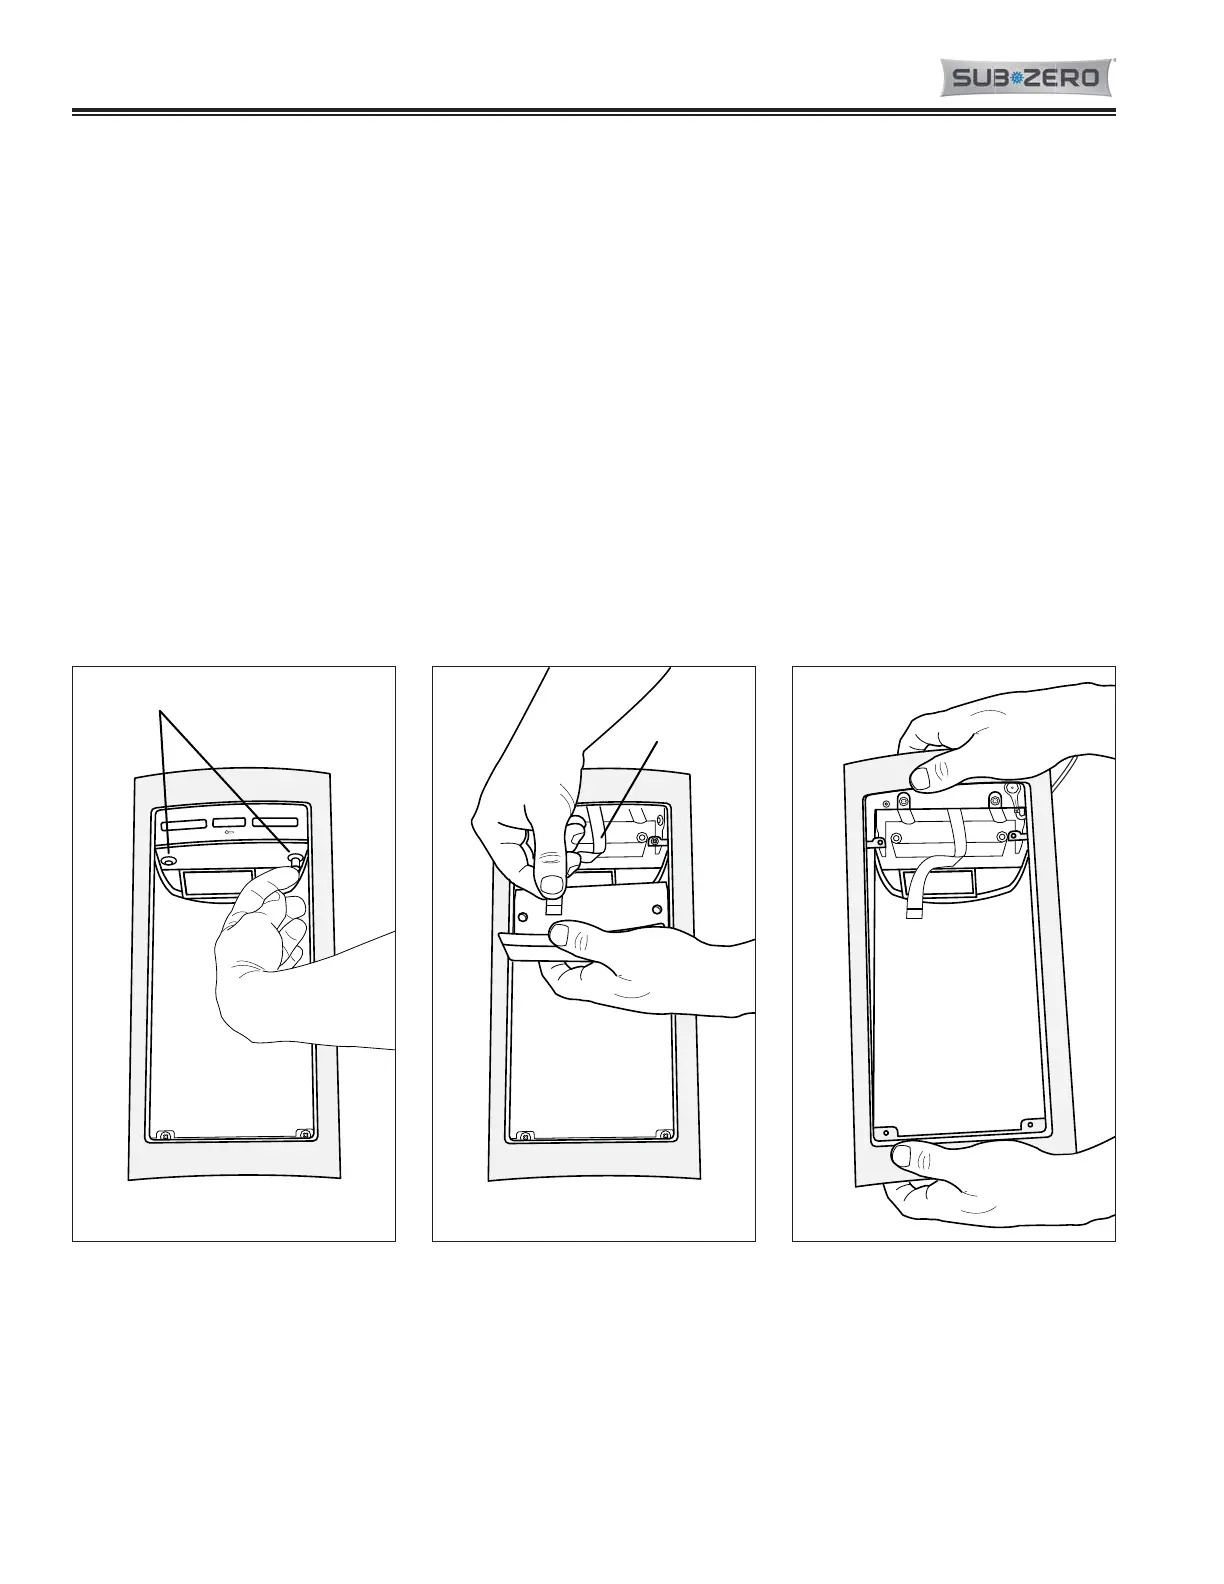
Dispenser Control Panel Removal Procedure:
1. Extract the center post of the plastic rivets using a fingernail, putty knife, or similar device (See Figure 2-19),
then pull the rivets out.
2. Pull the dispenser control panel down and disconnect the ribbon cable (See Figure 2-20).
NOTE: When reassembling:
a. Make sure blue side of ribbon cable is up when connecting to dispenser control panel.
b. Take care not to pinch or kink ribbon cable when reassembling.
Glasswell Bezel Removal Procedure:
1. Remove the dispenser control panel first, then lift out the glasswell grille to access the bottom screws.
2. Extracting the bezel mounting screws from each corner, then pull the bezel forward (See Figure 2-21).
Figure 2-19. Dispenser Control
Panel Removal, Extract rivets
Figure 2-21. Glasswell Bezel
Removal
Figure 2-20. Dispenser Control
Panel Removal, Disconnect
Ribbon Cable
 Loading...