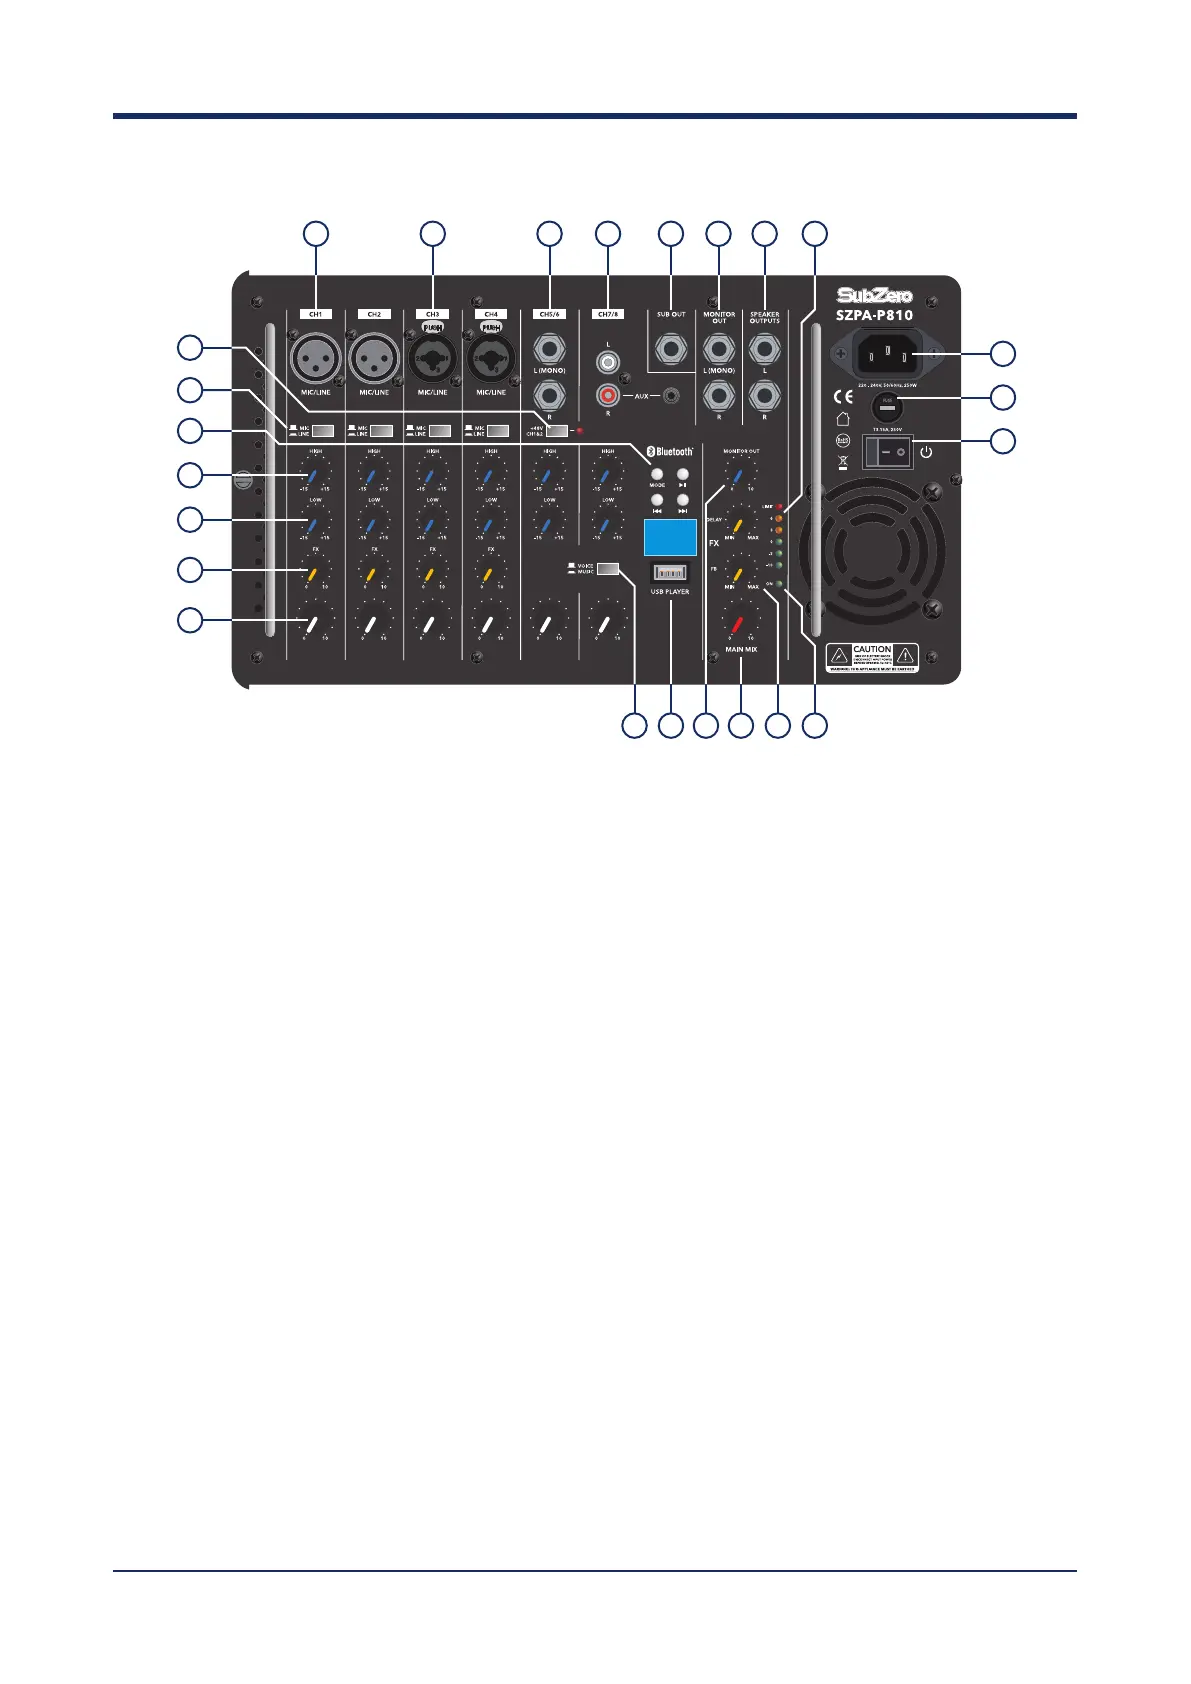
CONTROLS & FUNCTIONS
1. AC IN JACK
Connect the included power cord here.
CAUTION!
Be sure to use the included power cord.
Use of other cords may result in malfunction,
heat generation, or fire.
2. POWER SWITCH
For turning the power to the mixer on and off.
3. FUSE
220V: T2A-250V
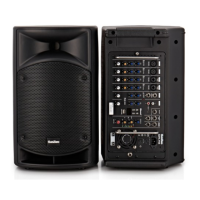
4. SPEAKERS L/R CONNECTORS
(for included speakers only)
These output the mixed signal channels from
1 to 7/8, and the level is adjusted with the
MASTER LEVEL control. Connect only the
included speakers.
Tip: + positive speaker terminal
Sleeve: - negative speaker terminal
5. MONITOR OUT L (MONO)/R CONNECTORS
These output the mixed signal channels from
1 to 7/8, and the level is adjusted with the
MONITOR OUT control. These connectors are
convenient for connecting an external powered
speaker for monitoring purposes.
Tip: + positive or “hot”
Sleeve: shield or ground
NOTE:
When L (MONO) output signal is inserted alone
without R output signal, the L (MONO) output
signal is the sum of both left and right signals.
6. SUB OUT
Used to connect an active bass speaker box.
Tip: + positive or “hot”
Sleeve: shield or ground
7. XLR CHANNEL INPUTS (CH 1 and 2)
For connecting a balanced or unbalanced
microphone, keyboard or other instrument
device. Set the MIC/LINE switch to MIC or LINE
for channels 1 and 2, depending on the level of
the input signal. XLR-type connectors are wired
as follows: pin 1: ground, pin 2: hot(+), and pin
3: cold(-).
8. XLR/TRS/TR CHANNEL INPUTS (CH 3 and 4)
For connecting a balanced or unbalanced
microphone, keyboard or other instrument
device. Set the MIC/LINE switch to MIC or LINE
for channels 3 and 4, depending on the level of
the input signal. XLR-type connectors are wired
as follow: pin 1: ground, pin 2: hot(+), and pin
3: cold(-). TR-type connectors Tip:”hot” (+),
Sleeve: ground.
5
1
4567 8 9
15
13
13
14
17
16 23 222018 19
12
10 21
3
2
11