Do you have a question about the Sulky X50+ 2400 and is the answer not in the manual?
General safety rules to be followed before starting and using the tractor/machine assembly.
General safety instructions and accident prevention measures to be observed.
Guidelines for using the spreader only for its intended purpose and adhering to manufacturer's instructions.
Instructions and precautions for connecting and disconnecting the machine from the tractor.
Safety instructions related to the power take-off and universal drive shafts.
Safety precautions and instructions for the hydraulic system, including pressure and hose maintenance.
General precautions and procedures for maintenance and repair work on the machine.
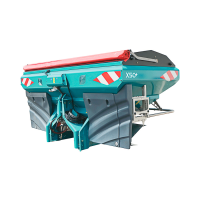
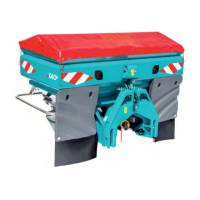
Procedures for checking equipment completeness and initial use of the spreader.
Instructions for handling the machine, including loading assistance device.
Checks and information required regarding tractor weight, axle loads, and linkage capacity.
Details about the category II three-point clevis hitch and working position adjustments.
Instructions for the power take-off (PTO) drive assembly, including angles and shaft length.
Instructions for fitting controls, covering cable and hydraulic connections.
How to connect control cables and hydraulic controls for operating the machine's flaps.
Information on installing and using the STOP&GO/VISION electrical control system.
Information on installing and using the ECONOV/VISION electrical control system.
Guidance on connecting ISOBUS machines to the console and ensuring compatibility.
How to set the fertilizer application rate using charts, website, or slide-rule.
Methods for selecting the correct setting index based on desired application rate per hectare.
Adjusting the fertilizer spreader's working width by modifying the chute opening.
Understanding fertilizer properties and using the granulometer for selection.
How to check and adjust the spreader's working width using an overlap check kit.
Instructions for correctly positioning the trays for width checks according to working width and machine.
Procedures for conducting the width calibration test, including distances and passes.
Analyzing test results for overlap to determine if fertilizer quantity is too high, too low, or correct.
How to achieve full width spreading with a double-disc machine, including start/stop offsets.
Adjusting for top dressing, especially for tall crops, by angling the spreader.
Instructions for spreading on steep slopes by placing the divider in the chute center.
How to set up and use the TRIBORD system for border spreading, including types and operation.
Adjusting border spreading modes (full width, environmental, yield-optimized) based on working width and settings.
Optimizing border spreading for yield, adjusting PTO speed and application rate based on working width.
Instructions for border spreading using the ecobord vane when the machine is not equipped with TRIBORD.
General safety precautions for intervention on the spreader, including protective gear and washing area requirements.
Procedures for washing the spreader before startup, after use, and before storage.
Lubrication points and procedures for the power take-off, mechanism, and angle take-off.
Follow PTO maintenance instructions and see diagram for lubrication points.
Grease moving parts before storage and specific points every 8 hours.
Angle take-offs are maintenance-free except for external cleaning; they use MARSON 00 grease.
Procedures for checking and calibrating the flow rate and spreading width for optimal performance.
Calibrating regulators and checking the space between the regulator end and shutter.
Checking and calibrating spreading chutes for symmetry and proper alignment.
Calibrating the shutter rate lever and ensuring consistent opening sizes on both sides.
Instructions for fitting the anti-compaction baffle, optional for specific fertilizers and crops.
Instructions for fitting the hopper cover kit.
Information on the electronic device for rate control proportional to forward speed and modulation.
Details on the electronic device for use compliant with the ISOBUS standard.
Information on the optional telescopic PTO shaft for easier hitching.
How to fit the parking wheel and its two positions: storage and spreading.
Instructions for fitting the mud guard.
Instructions for fitting the hopper extension kit.
Information on installing the 1000 rpm PTO gearbox and associated parts.
How to mount the tilting and parking supports kit for easier tractor hitching.
Explanation of the purpose and importance of safety warning labels affixed to the machine.
Information to note upon receiving the machine, including machine number, type, and accessories.
Table detailing technical specifications like capacity, width, height, and linkage distance.