8
EN
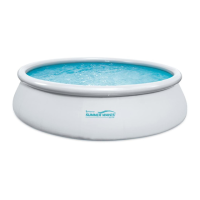
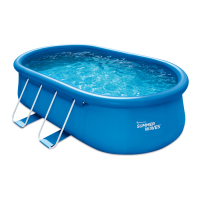
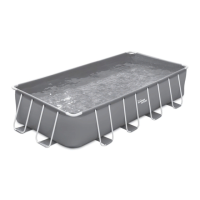
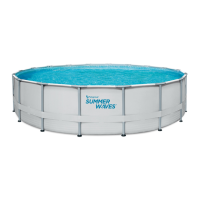
Follow the steps as illustrated in “Setup Diagrams No.1 to 11” to set up your pool.
Not following the steps will result in an uneven pool when it is filled with water, and may cause the pool to lean on one
side and collapse. Your pool should be straight and verticle to the ground. If you pool is leaning at all, the ground may not
be levelled and you will need to set up the pool again.
Failure to follow the instructions above will cause pool to collapse and will void the warranty!
Note
IMPORTANT: Before adding water to your pool, you must first install the pool wall fittings or an entire filtration system.
If your pool includes openings or if you plan on purchasing a filter pump system, position the suction and return fitting
locations so they are 10 to 21 feet from the electrical outlet you plan to use for the pool filter pump.
If your pool came with fittings, install both the suction and return fittings to the pool wall before filling the pool with water.
Refer to the filter pump's instruction manual for the steps to set up the fittings.
The black rubber gasket (Fitting Gasket) should always be slid over the threated plastic suction or return fitting, and also
be on the inside of the pool before the fitting is placed through the pool wall to make a secure watertight connection.
Make sure both the water cap and the service plug is secure when you fill up your pool with water, or when you are ready
to add a filtration system.
Drainage
Follow the steps as illustrated in “Drainage Diagrams No.1 to 3” to drain your pool.
Note
• Check the local regulations for the specific instructions regarding the disposal of the swimming pool water.
• Attach a 5/8” garden hose to the drain valve.
• Place the other end of the garden hose in an area where the water can be safely drained away from the house and
other nearby structures.
• When the water stops draining, start lifting the pool from the side opposite to the drain valve to drain any remaining
water and empty the pool completely.
Dismantle & Storage
Follow the steps as illustrated in “Dismantle & Storage Diagrams No.1 - 6” to dismantle and store your pool.
• Be sure that the pool and all parts are completely dry before storage. Sprinkle some talcum powder to prevent the
vinyl from sticking together and to absorb any residual moisture.
EN
This above-ground pool cannot be winterized and must be drained, disassembled, and properly stored if you live
in an area where the temperature drops below 32°F (0°C). If you are in a warmer environment, please follow the
instructions below.
After usage, you can easily empty and store away your pool in a safe place (see long term storage above). Some pool
owners, in warmer climates however, may choose to leave their pool up all year round. In colder areas, where freezing
temperatures occur, there can be a risk of ice damage to your pool. Leaving your above-ground pool set up in areas
where the temperature drops below 0ºC (32ºF) voids the warranty.
Winterising Your Above-Ground Pool
1. Clean the pool water thoroughly.
2. Remove the skimmer (if applicable) or any accessories attached to the threaded strainer connector. Replace strainer
grid if necessary. Be sure all accessories parts are clean and completely dry before storage.
3. Unplug the Inlet and Outlet fitting from the inside of the pool (if applicable).
4. Remove the ladder (if applicable) and store in a safe place. Be sure the ladder is completely dry before storage.
5. Remove the hoses that connect the pump and filter to the pool.
6. Add the appropriate chemicals for the winter period. Consult your local pool dealer as to which chemicals you should
use and how to use them. This can vary greatly by region.
7. Cover pool with Polygroup™ Pool Cover. IMPORTANT NOTE: Polygroup™ POOL COVER IS NOT A SAFETY
COVER.
8. Clean and drain the pump, filter housing, and hoses. Remove and discard the old filter cartridge. Keep a spare
cartridge for the next season.
9. Bring pump and filter parts indoors and store in a safe and dry area, preferably between 0ºC (32ºF) and 40ºC
(104ºF).
POOL STORAGE & WINTERISING
Before assembling your product, please take a few minutes to check the contents and become familiar with all the parts.
Site Preparation
1. Select a level area, and completely remove all debris, twigs, stones, etc. DO NOT select an area under overhead
electrical lines, trees, or within 4.57 m (15 ft) of a house, building, etc.
2. The pool shall be located a minimum distance of 1.83 m (6 ft) from any electrical receptacle.
3. Contact your local utilities, to check that no underground cables, telephone lines, gas lines, etc. run beneath the area
you have selected.
SETUP INSTRUCTIONS
WARNING
- DO NOT overfill the pool and/or allow people to lay over or sit on the pool wall - DOING SO
CAN CAUSE PERMANENT INJURY! Drain the pool to the proper level after heavy rain.
TIP
: It will be much easier to install your pool if you unfold it and let it lay in direct sunlight for about 2 hours prior to
installation. This will help ensure a wrinkle-free fit because the pool material will be more pliable, allowing it to form
into shape during installation.
WARNING
- IMPORTANT! SITE MUST BE LEVEL, STABLE, COMPACTED SOIL.
• The pool must be assembled on a smooth and level site of firm soil that is free of stones, gravel, sticks, blacktop,
or other oil-based compounds.
• Before setting up your pool, it is recommended that you clear the area of hardy grasses. Certain types of vigorous
grasses such as St. Augustine and Bermuda can grow through the liner. A ground sheet or tarp may be helpful in
preventing this from occurring. Grass growing through the liner is not covered under warranty.
• Do not install the pool on a wooden deck or any type of wooden surface. You cannot use sand and/or
uncompacted soil to provide a level surface for the pool; it will wash out.
• FAILURE TO FOLLOW ALL OF THESE INSTRUCTIONS WILL CAUSE THE POOL TO COLLAPSE AND WILL
VOID THE WARRANTY!
Do not add chemicals if the pool is occupied. This can cause skin or eye irritation. Concentrated chlorine solutions can
damage the pool liner. In no event is Polygroup™, the buyer/retailers, or any other party liable for costs associated with the
loss of pool water, chemicals, or water damage. Keep spare filter cartridges on hand. Replace cartridges every two weeks.
We recommend the use of Polygroup™ Filter Pump with all of our above-ground pools. To purchased a Polygroup™ Filter
Pump or other accessories, visit our website at support.polygroupstore.com or call Polygroup™ Customer Services.
EXCESSIVE RAIN: To avoid damage to the pool and overfilling, drain rainwater that causes the water level to be higher
than the FILL LINE immediately.
POOL MAINTENANCE & DRAINAGE
CAUTION:
ALWAYS FOLLOW THE CHEMICAL MANUFACTURER'S DIRECTIONS AND THE HEALTH
AND HAZARD WARNINGS.
 Loading...