OWNER′S MANUAL
9
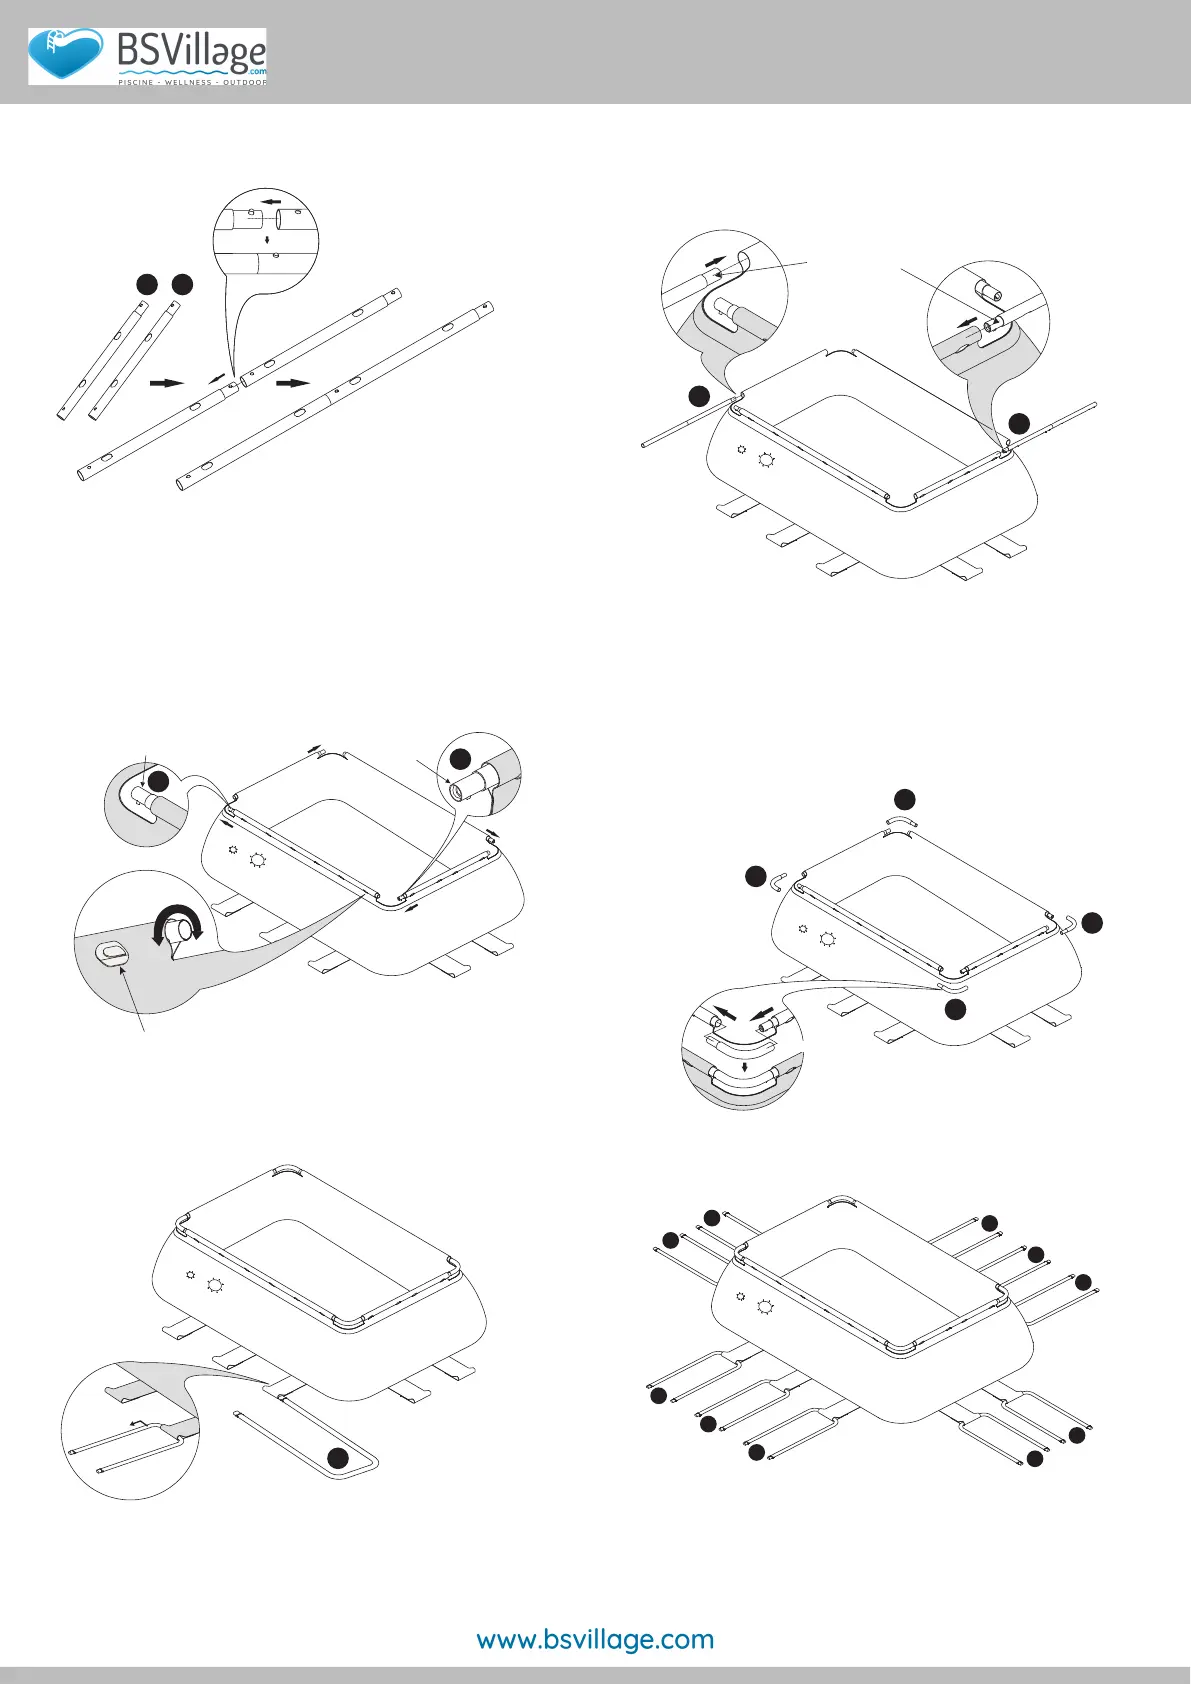
8. Rotate the beams to align the holes of beams with the openings
on the sleeves.
Swedged End
Swedged End
Swedged End
x4
2
2
2
2
2
2
2
2
2
2
4 4
NOTE:
Refer to the part list on page 7 for the exact quantity
of Short Tubes
4
. Connect half the total quantity to
form the horizontal beams on the short sides of the pool.
7. Carefully slide the connected Short Tubes
4
into the sleeves on the short sides of the pool.
4
4
• Align the holes of
4
and
5
with the sleeve openings.
• Make sure all the swedged ends of
4
and
5
are pointing to the clockwise direction.
4
5
3
3
3
3
2
6. Connect the Short Tubes
4
.
See NOTE below.
9. Connect the Corner Pieces
3
to the tubes at each of the 4
Corners. You should have a closed rectangular pool frame;
which is the frame around the top of the pool.
NOTE: The Corner Pieces
3
DO NOT have holes to catch the
spring pins. THIS IS NORMAL. Only the Long and Short Tubes
4
&
5
have holes to catch the spring pins.
10. Insert the U-Shaped Pipes
2
into the straps at the bottom of
the pool.
11. Continue to insert all of the U-Shaped Pipes
2
as shown below.