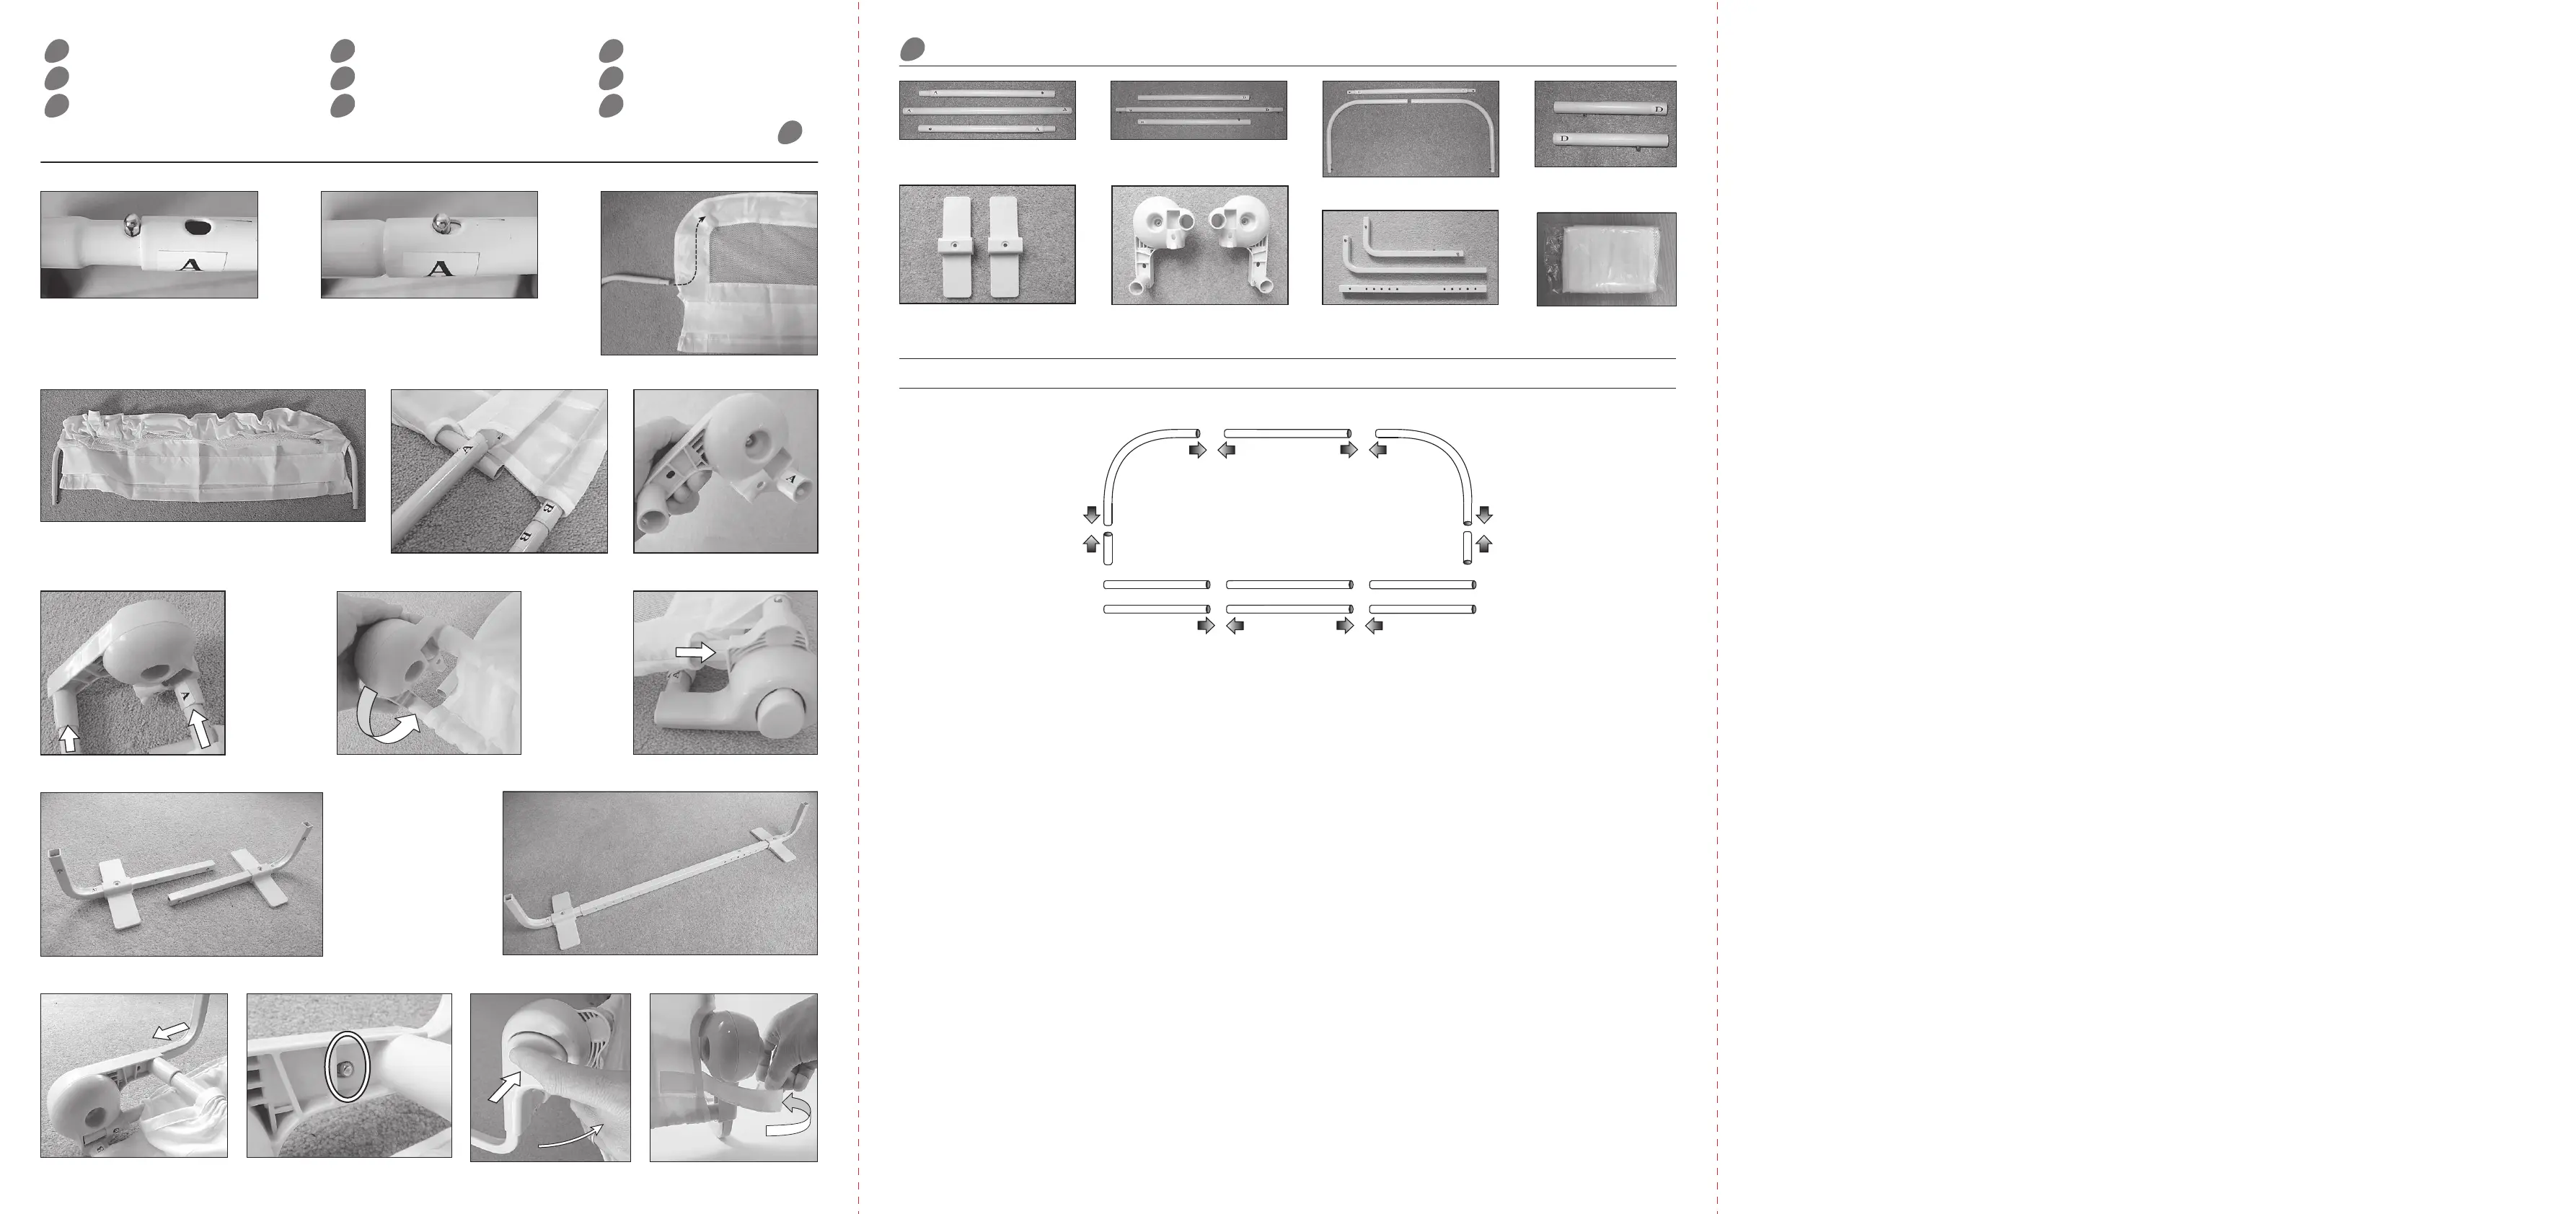
Hinges (x2) L & R
L = Left, R = Right
Leg supports (x2) Fabric panel
Straight tubes labelled ‘D’ x2
Straight tubes labelled ‘B’ x3
Curved tubes x2
Straight tube labelled ‘C’
Straight tubes labelled ‘A’ x3
COMPONENTS:
ENG
Legs (x2)
ASSEMBLY:
Panel Assembly (refer to the diagram for the location of the various parts):
Step 1: Join all tubes labelled ‘A’ together. Press down the spring tab and push the tubes together, making sure the tab pops up in the hole (Figures A & B).
Step 2: Repeat for tubes labelled ‘B’.
Step 3: Connect tubes ‘C’ together and then add tubes ‘D’ to the other ends of the curved sections.
Step 4: Lay the fabric panel on a flat surface. Insert curved tube assembly (‘C’ and ‘D’) through the channel in the upper part of the fabric panel
(Figure C and D).
Step 5: Insert tube assemblies ‘A’ and ‘B’ into the loops in the fabric panel (Figure E).
Step 6: Find the left hand hinge (labelled ‘L’). Make sure it looks exactly like the picture (Figure F). If necessary, press the release button and rotate
the parts until correctly positioned.
Step 7: Fit the ends of tubes ‘A’ and ‘B’ into the corresponding sockets in the left hand hinge (Figure G).
Step 8: Rotate the entire hinge moulding and at the same time, insert the end of the curved tube assembly (Figures H, I).
Step 9: Fit the other hinge to the opposite ends of the tubes. Insert tubes A and B first followed by the end of the curved tube.
Step 10: Secure the fabric tabs at each end of the bedrail panel using the hook/loop fastening, making sure each one wraps around the leg of the
hinge moulding as shown (Figure O).
Leg Assembly:
Step 1: The leg components are labelled A1 and A2. Use all A1 components to make one leg and all A2 components to make the other.
Step 2: Fit the plastic leg supports to the shorter curved legs A1 and A2 (Figure J).
Step 3: Fit the middle and end sections of the legs.
Note: The middle section has a number of holes to allow the leg to be adjusted to fit various mattress sizes. The ends of the legs should point
upwards to clamp against the side of the mattress. (Figure K)
Step 4: With the bedrail flat on the floor, attach the legs to the hinge mouldings. Note that the pins on the legs must engage with the holes in the
mouldings. (Figures L & M).
Refer to "USE" section for guidance on raising and lowering the bedrail side panel.
D
A
B
C
D
D
D
C C C
A A A
B B B
PT
ENG
FR
AR
IT
ES
NL
DE PL
RU
ASSEMBLY & USE: MONTAGE ET UTILISATION : ENSAMBLAJE Y USO:
MONTAGEM E UTILIZAÇÃO: MONTAGGIO E UTILIZZO: MONTAGE EN GEBRUIK:
MONTAGE UND VERWENDUNG:
СБОРКА И ИСПОЛЬЗОВАНИЕ:
MONTAŻ I OBSŁUGA:
:ﻡﺍﺩﺧﺗﺳﻻﺍﻭ ﻊﻳﻣﺟﺗﻟﺍ
A
B
E
D
F
J
K
C
IH
M
G
N
L
O