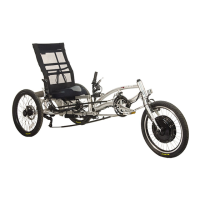
Do you have a question about the Sun Bicycles EZ-1 and is the answer not in the manual?
| Type | Recumbent |
|---|---|
| Frame Material | Steel |
| Gearing | 7-speed |
| Brakes | Linear-pull |
| Frame Type | Step-through |
| Fork | Steel |
| Rear Derailleur | Shimano Tourney |
| Rims | Alloy |
| Gears | 7 |
| Weight | 42 lbs |
| Wheel Size | 20 inches |
| Shifters | Twist shifters |
| Color Options | Red, Blue |
Rules for safe recumbent riding, covering helmet, mirror, traffic laws, and alertness.
Tips for riding safely at night, emphasizing lights, visibility, and caution.
Advice on stopping distances, cornering, and brake use in wet or icy conditions to prevent skidding.
Guidance on body relaxation, handlebar pressure, starting, balancing, pedaling, and stopping.
How to adjust the recumbent for comfortable and safe riding, covering seat distance, backrest, and handlebars.
Step-by-step guide for installing the handlebar and front wheel, including stem and quick-release setup.
Instructions for installing and adjusting front and rear linear pull brakes, including pad alignment and cable tension.
Detailed steps for installing the rear unit and wheels on a trike, including chain setup and alignment.
Guide for setting up and adjusting rear disc brakes, including cable connection and pad clearance.
Instructions for replacing disc brake pads, including removal of caliper and pad components.
Steps for installing pedals, including greasing threads and correct tightening direction for left and right pedals.
Steps for installing the seat base, quick release bolts, and seat back struts onto the recumbent frame.
How to adjust the seat position forward or backward for optimal leg extension and knee bend.
Instructions for adjusting the angle of the seat backrest for comfort.
Guide for adjusting handlebar height and angle for comfortable arm position and knee clearance.
Detailed steps for adjusting the rear derailleur, covering top, low, B-tension, and SIS adjustments.
Steps for installing front disc brake rotors and calipers, including torque specifications.
How to adjust the front brake caliper for proper rotor clearance and pad contact.
Instructions for assembling and adjusting rear wheels, particularly for models with disc brakes.
Guide for installing the bicycle chain, showing proper routing around rollers.
Steps for installing the seat, including the use of spacers and positioning.
Steps for installing the handlebar unit and stem on the EZ-Speedster model.
Instructions for installing the chain on the EZ-Speedster, showing correct routing.
Steps for assembling the frame of the EZ-3 USX, including pivot point adjustment.
Instructions for rear wheel and brake assembly specific to the EZ-3 USX model.
Steps for installing handlebars and control arms on the EZ-3 USX, ensuring correct orientation.
How to route and connect the front brake cable to the caliper on the EZ-3 USX.
Detailed explanation of how to properly operate and adjust quick release levers for wheel security.
Proper positioning of the quick release lever on the recumbent frame for safety.
Steps for removing wheels by opening quick release levers and loosening nuts.
A quick check method to verify wheel security by lifting and tapping the wheel.
Procedure for removing the rear wheel from a bicycle, including gear shifting and brake cable release.
Steps for removing the rear wheel from a trike, involving loosening axle nuts.
Instructions for reinstalling the rear wheel, reversing the removal process and checking brake adjustment.
Steps for installing rear wheels on a trike, including proper placement of spacers and nuts.
Steps for removing and reinstalling the front wheel, including brake cable release.
Guidelines for maintaining tire pressure, inspecting tires, and checking wheel trueness and spoke tightness.
A checklist for general inspection before each ride, covering nuts, bolts, levers, alignment, and components.
Recommendations for lubricating the drive chain, derailleur, brake cables, and bearings.
Advice on protecting the recumbent's surface finish with wax or polish and proper storage.
Details the 90-day warranty on complete recumbents, covering defects and conditions.
Outlines lifetime warranty for steel frames and 10-year warranty for other frames, excluding finish and components.
Specifies conditions for the warranty, proof of purchase, and exclusions like misuse or accidents.
Discusses the concept of a useful product life cycle and factors affecting it, along with safety checks.
Disclaims implied warranties and limits liability for incidental or consequential damages.
 Loading...