PLEASE READ AND SAVE THESE
IMPORTANT SAFETY INSTRUCTIONS
FEATURES - OPERATIONS
NOTE: To shut the humidifier off at any setting, press the
PowerButton( )untilallindicatorlightsgooff.The
humidistat has memory. This means that when you turn
the unit back on, it will be at the last humidity setting
beforethehumidifieristurnedoff.However,ifthe
humidifier is unplugged, the digital humidistat will no
longerremembertheprevioushumiditysetting.Youwill
need to reset the digital humidistat if the humidifier is
unplugged.
WARNING: DO NOT move the humidifier with water in
the tank or the humidifier base. The moving action of the
water may activate the water tank’s release nozzle and
overfill the humidifier base. This may cause the
humidifier to function intermittently, or stop emitting
mist.Shouldthisoccurs,simplyremovetheexcesswater
from the humidifier base.
NOTES:
• High setting will produce the maximum moisture
level and Low setting will produce the longest run
time and quieter performance
• Duringoperation,youmaychecktherun time
scale as located on the side of the Tank, it indicates
how long the humidifier will run at Low and High
setting.
• Allowupto30minutesforthefiltertofullyabsorb
water and for the unit to produce moisture.
• The9holesonthebottomrightoftheunitisthe
humidistat sensor.
• Theactualruntimestatedontheruntimescaleon
the tank may vary slightly due to the amount of
water in the reservoir of the humidifier.
Tank Empty Light
Once the tank is empty, the Tank Empty Light will
illuminate. Turn off your humidifier and unplug it from
theelectricaloutlet.Beforerefilling,emptyanyresidual
water from the base and the tank (follow the daily
maintenanceinstructions).ThenfollowtheFilling
Instructionstorefillthetankandputbackintothe
humidifier to begin operation. The Tank Empty Light
will go off.
Change Light
The Change Light will illuminate to monitor the life of
both wick filter and the optional demineralization
cartridge.
Wick Filter Change Instructions
YourCoolMisthumidifiercomeswithareplaceablewick
filter (SW2002-CN).Throughnormaluse,waterborne
minerals and sediment become trapped in the wick filter.
The harder your water, the great the amount of minerals
in the water, and the more often you will need to change
yourfilter.Itisstronglyrecommendedthatanewfilter
bereplacedevery30daysofuse.Whenthefilter
requires replacement, the Change Light will illuminate.
To replace the wick filter:
1. Turn off your humidifier and unplug it from the
electrical outlet.
2. Remove tank and main housing to access the base
tray.
3. Discard the old filter and follow the weekly cleaning
instructions.
4. Insertanewfilterintothefiltersupportinthebase,
ensure blue grommet is inserted into the groove.
5. Replace the main housing and then the tank onto the
unit.
6. PressandholdtheSpeed Control Button for 3
seconds. The Change Light will now be reset.
7. RepeatOperatingInstructionstepstobegin
operation, the Change Light will go off and start
another cycle for timing the new filter.
Demineralization Cartridge - Not included in
humidifier
To achieve cleaner and fresher output, a demineralization
cartridge(modelSDC2300)isavailable.Thecartridgelife
is determined by the average daily use of your humidifier
and the water hardness in your area. Areas with hard
water will require more frequent placement of the
cartridge.Itisstronglyrecommendedthatthecartridge
bereplacedevery30days.
21. Never place housing under water flow or immerse in
liquids.
22. Do not plug in the cord with wet hands: electric shock
could result.
23. Do not pour water in any openings other than the
water tank.
24. To prevent damage to surfaces, do not place
humidifier under overhanging surfaces.
25.NEVERoperateunitwithoutwaterinthetank.
26.Donotmoveunitafterithasbeenuseduntilunit
cools completely.
27.Usebothhandswhencarryingfulltankofwater.
PLEASE READ AND SAVE
THESE IMPORTANT SAFETY
INSTRUCTIONS
CONSUMER SAFETY INFORMATION
NOTE: This is an electrical appliance and requires
attention when in use.
NOTE:Ifmoistureformsonthewallsorwindowsofthe
room, turn off the humidifier. The room already has
plenty of humidity and additional moisture may cause
damage.
NOTE: DO NOT block air inlet or outlet.
Cord and Plug Installation Safety Instructions:
The length of cord used on this appliance was selected to
reduce the hazards of becoming tangled in, or tripping
overalongercord.Ifalongercordisnecessaryan
approved extension cord may be used. The electrical
rating of the extension cord must be equal to or greater
than the rating of the humidifier (refer to the rating
informationplacedonthehumidifier).Caremustbe
taken to arrange the extension cord so that it will not
drape over the countertop or tabletop where it can be
pulled on by children or accidentally tripped over.
HOW COOL MIST WORKS:
Air circulating through an absorbent wick filter releases
invisible cool mist moisture into the air.
NOTE: Ahumiditylevelbelow20%canbeunhealthy
and uncomfortable. The recommended humidity level is
between40%-50%.
PRE-OPERATING INSTRUCTIONS
1. BesurethehumidifierisswitchedOFFandtheunitis
disconnected from the electrical outlet.
2. Selectalocationforyourhumidifier,onaflat
surface,about4inches(10cm)awayfromthewall.
DO NOT place the humidifier on a finished floor or
near furniture, which can be damaged by too much
moisture or water. Place on a moisture resistant
surface.
FILLING THE WATER TANK
1. Remove the tank from the main housing.
2. Bringthetanktothesink,turnupsidedownand
twist off the tank cap by turning counter clockwise.
Filltankwithcool,freshtapwater.DONOTfillwith
warm water as this may cause leaking. Replace the
capontankFIRMLY.
3. Place tank back on to the base. The tank will
immediately begin to empty into the base.
4. Plugthehumidifierintoa120Velectricaloutlet.
OPERATING INSTRUCTIONS
The number of control buttons and settings may vary
slightly between models, read below instructions carefully
before operating:
Power Button
PressthePowerButtontoturnthehumidifieron,the
Power Light Ring will illuminate. The humidifier will
run at High setting and the Stay On humidity indicator
light will illuminate. Press the Power button to manually
turn off the humidifier at any setting.
When using electrical appliances, basic safety precautions
should always be followed to reduce the risk of fire,
electric shock, and injury to persons, including the
following:
1. Read all instructions before using the appliance.
2. To avoid fire or shock hazard, plug the appliance
directlyintoa120VACelectricaloutlet.
3. Keep the cord out of heavy traffic areas. To avoid
firehazard,NEVERputthecordunderrugsornear
heat registers.
4. DO NOT place humidifier near heat sources such as
stoves, radiators, and heaters. DO locate your
humidifier on an inside wall near an electrical outlet.
Thehumidifiershouldbeatleast4inches(10cm)
away from the wall for best results.
5. NEVERplacehumidifierinanareawhereitis
accessibletochildren.NEVERusehumidifierina
closed room, particularly where a child may be
sleeping, resting, or playing (a closed room may
resultinexcessivehumidity).
6. WARNING: Do not attempt to refill humidifier
without first unplugging the unit from its electrical
outlet.Failuretoheedthiswarningmaycause
personalinjury.Besuretounplugtheunitbypulling
on the plug and not the cord.
7. Never place anything over moisture outlet when the
unit is running.
8. NEVERdroporinsertanyobjectintoanyopenings.
9. DONOToperateanyappliancewithadamagedcord
or plug, after the appliance malfunctions, or if it has
been dropped or damaged in any manner. Return
appliance to manufacturer for examination, electrical
or mechanical adjustment, or repair.
10.Useapplianceonlyforintendedhouseholduseas
described in this manual. Any other use not
recommended by the manufacturer may cause fire,
electric shock, or injury to persons. The use of
attachments not recommended or sold by the
manufacturer may cause hazards.
11. DO NOT use outdoors.
12. Always place humidifier on a firm, flat, level surface.
A waterproof mat or pad is recommended for use
underthehumidifier.NEVERplaceitonarugor
carpet, or on a finished floor that may be damaged
by exposure to water or moisture.
13.DONOTallowtheMoistureOutlettodirectlyfacethe
wall.Moisturecouldcausedamage,particularlyto
wall paper.
14.Humidifiershouldbeunpluggedwhennotinuse.
15.NEVERtilt,move,orattempttoemptyunitwhileitis
operating.Shutoffandunplugbeforeremovingthe
water tank and moving the unit.
16.Thishumidifierrequiresdailyandweekly
maintenance to operate appropriately. Refer to daily
andweeklycleaningprocedures.Useonlycleaners
and additives recommended by the manufacturer.
17.NEVERusedetergents,gasoline,glasscleaner,
furniture polish, paint thinner, or other household
solvents to clean any part of the humidifier.
18.Excessivehumidityinaroomcancausewater
condensationonwindowsandsomefurniture.Ifthis
happens,turnthehumidifierOFF.
19.Donotusehumidifierinanareawherehumidity
levelisinexcessof50%.Useahygrometer,
available at your local retailer or through the
manufacturer, to measure the humidity.
20.DONOTattempttorepairoradjustanyelectricalor
mechanical functions on this unit. Doing so will void
your warranty. The inside of the unit contains no user
serviceable parts. All servicing should be performed
by qualified personnel only.
FEATURES - OPERATIONS
FEATURES - OPERATIONS
THIS APPLIANCE HAS A POLARIZED PLUG (one blade is wider than the
other). To reduce the risk of electric shock, this plug is intended to fit in a
polarized outlet only one way. If the plug does not fit fully in the outlet,
reverse the plug. If it still does not fit, contact a qualified electrician to
install the proper outlet.
DO NOT ATTEMPT TO MODIFY THIS PLUG OR DEFEAT THIS
SAFETY FEATURE IN ANY WAY.
Speed Control
PresstheSpeedControlButtontoselectyourdesired
setting (your humidifier may come with either 2 or 3
settings).Onceselected,theSetting Indicators will
illuminate to indicate which setting is activated:
Low – High (2 settings mode sequence)
Low – Med – High (3 settings mode
sequence)
Digital Humidistat Control
Yourhumidifierisequippedwithadigitalhumidistatthat
allows you to set your humidifier to your desired comfort
level by turning the Dial Knob on the control panel:
To preset a precise comfort level, turn the Dial Knob to
adjust the humidity level ranging from 60% to 30%.
The corresponding Humidity Indicator will illuminate
once selected. When the room humidity level rises above
the set humidity, the humidifier will stop. When the room
humidity level drops below the set humidity, the
humidifier will turn on automatically to maintain the
preset humidity level.
CARACTÉRISTIQUES – UTILISATION
CARACTÉRISTIQUES – UTILISATION
CARACTÉRISTIQUES – UTILISATION
VEUILLEZ LIRE ET CONSERVER CES
DIRECTIVES DE SÉCURITÉ IMPORTANTES
CET APPAREIL COMPORTE UNE FICHE POLARISÉE (une lame est plus large
que l’autre). Pour réduire les risques de choc électrique, la fiche ne rentre
dans les prises de courant polarisées que dans un sens. Si la fiche n’enfonce
pas parfaitement dans la prise, inversez-la. Si elle ne pénètre toujours pas
bien, faites remplacer la prise par un électricien qualifié.
NE MODIFIEZ LA FICHE EN AUCUNE FAÇON ET N’ESSAYEZ PAS DE
NEUTRALISER CETTE CARACTÉRISTIQUE DE SÉCURITÉ.
Touche de vitesse
Pressez la touche de vitesse pour régler l’allure désirée
(votrehumidificateurestpourvude2oude3réglages).
Unefoislasélectionfaite,levoyant de réglage
s’allumera pour indiquer votre choix:
Bas ou haut (2 réglages en séquence)
Bas, moyen ou haut (3 réglages en séquence)
Commande de l’humidistat numérique
L’humidificateur comprend un humidistat numérique qui
permet de régler le niveau de confort préféré à l’aide de
la roulette à cadran de son tableau de commande:
Pour régler un taux de confort précis, tournez la roulette
afin d’ajuster le taux d’humidité entre 60 et 30 %. Le
voyant d’humidité correspondant luira après la
sélection.L’humidificateurs’arrêteralorsquel’humidité
relative dépasse le niveau choisi puis se remettra
automatiquement en marche lorsque le taux ambiant a
baisséau-dessousdutauxréglé,afindemaintenirle
niveau sélectionné.
REMARQUE: Pour éteindre l’humidificateur à tout
réglage, pressez la touche d’alimentation ( )jusqu’àce
que tous les voyants s’éteignent. L’humidistat ayant de la
mémoire, lorsque vous remettrez l’appareil en marche, il
serappelleradudernierréglaged’humiditéchoisi.Si,
toutefois, vous débranchez l’humidificateur, l’humidistat
numérique oubliera le réglage d’humidité et vous devrez
le régler de nouveau.
AVERTISSEMENT:NEdéplacezPASl’humidificateur
quand il y a de l’eau dans le réservoir ou la base, le
mouvement de l’eau risquerait d’ouvrir la buse et de
remplir la base à l’excès, provoquant le fonctionnement
intermittentoul’arrêtdudébitdevapeur.Encecas,
réduisez simplement le volume d’eau dans la base de
l’humidificateur.
REMARQUES:
• Le réglage haut produit le débit de vapeur maximal
alors que le réglage bas fournit l’autonomie la plus
longue et le fonctionnement le plus silencieux.
• Durantlefonctionnement,vouspouvezvérifier
l’échelle d’autonomie qui se trouve sur le côté du
réservoir–ellerévèleladuréerestanteauxréglages
bas et haut.
• Prévoyezundélaiatteignantjusqu’à30minutespour
que le filtre absorbe de l’humidité et produise de la
vapeur.
• Les9orificesaufond,àdroitedel’appareil,font
partie du détecteur de l’humidistat.
• Laduréeréelled’autonomiequ’indiquel’échellepeut
légèrement varier en fonction du volume d’eau dans
le réservoir de l’appareil.
Réservoir Vide Light
Le voyant de réservoir vide s’allume lorsqu’il n’y a
plusd’eau.Éteignezl’humidificateuretdébranchez-le.
Avant de le remplir, videz toute eau résiduelle de la base
et du réservoir (suivez les instructions d’entretien
quotidien).Observezalorslesdirectivesderemplissage
puis replacez le réservoir dans le boîtier avant de
remettre l’humidificateur en marche. Le voyant de
réservoir vide s’éteindra.
20.NetentezPASderépareroudemettreaupointtoute
fonction électrique ou mécanique de l’appareil, sous
peine d’annulation de la garantie. L’appareil ne
contient aucune pièce que puisse réparer l’utilisateur.
Réparationsetentretiendoiventêtreconfiésau
personnel qualifié.
21. Ne placez jamais le boîtier sous l’eau courante et ne
l’immergez dans aucun liquide.
22. Ne branchez pas le cordon avec les mains mouillées,
vous risqueriez un choc électrique.
23.NeversezPASd’eaudanslesorificesde
l’humidificateur, uniquement dans le réservoir.
24. Ne placez pas l’humidificateur sous les surfaces en
saillie, pour éviter de les endommager.
25.NefaitesJAMAISfonctionnerl’appareilsansqu’iln’y
ait d’eau dans le réservoir.
26.Enfind’utilisation,nedéplacezpasl’humidificateur
avant qu’il ait refroidi.
27. Quand vous portez un réservoir plein d’eau, utilisez
vos deux mains.
VEUILLEZ LIRE ET
CONSERVER CES
CONSIGNES DE SÉCURITÉ
IMPORTANTES
RENSEIGNEMENTS DE SÉCURITÉ POUR
LE CONSOMMATEUR
REMARQUE: Cet humidificateur est un appareil
électriquequidoitêtresurveillélorsqu’ilestenmarche.
REMARQUE:Sidelacondensationperlesurlesmursou
lesfenêtresdelapièce,éteignezl’humidificateur.Dansce
cas, l’humidité ambiante est suffisante et toute humidité
supplémentaire pourrait causer des dommages.
REMARQUE: Ne bloquez pas les ouvertures d’entrée et
de sortie d’air.
Utilisation sécuritaire du cordon et de la fiche
La longueur du cordon d’alimentation a été choisie afin
quepersonnenepuisses’empêtrerles
piedsoutrébucher,
commeçapourraitêtrelecasavecuncordonpluslong.
Vouspouvezaubesoinvousservird'unerallonge
approuvée, à condition que sa puissance nominale soit
équivalente ou supérieure à celle de l’humidificateur
(voyezlaplaquesignalétiquedel’humidificateur).Ne
laissez pas pendre la rallonge afin que les enfants ne
risquent pas de la tirer; évitez également les endroits où
elle risquerait de faire trébucher.
HUMIDIFICATION À VAPEUR FROIDE:
L’airquipasseàtraverslefiltre-mècheabsorbantlibère
un brouillard froid et invisible dans l’air.
REMARQUE: Unniveaud’humiditédemoinsde20%
peutêtremalsainetinconfortable.Leniveaud’humidité
recommandé se situe entre40et50%.
INSTRUCTIONS AVANT L’UTILISATION
1. Assurez-vousquel’appareilestéteintetdébranché.
2. Choisissez un endroit approprié pour l’humidificateur,
surunesurfaceplane,àenviron10cm(4po)du
mur.NEplacezPASl’humidificateursurunplancher
fini ou près de meubles que l’humidité risquerait
d’abîmer.Posez-lesurunesurfacerésistanteà
l’humidité.
Lors de l’usage de tout appareil électrique, des précautions
fondamentales doivent être observées pour réduire le
risque d’incendie, de choc électrique et de blessures
corporelles,ycompriscelles-ci:
1. Lisez toutes les directives avant d’utiliser l’appareil.
2. Pour éviter le risque de choc électrique, branchez
l’humidificateur directement sur une prise de courant
alternatifde120volts.
3. Éloignezlecordond’alimentationdespassages.Pour
évitertoutrisqued’incendie,n’acheminezPASle
cordon d’alimentation sous des moquettes ou près de
registres d’alimentation en air chaud.
4. NEplacezPASl’humidificateurprèsd’unesourcede
chaleur–unecuisinièreouunradiateur,par
exemple.PLACEZ-LEplutôtprèsd’unmurintérieuret
d’une prise murale. Pour de meilleurs résultats,
l’humidificateurdoitsetrouveràaumoins4po(10
cm)dumur.
5. NEplacezJAMAISl’humidificateuràunendroit
accessibleauxenfants.Nel’utilisezJAMAISdansune
pièce fermée, surtout si un enfant y dort, s’y repose
ou y joue (le taux d’humidité peut devenir excessif
dansunepiècefermée).
6. AVERTISSEMENT: N’essayez pas de nettoyer ou de
remplir l’humidificateur sans préalablement le
débrancher. Ne pas observer cette consigne peut
provoquer des blessures. Débranchez le cordon de
l’appareil en tirant sur la fiche et non sur le cordon.
7. Ne mettez jamais quoi que ce soit sur les sorties d’air
pendant que l’humidificateur est en marche.
8. N’échappezetn’insérezJAMAISd’objetsdansles
orifices d’entrée ou de sortie d’air.
9. N’employezPASl’appareilsisaficheousoncordon
est endommagé, s’il a mal fonctionné ou a été
échappéouabîmédequelquefaçon.Retournez-leau
fabricant pour le faire vérifier ou réparer et lui faire
subir les mises au point électriques ou mécaniques
nécessaires.
10.Ceproduitestuniquementdestinéàl’usage
domestique, tel que décrit dans ce guide. Toute autre
utilisation non recommandée par le fabricant peut
causer des risques d’incendie, de choc électrique ou
de blessures corporelles. L’emploi d’accessoires qui ne
sont pas formellement recommandés ou vendus par
le fabricant peut se révéler dangereux.
11.N’utilisezPASl’humidificateuràl’extérieur.
12. Posez toujours l’humidificateur sur une surface plane,
rigide et d’aplomb. Nous recommandons de placer un
coussin ou une plaque imperméable sous l’appareil.
NemettezPASl’humidificateursuruntapisou
plancher fini que l’humidité risque d’endommager.
13.N’orientezPASlasortiedevapeurversunmur.
L’humidité peut causer des dommages, surtout au
papier peint.
14. Débranchez l’humidificateur entre utilisations.
15. Ne tentez pas d’incliner ou de déplacer et n’essayez
JAMAISdeviderl’appareildurantson
fonctionnement.Éteignez-leetdébranchez-leavant
de retirer le réservoir ainsi qu’avant d’entreprendre
son déplacement.
16.Pourfonctionnerconvenablement,cetappareilexige
des procédures d’entretien quotidiennes et
hebdomadaires–consultez-les.N’utilisezqueles
nettoyants et additifs que recommande le fabricant.
17.N’employezJAMAISd’essence,deproduitpour
vitres, d’encaustique pour meubles, de diluant, ou
d’autres solvants domestiques pour nettoyer
l’humidificateur.
18.Unehumiditéexcessivedansunepiècepeutcauser
delacondensationsurlesfenêtresetlesmeubles.
En ce cas, éteignez l’humidificateur.
19.N’utilisezpasl’humidificateurdansunendroitoùle
tauxd’humiditédépasse50%.Pourmesurer
l’humidité,servez-vousd’unhygromètrequevous
vous procurerez chez votre détaillant ou par
l’entremise du fabricant.
REMPLISSAGE DU RÉSERVOIR À EAU
1. Retirez le réservoir du boîtier de l’appareil.
2. Apportezleréservoiràl’évier,mettez-lesensdessus
dessous et dévissez son bouchon en sens antihoraire.
Remplissez le réservoir d’eau froide du robinet. NE le
remplissezPASd’eauchaude,desfuitespourraient
enrésulter.ReplacezFERMEMENTlebouchon.
3. Replacezleréservoirsurlabase.Ilcommencera
aussitôt à se vider dans la base.
4. Branchezl’humidificateursuruneprisede120volts.
MODE D’EMPLOI
Le nombre de touches de commande et de réglages varie
légèrement d’un modèle à l’autre; lisez attentivement ces
instructions avant de commencer à utiliser votre appareil:
Touche d’alimentation
Pressez la touche d’alimentation pour mettre l’appareil
en marche et la bague lumineuse de sous tension
brillera. L’humidificateur démarrera au réglage haut et
le voyant de fonctionnement continu s’allumera. Quel
que soit le réglage, pressez la touche d’alimentation pour
éteindre manuellement l’humidificateur.
To install the cartridge:
1. SwitchOFFthehumidifierandunplug.Removethe
water tank and drain out any residue water.
2. Remove the protective bag from the new cartridge.
Eachnewcartridgeispre-installedtofitinplaceof
thetankcap.Youmaysimplyplacethecartridge
onto the tank as the normal tank cap after filling the
tankwithwater(followthe"FillingtheWaterTank"
instructions).Keepthetankcapforfutureusefor
instances when you are not using the
demineralization cartridge.
3. Replace the tank onto the unit and plug in.
When the Change Light illuminates, both wick filter and
demineralizationcartridgewillneedtobereplaced.Itis
recommended to change both the wick filter and
demineralization cartridge at the same time. Press and
hold the Speed ControlButtonfor3seconds,the
Change Light will blink 3 times and then go off. The
unit will start timing the cartridge life and the Change
Lightwillilluminateafter30daystoindicatethatanew
demineralization cartridge needs to be replaced.
NOTE:Itwilltakeabout30minutesforeverynew
filter/cartridge to absorb water in order to allow the
humidifier to reach maximum output.
Youcanpurchasereplaceablewickfilter(model
SW2002-CN)anddemineralizationcartridge(model
SDC2300)atalocalretailer,bycalling1-888-264-9669
or by visiting www.sunbeam.ca.Itisrecommendedthata
replacement / cartridge is purchased for uninterrupted
use.
Timer (if applicable)
Somemodelsareequippedwith12-HourAutoShut-off
Timer feature. This allows you to program your
humidifier to shut off automatically after running a
defined time interval.
1. Toactivatethetimer,presstheTimerButton( ).
EachpressoftheTimerButtonwillcyclethroughthe
below Timer options.
2. Selectyourdesiredintervalforthehumidifierto
shut-offautomatically.Thecorresponding hour
indicator light will illuminate.
3. To cancel the Timer feature, continue to press the
TimerButton( )untilallTimer Indicator lights
go off. The Timer will then be cancelled.
FEATURES - OPERATIONS CLEANING / MAINTENANCE
CARACTÉRISTIQUES – UTILISATION
CARACTÉRISTIQUES – UTILISATION
NETTOYAGE ET ENTRETIEN
Voyant «Changer»
Le voyant«Changer» s’allume pour contrôler l’état du
filtre-mèche,d’unepart,etdelacartouchede
déminéralisation, d’autre part.
Instructions de changement du filtre-mèche
L’humidificateuràvapeurfroidevientavecunfiltre-
mècheremplaçable(SW2002-CN).Soususagenormal,ce
filtre capte les minéraux et sédiments en suspension dans
l’eau.Plusl’eauestdure(calcaire),plusellecontientde
minéraux et il faut donc que vous changiez le filtre plus
souvent. Nous conseillons vivement de le remplacer au
boutde30joursd’utilisation.Levoyant«Changer»
s’allume pour signaler que le changement est nécessaire.
Remplacement du filtre-mèche:
1. Éteignezl’humidificateurpuisdébranchez-le.
2. Sortezleréservoirduboîtierpouraccéderàlabase.
3. Jetezlefiltreuséetsuivezlesinstructionsdu
nettoyage hebdomadaire.
4. Mettezunfiltreneufdanslesupportdefiltredela
base, en veillant à bien insérer l’œillet dans la
rainure.
5. Réinstallez le boîtier principal ainsi que le réservoir.
6. Pressez la touche de vitesse 3 secondes sans la
relâcher. Le voyant«Changer» sera alors
réinitialisé.
7. Observez les instructions du mode d’emploi pour
faire démarrer l’appareil, le voyant«Changer»
s’éteindra et la comptabilisation de l’utilisation
recommencera.
Cartouche de déminéralisation – non incluse
Unecartouchededéminéralisation(modèleSDC2300)est
proposée pour obtenir un débit de vapeur encore plus
fraisetpluspur.Saduréedeservicedépendde
l’utilisation quotidienne moyenne de l’humidificateur et
delanaturedel’eau–elledevraêtreremplacéeplus
souventdanslesrégionsoùl’eauestcalcaire(dure).La
remplacertousles30joursestvivementconseillé.
Mise en place de la cartouche
1. ÉTEIGNEZl’humidificateuretdébranchez-le.Retirez
le réservoir et videz toute eau résiduelle.
2. Sortezlacartoucheneuvedesonenveloppe.La
cartouche est destinée à remplacer le bouchon du
réservoir(maisgardez-lebouchonpourl’utiliserplus
tard, quand vous ne vous servez pas de cartouche,
parexemple).Vousl’employezaulieudubouchon
du réservoir après le remplissage (selon les
instructionsdonnéessous«Remplissagedu
réservoir»).
3. Réinstallez le réservoir puis branchez l’appareil.
Quand le voyant«Changer» s’allume,lefiltre-mèche
ainsiquela
cartouchededéminéralisationdoiventêtre
remplacés.Ilestconseillédeleschangerenmêmetemps.
Pressez la touche de vitesse pendant 3 secondes sans
la relâcher, le voyant«Changer» clignotera 3 fois puis
s’éteindra. La comptabilisation de la cartouche neuve
débutera et le voyant«Changer» s’allumera au bout
de30jourspoursignalerquelacartouchede
déminéralisationdoitêtrechangée.
REMARQUE:Ilfautcompterenviron30minutespour
quelefiltre-mècheneufetlacartoucheneuveabsorbent
l’eau voulue pour que l’humidificateur atteigne son débit
maximal.
Vouspouvezvousprocurerlesfiltres-mèches
(SW2002-CN)etlescartouchesdedéminéralisation
(modèleSDC2300)chezvotredétaillantattitré,en
composant le1888264-9669oubienenvisitant
www.sunbeam.ca. Nous vous recommandons de toujours
avoirunfiltre-mècheetunecartouchederechangesous
la main afin de pouvoir utiliser l’appareil sans
interruption.
CLEANING AND MAINTENANCE
INSTRUCTIONS
Humidifiersprovidecomfortbyaddingmoisturetodry,
heated indoor air. To benefit most from the humidifier
and avoid product misuse, follow all instructions carefully.
Please note that this is an electrical appliance and
requires attention when in use.
Inaddition,ifyoudonotfollowtherecommendedcare
andmaintenanceguidelines,micro-organismsmaybe
abletogrowinthewaterwithinthewatertank.Youmust
routinely follow the cleaning procedures that follow in
order to ensure proper, efficient operation of your
humidifier. Proper maintenance and cleaning is essential
to the continued performance of your unit and the
avoidanceofalgaeorbacteriabuild-up.
Daily Maintenance:
1. BesuretheunitisOFFandisdisconnectedfromthe
electrical outlet.
2. Remove the housing and the tank from the
humidifier and place in sink or tub. Remove the filter
if applicable.
3. Carry the base of the unit to the sink, remove the
wick, place in sink, drain any remaining water and
rinse thoroughly to remove any sediment or dirt.
Wipe clean, and dry with a clean cloth or paper
towel.
4. Drain the water from the tank into the sink and rinse
tank thoroughly. Wipe clean, and dry with a clean
cloth or paper towel.
5. Put filter back in, replace the housing, then refill tank
withcooltapwaterasinstructedearlierintheFilling
Instructions.Donotoverfill.
6. FollowOperatingInstructionstoturnonthe
humidifier.
Weekly Maintenance:
To Remove Scale:
1. RepeatpreviousstepsinDailyMaintenance.
2. Clean the base by partially filling the base with one
8-ozcupofundilutedwhitevinegar,orbyusing
CleanseCleanSolution(ModelS1710)bythe
manufacturer.Leavethissolutioninthebasefor20
minutes, while cleaning all the interior surfaces with
asoftbrush(brushnotincluded).Removebasescale
by wiping the base with a cloth dampened with
undiluted white vinegar.
3. Rinse with clean warm water to remove the cleaning
solution before disinfecting the tank.
To Disinfect Humidifier Base and Tank:
1. Fillhumidifiertank1/2fullwithwaterand1/2
tablespoon of chlorine bleach.
2. Letthesolutionstandfor20minutes,swishingevery
few minutes. Wet all surfaces.
3. Carefullyemptythetankafter20minutes,andrinse
with warm water until you cannot detect any bleach
smell. Dry with a clean cloth or paper towel.
4. Place filter back into base.
5. Refill the water tank with cool water and replace on
housing(seeFillingInstructionsabove).Follow
OperatingInstructionstoturnthehumidifierON.
6. Tocleanthehumidifierbase,pouroutallexcess
water. Rinse thoroughly to remove any sediment and
dirt. Wipe clean and dry with a clean cloth or paper
towel. Do not use metal cleaning utensils or abrasive
cleansers.
Minuterie (s’il y a lieu)
Certainsmodèlescomprennentuneminuteried’arrêt
automatiquede12heurespouvantêtreprogrammée
pour éteindre automatiquement l’humidificateur après un
laps de temps déterminé.
1. Pour mettre la minuterie en fonction, pressez la
touche ( ).Lespressionssurlatoucheminuterie
ferontdéfilerlesoptionsci-dessous.
2. Choisissez le laps de temps après lequel vous
souhaitez que l’humidificateur s’éteigne
automatiquement. Le voyant correspondant au
nombre d’heures luira.
3. Pour annuler le réglage de la minuterie, continuez à
presser la touche de la minuterie (
)jusqu’àceque
tous les voyants de durée s’éteignent. Le réglage
de la minuterie sera ainsi annulé.
DIRECTIVES DE NETTOYAGE ET/OU
D’ENTRETIEN
Les humidificateurs améliorent le niveau de confort en
réhydratant l’air ambiant trop sec. Observez
attentivement toutes les instructions d’entretien pour
mieux profiter de l’humidificateur et éviter son utilisation
inappropriée.Veuilleznoterqu’entantqu’appareil
électrique, son utilisation exige un certain niveau de
supervision.
Sivousnerespectezpaslesdirectivesrecommandéesde
nettoyage et d’entretien, des microorganismes peuvent
proliférerdansl’eauduréservoir.Suivezrégulièrement
lesprocéduresdenettoyageci-dessousafinquel’appareil
fonctionnecommeilsedoit.Unentretienetunnettoyage
appropriés sont essentiels pour assurer le fonctionnement
convenable et éviter la prolifération des algues ou
bactéries.
Entretien quotidien
1. Assurez-vousquel’appareilestéteintetdébranché.
2. Retirez le boîtier et le réservoir de l’humidificateur et
déposez-lesdansl’évieroulabaignoire.Sortezle
filtre s’il y a lieu.
3. Apportez la base de l’appareil à l’évier. Retirez le
filtre-mèche,placez-ledansl’évier,videztoutel’eau
résiduelle et rincez bien la base pour éliminer saletés
ousédiments.Essuyez-laetasséchez-laavecunlinge
propreouunessuie-toutenpapier.
4. Videzl’eauduréservoirdansl’évieretrincez
soigneusementleréservoir.Essuyez-leetasséchez-le
avecunlingepropreouunessuie-toutenpapier.
5. Replacez le filtre, le boîtier et remplissez le réservoir
d’eau froide, tel qu’indiqué dans les directives de
remplissage. Ne le remplissez pas à l’excès.
6. Observezlesinstructionsdemiseenmarche.
NOTES:
• Yourhumidifiermaycomewitheither2or3settings.
• The icon ( )shownonthecontrolpanelrepresent
the speed of moisture being put into the air.
F. PowerButton
G. SpeedControlButton
H. SettingIndicators
I. TimerButton(if
applicable)
J. HumidityIndicators
K. TimerIndicators(if
applicable)
L. Dial Knob
M. PowerLightRing
N. Change Light
O. Tank Empty Light
O
N
M
L
K
I
G
H
F
J
Figure2ControlPanel(close-up)
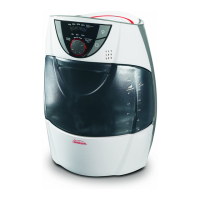
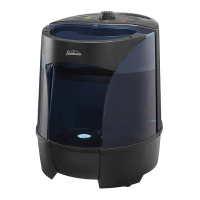
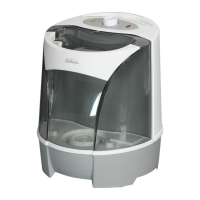
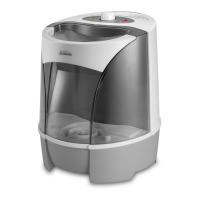
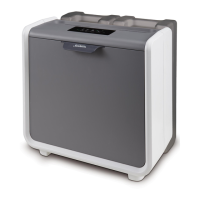
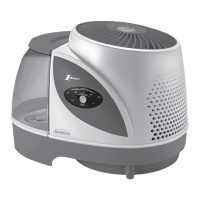
A. CarryHandle
B. Water Tank
C. HumidifierHousing
D. HumidifierBase
E. Control Panel (see
Fig.2forclose-up)
NOTES:
• Thelocationofcontrolpanelmayvaryacross
models, either on the top or bottom of the unit.
Figure1
A
B
C
D
E
O
N
M
L
K
I
G
H
F
J
Figure2PanneaudeControle(grosplan)
REMARQUE:
•
Votrehumidificateurpeutêtrepourvude2oude
3 réglages.
• Ces icône ( )dutableaudecommande
représentent la vitesse du débit émis dans l’air.
F. Touched’alimentation
G. Touchedevitesse
H. Voyantsderéglage
I. Toucheminuterie
(s’ilyalieu)
J. Voyantsd’humidité
K. Voyantsdedurée
(s’ilyalieu)
L. Roulette à cadran
M. Baguelumineuse
de sous tension
N. Voyant«Changer»
O. Voyantderéservoir
vide
Figure1
A
B
C
D
E
A. Poignée De
Transport
B. RéservoirD’eau
C. Boîtierde
l'humidificateur
D. Basede
l’humidificateur
E. Panneau de
Controle (gros plan
àlafig.2)
REMARQUE:
• L’emplacementdutableaudecommandevarie,il
peut se trouver en haut ou en bas de l’appareil.
Sun-CN_Platform_Cool_HM_LED_11EFM1.indd 2 4/13/11 3:09 PM
 Loading...