CAUTION
• Do NOT sit, stand or lean on house.
• NOT intended for use by children.
• This product may become susceptible to damage in freezing temperatures.
• Do NOT
store near excessive heat.
• If parts become broken or cracked, they should be replaced.
• Place Dog House on a level surface.
ATTENTION
• NE P
AS s'asseoir, ni se tenir debout ou s'appuyer sur la niche.
• Ce produit N'est P
AS conçu à l'usage des enfants.
• Ce produit peut être endommagé par le gel.
• NE P
AS entreposer près d'une source de chaleur excessive.
• Les pièces qui se cassent ou se fissurent doivent être remplacées.
• Placer la niche pour chien sur une surface nivelée.
PRECAUCION
• NO se pare, siente o apoye sobre la casa.
• NO es conveniente su uso por parte de los niños.
• Este producto podría sufrir daños a temperaturas de congelamiento.
• NO guardar cerca de fuentes de calor excesivo.
• En caso de que las piezas se dañen o quiebren, deben reemplazarse.
• Coloque la casa para perros sobre una superficie nivelada.
OWNER’S MANUAL
MANUEL D'UTILISA
TION
MANUAL DEL USUARIO
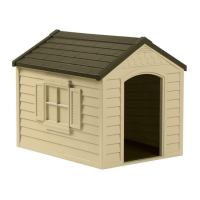
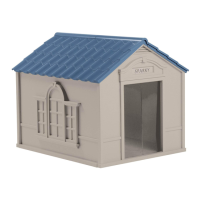
DH250
Medium Dog House
Niche pour chiens de taille moyenne
Casa para perros medianos
© 2007 Suncast Corporation, Batavia, IL
0361040
Before you begin...
Read instructions prior to assembly. This kit contains parts that can be damaged if incorrectly assembled.
Please follow instructions. Suncast is not responsible for replacing parts damaged due to incorrect assembly.
Avant de commencer...
Lisez les instructions avant de commencer l'assemblage. Ce kit contient des pièces pouvant être endommagées si elles ne sont pas assemblées correctement.
Veuillez suivre les instructions. Suncast décline toute responsabilité en cas de perte de pièces ou de dommages suite à un montage incorrect.
Antes de comenzar…
Lea estas instrucciones antes de armarlo. Este kit contiene piezas que pueden dañarse si se arman incorrectamente.
Por favor, siga las instrucciones. Suncast no se hace responsable de piezas dañadas debido a un armado incorrecto.
Assembly Instructions / Instructions de montage / Instrucciones de armado
NOTE: Door Flaps are optional. Flaps can be installed or removed for seasonal use.
1. Attach Door Flaps to backside of Front Panel D using provided Wing Nuts. Do NOT
overtighten Wing Nuts. Set panel aside.
T
ip: In warm weather, open or remove Door Flaps to keep your pet comfortable.
REMARQUE: les volets de porte sont optionnels. Les volets peuvent être montés ou
démontés en fonction de la saison.
1. Fixer les volets de porte au dos du panneau avant D à l'aide des écrous à oreilles
fournis. NE PAS trop serrer les écrous à oreilles. Mettez le panneau de côté.
Conseil pratique : quand il fait chaud, ouvrez ou enlevez les volets de porte pour
que l'animal soit à l'aise.
NOTA: La hojas para las puertas son opcionales. Pueden instalarse o retirarse según
la estación.
1. Fije las hojas de la puerta a la parte posterior del panel delantero D utilizando las
tuercas de mariposa provistas. No se exceda en el ajuste de las tuercas de mariposa.
Ponga el panel a un lado para su uso posterior.
Consejo: Cuando el clima sea cálido, abra o retire las hojas de la puerta para que
su mascota se sienta más cómoda.
D
NOTE: For Dogs up to 70 lbs.
REMARQUE : Pour les chiens pouvant peser jusqu'à 70 lbs (32 kg)
NOTA: Para perros de hasta 70 libras (32 kg)