This document provides a quick start guide for the Sungale digital photo frame, model DPF710, aiming to help users set up and begin using the device efficiently.
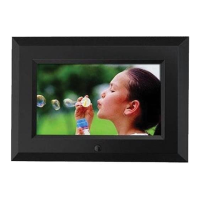
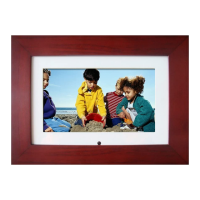
The device is a digital photo frame designed to display pictures from various sources. Its primary function is to showcase digital photos in a slideshow format, offering a modern way to view and share memories without the need for a physical photo album.
Usage Features:
Getting Started:
To begin using the DPF710, simply connect it to a power source using the provided power adapter. Upon connection, the device will automatically power on and navigate to its main menu, which serves as the central hub for all operations.
The device features several physical controls and connection points to facilitate its operation:
- Play / Pause Button (1): This button serves multiple purposes. A single press acts as an 'Enter' or 'Confirm' action within menus. When a slideshow is active, pressing this button will pause the current picture; pressing it again will resume the slideshow.
- Right / Left / Up / Down Buttons (2): These directional buttons are used for navigation within the device's menus. They allow users to move a cursor or selection indicator in the respective directions to highlight different options or settings.
- Home Menu Button (3): Pressing this button will immediately return the user to the main home menu, regardless of the current screen or activity.
- SD/SDHC Card Slot (4): This slot is designed for inserting SD or SDHC memory cards. Users can insert one card at a time to load and display photos stored on it.
- Back Button (5): This button allows users to return to the previous screen or step in the menu navigation.
- USB Port (6): This port is for inserting a USB flash drive. Users can connect a USB stick containing photos to display them on the frame.
- 5V DC IN Jack (7): This is the power input jack where the power adapter cord is connected to supply electricity to the unit.
Loading Photos from Memory Card or USB:
The DPF710 supports displaying photos from both SD/SDHC memory cards and USB flash drives.
- SD/SDHC Card: To load photos from an SD/SDHC card, simply insert the card into the designated slot (4) following the indicated direction.
- USB Flash Drive: To load photos from a USB flash drive, insert the drive into the USB slot (6).
Once a memory card or USB drive containing pictures is inserted, the digital photo frame will automatically begin a slideshow of the stored images.
Main Menu and Navigation:
The main menu typically displays three primary icons:
- Photo: This option is for managing and viewing photos.
- Calendar: This option allows users to access and configure calendar settings.
- Setting: This option provides access to various device configurations and preferences.
Users can navigate these icons using the Up/Down directional buttons (2) and select an option by pressing the Play/Pause button (1).
Setting Up the Device:
To access the device settings:
- From the main menu, use the Left/Right directional buttons (2) to move the cursor to the "Setting" icon.
- Press the Play/Pause button (1) to enter the detailed setup options.
Within the setup menu, there will be three main categories: Photo Setup, Calendar Setup, and System Setup.
- Use the Up/Down buttons (2) to select one of these categories.
- Press the Play/Pause button (1) to enter the selected setup options.
- Within each setup category, use the Up/Down buttons (2) to choose the specific setting you wish to adjust.
- Use the Left/Right buttons (2) to change the value or option for that setting.
- After making changes, press the Back button (5) to return to the previous menu or the Home Menu button (3) to go directly to the main menu.
What You Can Set Up:
The DPF710 offers a range of customizable settings to enhance the user experience:
- Slideshow Interval Time: Adjust the duration each photo is displayed during a slideshow.
- Transition Effect: Choose from various visual effects for how photos transition from one to the next.
- Show Type: Select whether photos are displayed to fit the screen or in full-screen mode.
- Browse Mode: Choose between thumbnail mode (showing multiple small previews) or browse mode (showing one larger image at a time).
- Play Repeat Mode: Configure how slideshows repeat (e.g., repeat all, repeat one).
- Photo Auto Play: Enable or disable automatic photo playback upon device startup or media insertion.
- Brightness and Contrast: Adjust the display's brightness and contrast levels to suit viewing preferences.
- TFT Saturation: Modify the color saturation of the display.
- OSD Language: Select the desired language for the on-screen display (OSD) menus.
- Restore to Factory Default: Reset all settings to their original factory configuration by selecting "Default" in the Setting menu.
Calendar and Clock Settings:
To set up the calendar and clock:
- From the "Setting" menu, select "Calendar Setup" and confirm with the Play/Pause button (1).
- This will lead to an interface with four options: Display Mode, Set Date, Clock Mode, and Set Time.
- Use the Up/Down buttons (2) to select "Set Date" or "Set Time."
- Use the Left/Right buttons (2) to adjust the date or time values.
- After setting, press the Back button (5) to return to the main menu. The same steps apply for setting the clock.
Maintenance Features:
- To exit from a detailed setup option and return to the previous menu, press the Back button (5).
- To exit from any menu or slideshow and return to the main menu, press and hold the Home Menu button (3). This is particularly useful when a slideshow is running and you wish to access other functions.
Support:
For any issues or further assistance, users can access support resources:
- Support Site: Visit www.sungale.com for manual downloads and frequently asked questions (FAQs).
- Contact Support Team: For direct assistance, users can call the toll-free number in the USA: 800-473-5156, or send an email to service@sungale.com.
The DPF710 is designed for ease of use, providing intuitive navigation and essential customization options to deliver a pleasant digital photo viewing experience.