10
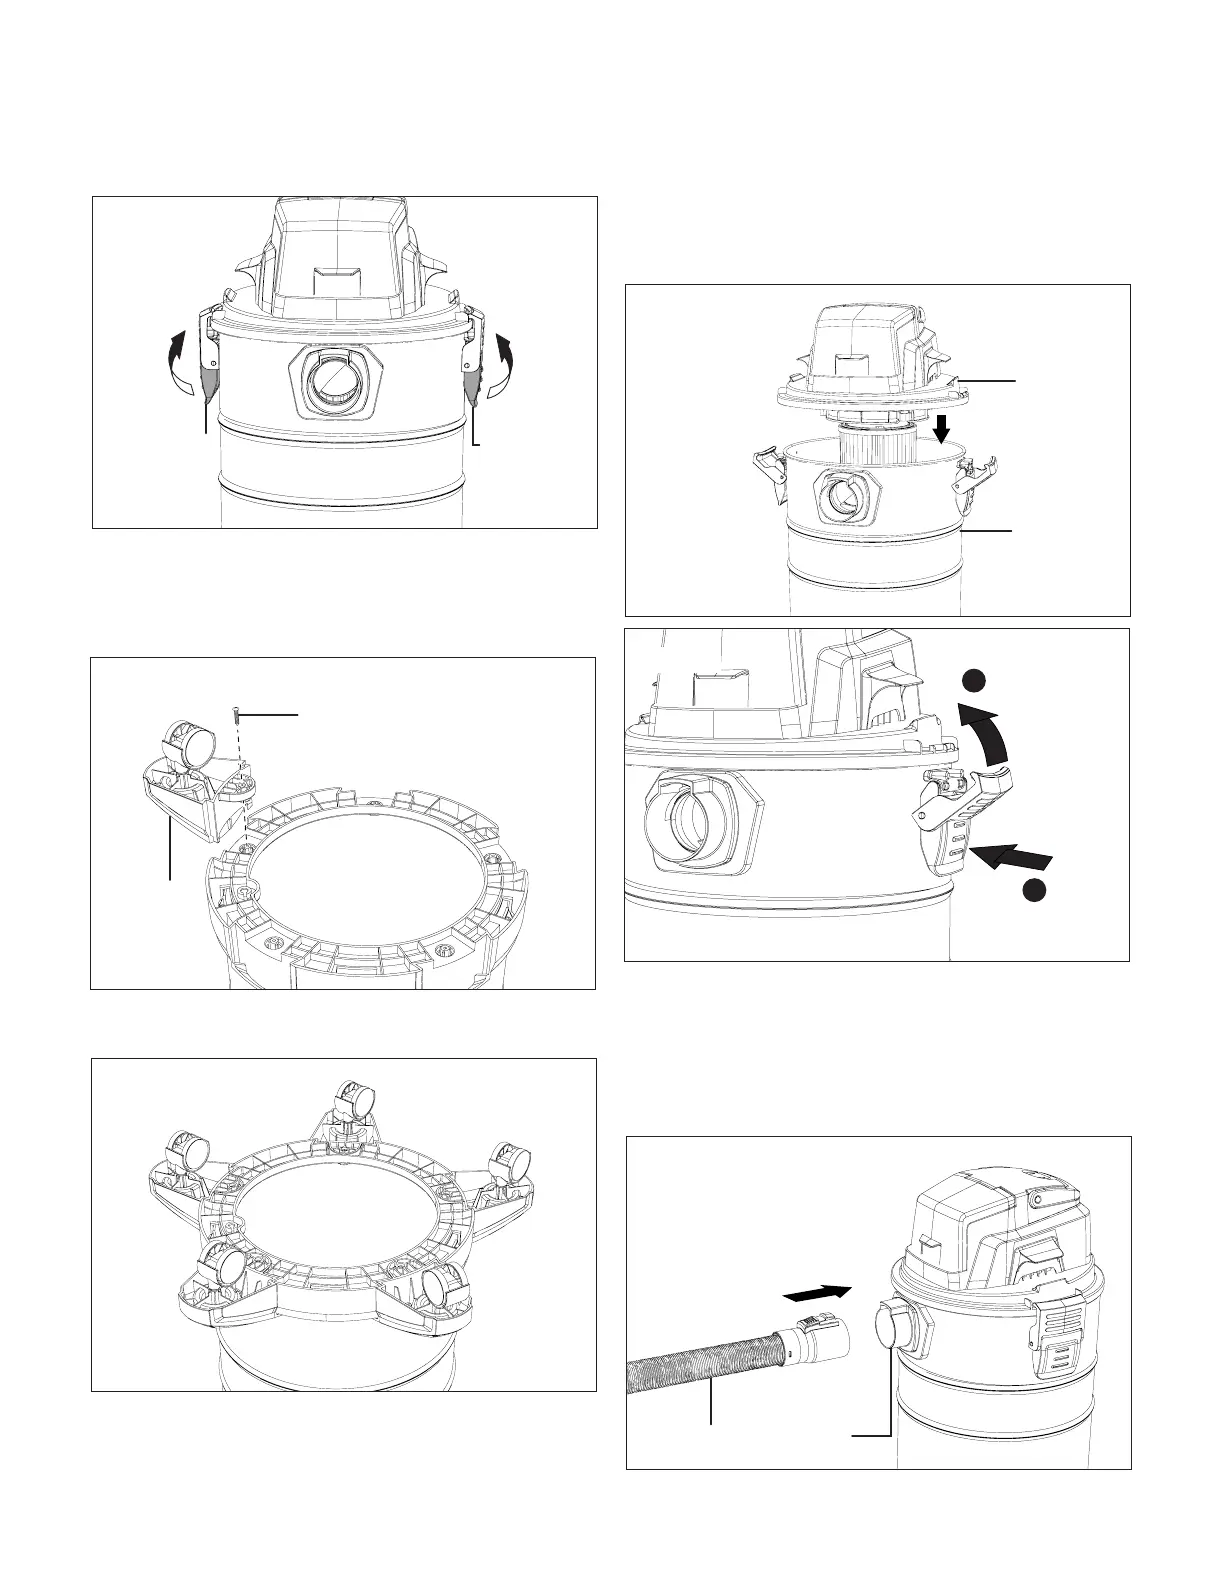
1. Unlock the powerhead by ipping up the latches on both
sides, and then lift up (Fig. 3).
2. Remove all the contents from the tank.
3. Turn the dust tank upside down. Fit a caster into the
mounting as shown. Fix with provided screw. Do not
overtighten (Fig. 4).
4. Repeat to assemble all the 5 casters on the bottom
(Fig. 5).
NOTE: The assembly requires 5 screws. The 3 additional
screws are spares.
5. Turn the dust tank back over onto the casters. Cap it with
the powerhead with the desired lter attached. Flip up the
two latches located on either side of the dust tank. Press
in on the two latches located on either side of the dust
tank until they snap into place, securing the powerhead to
the tank (Figs. 6 – 7).
NOTE: For dry vacuum cleaning, install the supplied cartridge
lter and the dust bag. For wet vacuum cleaning, install the
supplied foam lter. See page 11 - 12 for instructions on how
to install the lters.
6. Insert the end of the suction hose with the releasing
button into the air inlet. Push in to lock it in place (Fig. 8).
Fig. 3
Latch lockLatch lock
Fig. 4
Caster
Screw
Fig. 5
Powerhead
Fig. 6
Dust tank
Fig. 7
Flip up
1
Press
2
Fig. 8
Suction hose Air Inlet


 To Next Page