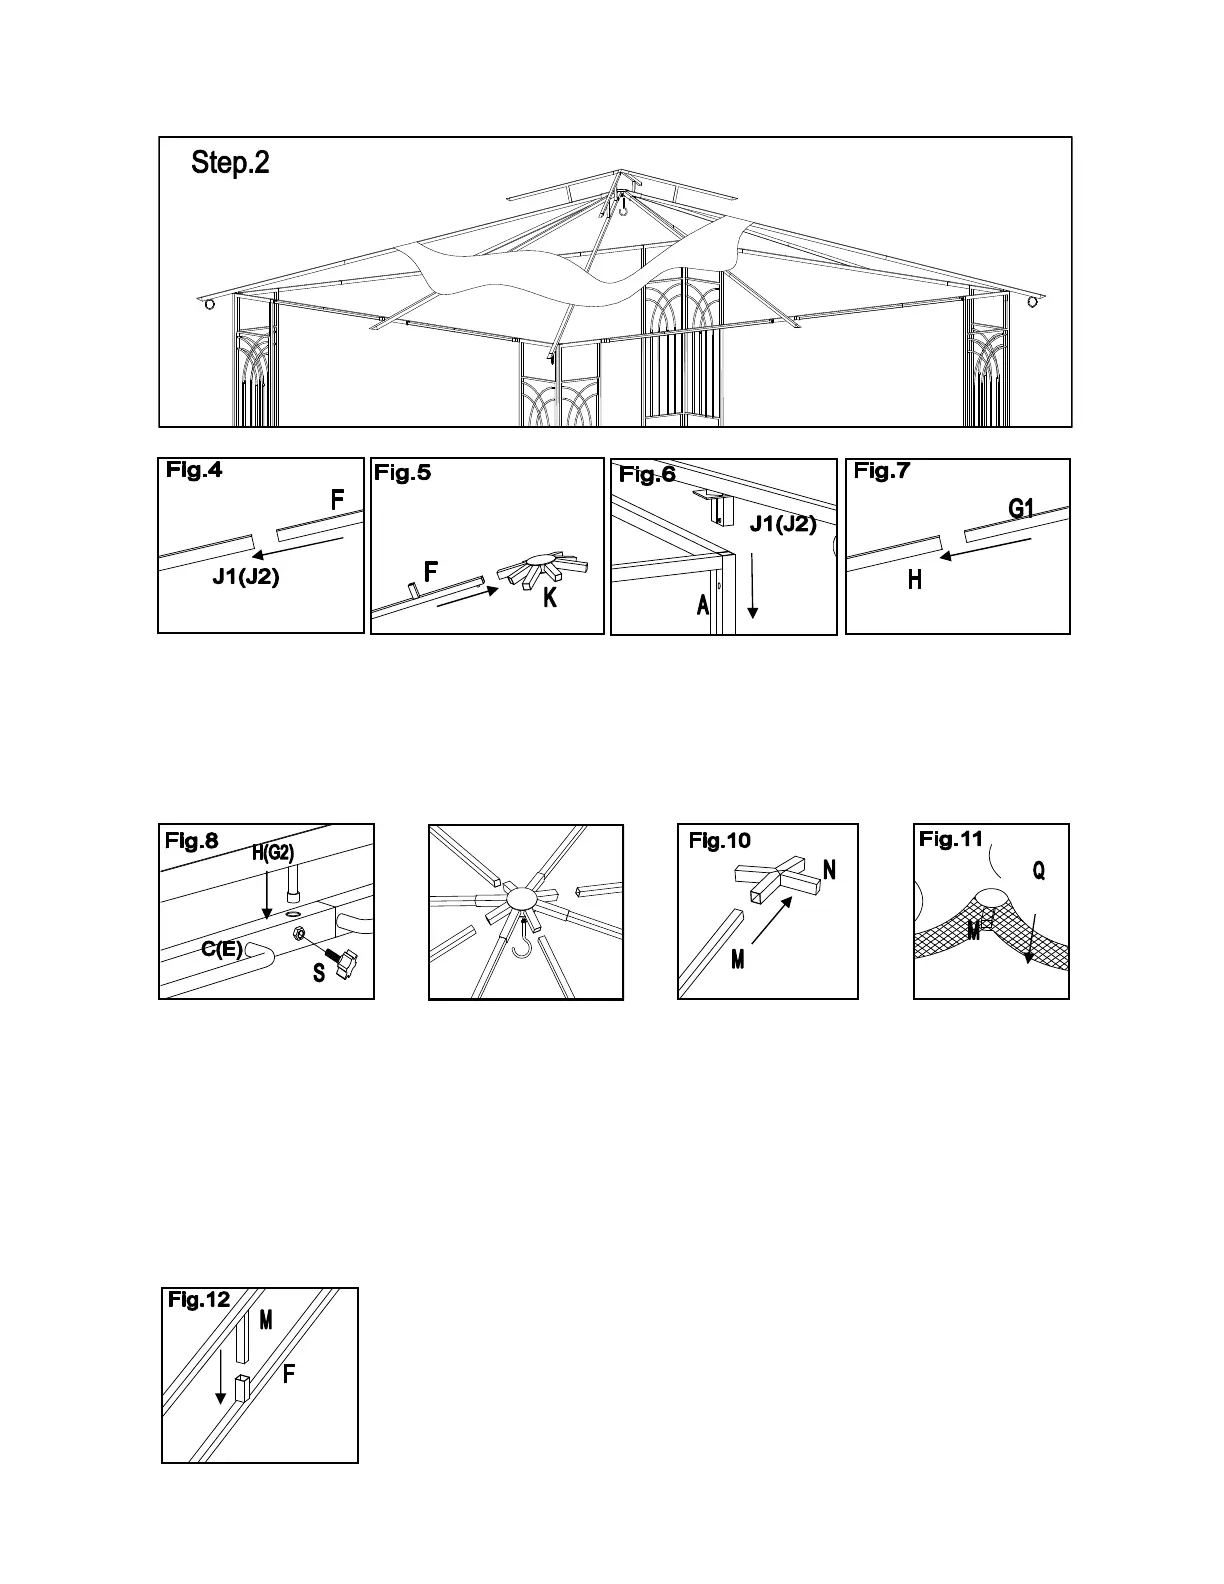
Fig.4: Insert the Oblique Beam (F) into Bottom Oblique Beam (J1&J2),
you will assemble four Oblique Beams
Fig.5,6: Ask your assistant to step on the ladder and hold Big Roof Connector (K) in the middle of the Gazebo;
one-by-one insert assembled Oblique Beams F-J1 and F-J2 into the Corner Panels (A), then into the Big
Roof Connector(K); make sure you align beams properly (see illustration)
Fig.7: Insert the Middle Beam
(
G1
)
into the Bottom Middle Beam (H),
you will assemble two Long Middle
Beams
Fig.8,9: Insert one end of the assembled Long Middle Beam (G1-H) into Short Cross Beam (D-E), then the
other end of the beam into the Big Roof Connector(K); tighten with the Knob (S); repeat for the other side
Fig.8,9: Insert one end of the Short Middle Beam (G2) into Long Cross Beam (B-C), then the other end of the
beam into the Big Roof Connector(K); tighten with the Knob (S); repeat for the other side
Place the Big Canopy (P) on the roof, spread it but do not stretch it yet; the canopy is rectangular, make
sure you align it properly
Fig.10: While it is still on the ground, insert the Small Roof Oblique Beam (M) into the Small Roof Connector
(N); repeat for all four beams
Fig.11: Place and stretch the Small Canopy (Q) to the small roof frame and stretching it to fit.
Fig.12: Lift the assembled small roof and insert it
into the Oblique Beams (F); attach the Hook (L)
to the Big Roof Connector
F
F
J2
J2
J1
F
K
A
A
A
A
H
G1
G2
N
M
M
L
P
G1
F
G2
F
G1
F
G2
F
K
L
Fig.9