Do you have a question about the Sunpentown WA-1010H and is the answer not in the manual?
Use a soft, damp cloth to wipe the body clean. Avoid harsh chemicals.
Use a vacuum or rinse filter lightly to remove dust and dirt. Dry thoroughly.
Unplug unit, drain water, clean filter, dry unit, store in original carton.
When the unit is not in use, store the power cord away as shown in Figure 3.
Important instructions before operating the unit, including transport and placement.
Regulate the desired temperature using the thermostat, range 64°F to 90°F.
Set the timer for desired operating time (1 to 8 hours) for automatic shut-off.
Control the airflow direction using the roller on the air vent for vertical louvres.
Press SPEED button for high or low fan speed. AUTO mode selects automatically.
Set the timer for operating hours (1 to 12 hours) for automatic shut-off.
Control airflow direction with the roller on the air vent for vertical louvres.
Connect foam strips with exhaust pipe for window fitting. Cut to size if needed.
Make a hole for the round connector to fit the exhaust hose through the wall.
Extend exhaust hose from 1-5 feet. Avoid kinks. Use shortest possible length.
Steps to remove, insert, and re-fit the active carbon filter for optimal performance.
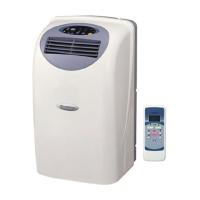
List of included accessories such as adaptors, foam strips, round connectors, and remote control.
Use a shallow container under the drain hole to collect condensed water.
Connect a water tube to the drain hole for continuous water removal.
Notes on heating function, exhaust pipe installation, and working temperature range.
| Type | Portable Air Conditioner |
|---|---|
| Cooling Capacity | 10, 000 BTU |
| Air Flow | 200 CFM |
| Power Supply | 115V/60Hz |
| Fan Speed | 3 speeds |
| Voltage | 115V |
| Noise Level | 52 dB |
| Coverage Area | 300 sq. ft. |