EN
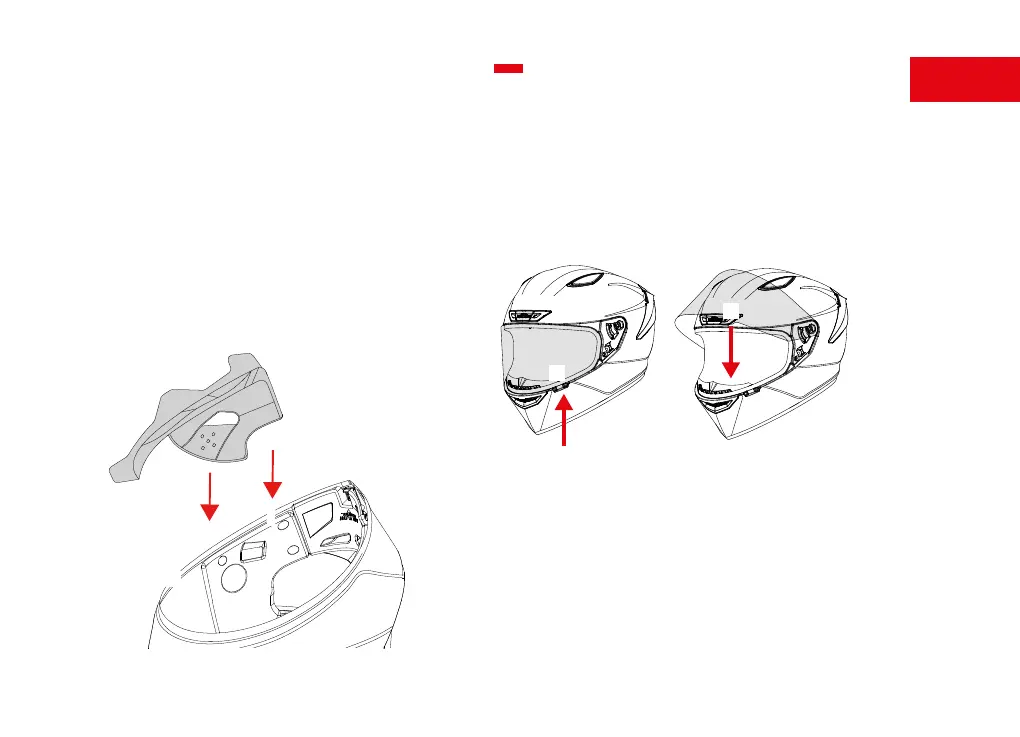
Assembly — Figure 11
Turn upside down the cheek pads from the original position.
Insert the xing hook (H) in the red hooking hole (I)
Put the back part of the cheek pad on the xed part of the inner
lining. Verify that the fastening strap (L) is correctly inserted in the
appropriate seat (M). Push the cheek pad to the back part of the
helmet and hook the press studs.
Verify that the part was assembled correctly by checking that:
- the cheek pad is rmly locked in position
- the strap is completely free inside the hole and is not blocked
under the cheek pad during assembly.
Only the correct assembly of the cheek pad and the correct
positioning of the strap will assure the proper efcacy of the
retention system. During use, the locking lever must always be
xed in lock position; if it cannot be locked correctly do not use
the helmet.
VISOR — N —
The visor must be periodically cleaned and controlled. If the visor
is dirty and/or has bad scratches on the surface there could be
unusual light reections or deviations, which may jeopardize safety.
Immediately replace the visor if there are these problems.
Opening the visor: push lightly the lifting lever outwards (O),
to unlock the tab from its seat (P) under the gasket and lift it up.
Closing the visor: to lock the visor in position, lower it until the tab
is blocked inside its seat (P) in the gasket.
There are two locking positions: intermediate and visor completely
open.The visor must be opened or closed completely up to the
lock position. The visor is correctly locked into position when it
clicks into its seat. To unlock the visor from the lock position just
follow the above procedure, lightly press during initial phase of the
movement until the visor is unlocked.
H
I
H
L
M
I
FIGURE 11
29
N
N
O
P
O
FIGURE12

 Loading...