EasyManua.ls Logo

Supaswift SSU797KMC - User Manual

Supaswift SSU797KMC
12 pages
Print Icon
To Next Page IconTo Next Page
Loading...
Manual
Retailers Name: .............................. ...............
Address: ........................ ................ ...........
Phone No: ...................................................... Model No: .............................. .................
Serial No: .......................................................Date of Purchase:.............. .......................
The manufacturer warrant that this machine is free from defects in material and workman-ship.
This warranty is limited to making good or replacing any part which appears upon inspection by
the manufacturer or his agent to be defective in material or workmanship.
The warranty for the engine used to power this machine may differ from the warranty for the
other components. Refer to the engine warranty statement in the Engine Owner’s Manual which
has been included with this machine. As the warranty may differ, you are advised to read the
engine warranty carefully.
For other items, this warranty shall apply for a period of 2 years from date of purchase for
domestic use and for 120 days for commercial use and 90 days hire.
This warranty does not obligate the manufacturer, his agents or dealers to bear the transport
costs incurred in the repair or replacement of any defective part. This warranty excludes fair
wear and tear, or any damage caused by misuse or abuse. Parts such as blades, blade bolts,
V-belts, and spark plugs, which can be subjected to use beyond their normal intended working
capacity are also excluded.
This warranty is void if parts other than genuine have been used or if repairs or alterations have
been made without the manufacturer’s written authority.
The benefits to the consumer given by this warranty are in addition to other rights and remedies
of the consumer under a law in relation to the goods or services to which this warranty relates.
Our goods come with guarantees that cannot be excluded under the Australian Consumer Law.
You are entitled to a replacement or refund for a major failure and for compensation for any
other reasonably foreseeable loss or damage. You are also entitled to have the goods repaired
or replaced if the goods fail to be of acceptable quality and the failure does not amount to a
major failure.
The text above applies notwithstanding anything else expressed or implied to the contrary in
this warranty document.
The manufacturer reserves the right to make changes and add improvements to its product at
any time without notice or obligation. The Company also reserves the right to discontinue
manufacture of any product at its discretion at any time.
s
For all 20" Alloy Base Commercial Models
Models: SSU797KMC, SSU797HMC
Visit gaspares.com.au or call 1300 363 027 for more information.
Copyright © 2018 Roy Gripske and Sons Pty. Ltd. All rights reserved. 883509224599147.
Images are for illustrative purposes only.
Question and Answer IconNeed help?

Do you have a question about the Supaswift SSU797KMC and is the answer not in the manual?

Summary

Safety Instructions

General Safety Precautions

General safety rules for operating the lawn mower safely, including personal protection and hazard avoidance.

Blade and Bolt Hazards

Highlights the significant risks associated with damaged blades and worn bolts.

Introduction and Manual Guidance

Welcome and User Guidance

Congratulates the user on their purchase and emphasizes reading the manual for safe operation.

Setting Up the Lawnmower

Unpacking and Handle Assembly

Step-by-step instructions for unpacking the mower and assembling the handle bars.

Engine Oil and Fuel Check

Important notes on checking engine oil and fuel levels before starting the engine.

Operating the Lawnmower - All Models

Adjusting the Cutting Height

Guide on how to adjust the lawn mower's cutting height using the height adjustment lever.

Operation - Mulch Mowers Only

Installing and Removing the Mulch Plug

Detailed instructions for installing and removing the mulch plug for mulch mowing.

Operation - All Mowers (Starting and Stopping)

Starting and Stopping the Engine

Procedures for starting and stopping the lawn mower engine.

Operation - Self-Propelled Mowers

Engaging and Disengaging Drive

How to engage and disengage the self-propelled drive system on the mower.

Maintenance - All Mowers (Engine and Blades)

Engine Air Cleaner and Spark Plug

Maintenance instructions for the engine air cleaner and spark plug.

Blade and Cutting Assembly

Checks and replacement procedures for blades and cutting assembly components.

Maintenance - All Mowers (Cleaning)

Mower Cleaning Procedures

Detailed steps for cleaning the underside and upper side of the lawn mower.

Maintenance - Self-Propelled Mowers

Drive Cable Adjustment

Instructions for adjusting the drive cable for proper clutch engagement.

Drive Wheel and Pawl Maintenance

Cleaning and lubricating drive wheels, pinions, and pawls for self-propelled models.

Maintenance - Mulch Mowers

Mulching Equipment Care and Information

Tips for maintaining mulch blades and understanding mulch mowing techniques.

Useful Mulch Mowing Tips

Best Practices for Mulch Mowing

Advice on conditions, techniques, and mower settings for optimal mulch mowing results.

Warranty Conditions and Consumer Rights

Warranty Terms and Exclusions

Details on the manufacturer's warranty, coverage period, and excluded components.

Consumer Law and Responsibilities

Information on Australian Consumer Law rights and owner responsibilities for warranty claims.

Overview

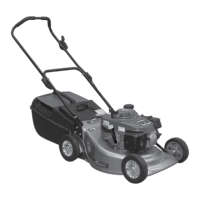
This document is an owner's manual for Supaswift 20" Alloy Base Commercial Rotary Lawn Mowers, specifically models SSU797KMC and SSU797HMC. It provides comprehensive instructions for setting up, operating, and maintaining the mower, emphasizing safety, proper usage, and care to ensure longevity and optimal performance.

The primary function of these devices is to cut grass using a rotary blade system. As commercial models, they are designed for robust performance and durability, suitable for professional landscaping tasks. A key feature highlighted is the mulching capability, which allows the mower to finely chop grass clippings and redistribute them onto the lawn, acting as a natural fertilizer and reducing the need for bagging.

Important Technical Specifications (Inferred and Explicit):

  • Type: 20" Alloy Base Commercial Rotary Lawn Mower.
  • Models: SSU797KMC, SSU797HMC.
  • Engine: 4-stroke engine (requires oil and unleaded fuel, shipped without oil in the sump). Specific engine details are referred to in a separate engine owner's manual.
  • Cut Height Settings: Ten height settings, adjusted via a lever at the rear right-hand wheel.
  • Blade Tightening Torque: Central bolt: 57-62Nm; three concentric bolts: 8-11Nm.
  • Blade Retaining Nuts Torque: 16Nm.
  • Self-Propelled Drive (if equipped): Features a clutch engagement lever for rear-wheel drive.
  • Clutch Spring Length (Disengaged): 18mm.
  • Clutch Spring Length (Engaged): Stretched to 28mm (10mm longer).

Usage Features:

  • Safety First: The manual strongly emphasizes safety, including wearing appropriate footwear, clearing the mowing area of debris, disconnecting the spark plug before maintenance, and never operating the mower while tired or under the influence. It warns against operating in confined spaces due to exhaust fumes and advises against mowing on excessively steep slopes.
  • Starting the Engine: Detailed instructions refer to the engine owner's manual for specific procedures but generally involve moving the throttle to "CHOKE" or "FAST" and priming the engine, then pulling the cord rapidly.
  • Stopping the Engine: Move the throttle control lever to the "STOP" position and wait for the engine to come to a complete stop.
  • Adjusting Cut Height: The mower offers ten height settings. To adjust, grasp the height adjustment lever, pull it away from the base to disengage, move it to the desired position, and release. Users are warned to stand clear of cutting blades during adjustment.
  • Mulching Operation:
    • Installation of Mulch Plug: Involves raising the rear flap, removing the grass catcher (if fitted), inserting the mulch plug (right-hand side first), rotating the left-hand side, aligning locating pins with slots, and lowering the plug until it rests flat. The rear flap should close against the plug's vertical face.
    • Removal of Mulch Plug: With the engine stopped, raise the rear flap, grasp the rear of the plug, lift it up and away, then rotate and guide it out.
    • Mulching Tips: To optimize mulching, the manual advises keeping blades sharp, maintaining the sharpening angle, ensuring the cutting edge is feather-free, keeping the mower deck and mulch plug clean, avoiding mulching wet grass, not cutting too low (maximum 25mm or 1/3 blade height), not pushing the mower too fast, and running the engine at full throttle.
    • Benefits of Mulching: Includes quick breakdown of clippings for soil nutrients, reduced water evaporation, temperature control for grass roots, and assistance in controlling soil erosion. For the user, it eliminates raking leaves and cut grass, saves time emptying the catcher, and disposes of clippings automatically.
  • Self-Propelled Drive (if equipped):
    • Engaging Drive: Start the engine, move the throttle to "FAST," then slowly push the clutch engagement lever to engage the self-propelled drive to the rear wheels.
    • Disengaging Drive: Release the clutch engagement lever and allow it to return to the disengaged position. A caution warns against holding the lever in a semi-engaged position to avoid excessive clutch wear.

Maintenance Features:

  • General Cleaning: Recommended after every use to prevent corrosion, overheating, and fire risk.
    • Underside: Place the mower outdoors on a flat surface, set cut height to maximum, remove grass catcher/mulch plug, lift discharge flap, and use a garden hose to wash out clippings. Repeat if not clean. Caution: Do not hose the engine.
    • Upper Side: Use a dry cloth or soft brush for loose clippings, a damp cloth with mild detergent for oil/grime, and wash the grass catcher/mulch plug separately. Allow to dry before storing.
  • Engine Maintenance: Refers to the engine owner's manual for detailed instructions.
    • Air Cleaner: Service every 25 hours, more regularly in dusty conditions, replace if damaged.
    • Spark Plug: Remove every 50 hours for gap checking, replace every 100 hours, or sooner if electrodes are pitted/burned or porcelain cracked.
  • Muffler: Check periodically for rust/cracks and replace with genuine parts if damaged.
  • Blades and Cutting Assembly:
    • Inspection: Check blades and central fasteners regularly, or after striking an object, or if the mower vibrates abnormally. Replace worn or damaged blades in sets to maintain balance.
    • Blade Change: With the engine stopped and spark plug lead removed, open the discharge flap, set the mower to high cut, fold the handle bar forward, and carefully rotate the cutting assembly. Use gloves and a spanner to remove the blade assembly. Retain "D" plates, discard old blades/fasteners. Fit new blades and fasten in the correct order, tightening to 16Nm.
  • Self-Propelled Mowers Only:
    • Adjusting Drive Cable: Check that the drive disengages before starting the mower. Measure clutch spring length in disengaged (18mm) and engaged (28mm) positions. Adjust using the thumb wheel on the cable support block (anti-clockwise to increase stretch, clockwise to decrease).
    • Drive Wheel Cleaning and Pawl Lubrication (Every 50 hours): Disconnect spark plug, support rear wheels, remove wheel caps, nyloc nut, and tension washer. Remove wheel and clean hub. Remove circlip, outer washer, outer bush, pinion gear, and pawl (noting orientation). Clean all components, lightly grease the pawl, shaft slot, bushes, and pinion gear, then refit. Note: Pinion gear (H) is marked "R" and "L" for right and left side fitting, respectively. Replace wheel, tension washer, nyloc nut, and wheel caps.

Warranty Conditions:

  • Manufacturer's Warranty: Covers defects in material and workmanship, limited to repair or replacement of defective parts.
  • Engine Warranty: May differ from other components; refer to the engine owner's manual.
  • Duration: 2 years for domestic use, 120 days for commercial use, and 90 days for hire.
  • Exclusions: Transport costs, fair wear and tear (blades, blade bolts, V-belts, spark plugs), damage from misuse/abuse, use of non-genuine parts, or unauthorized repairs/alterations.
  • Australian Consumer Law: States that the warranty benefits are in addition to other consumer rights and guarantees that cannot be excluded. Consumers are entitled to replacement or refund for major failures and compensation for foreseeable loss, or repair/replacement for non-major failures.
  • Proof of Purchase: Recommended for warranty work. Repairs must be carried out by an authorized dealer/agent using genuine spare parts.

The manual concludes with a section for recording retailer information, address, phone number, model number, serial number, and date of purchase, and provides contact information for further assistance.

Supaswift SSU797KMC Specifications

General IconGeneral
BrandSupaswift
ModelSSU797KMC
CategoryLawn Mower
LanguageEnglish