2. To stop threading, turn the auto-open lever to the
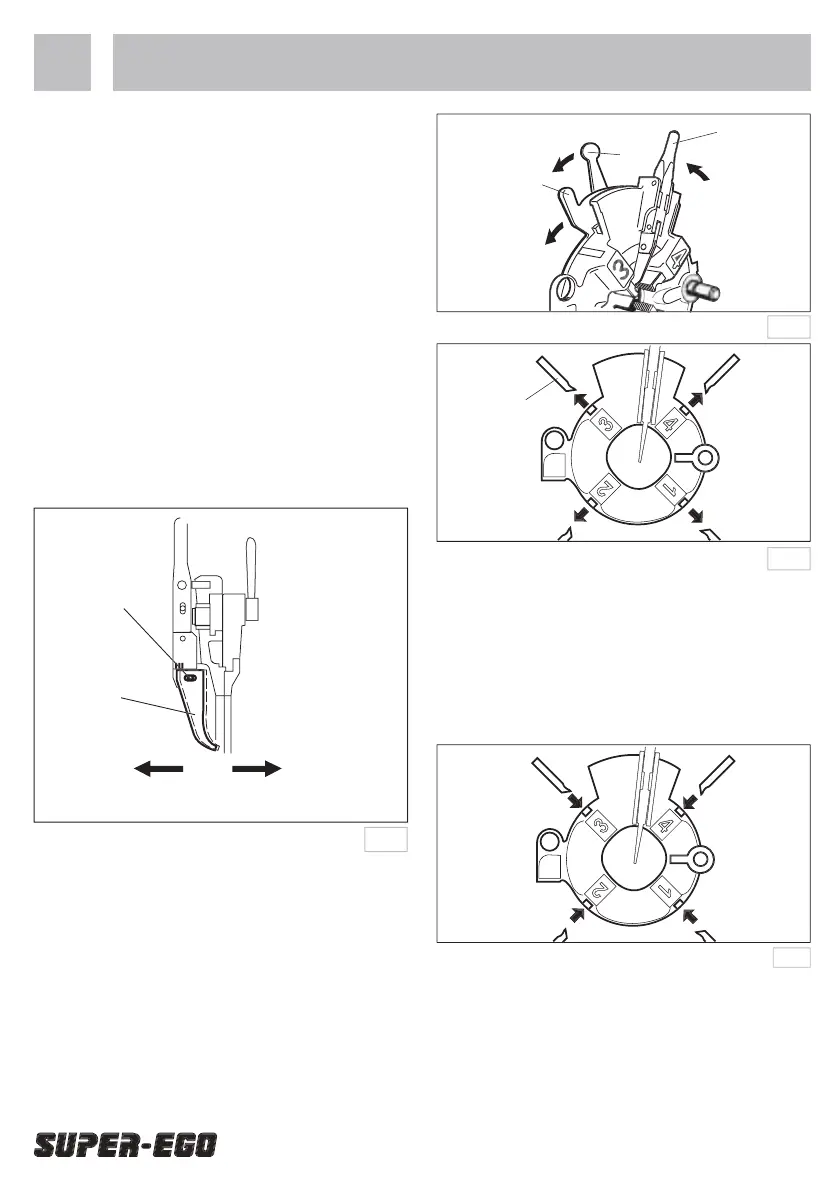
Adjustment of the threading length
A device for adjustment of the threading length is
attached. Use this for making threads of the desired
Adjustable capacity: 1 - 2”(3 threads)
1. Loosen the socket head cap screw on the auto-
2. Move the auto-open lever to the left for longer
threads or to the right for shorter threads as
indicated by the arrows in the diagram.
3. Retighten the socket head cap screw.
Removal and replacement of the dies
1. Push the auto-open lever A in the direction of
the arrow (1) and put the die head into the open
2. Loosen the lever nut by turning in the direction of
the arrow (2) and fully turn the cam plate in the
direction of the dies-open position. (3)
3. Remove the dies from the diehead. (4)
Insert each die into its corresponding slot number in
the die head as far as the line marked on the die. (1)
Turn the cam plate in the direction of the die-set (2)
and tighten the lever nut on the appropriate pipe size
Next push the cam plate upwards in the direction of
the die-set and set in position. (4)
 Loading...