Adjusting the threading length
The machine is designed to produce threads of
standard length. However, the length can be increased
or decreased individually by turning the appropriate
hex-socket set screw in the threads length knob.
Whichever size is selected, one revolution to the
right will increase thread length by 1.5 mm, while
one revolution to the left will decrease thread length
by the same amount. There is no need to ‘lock’ the
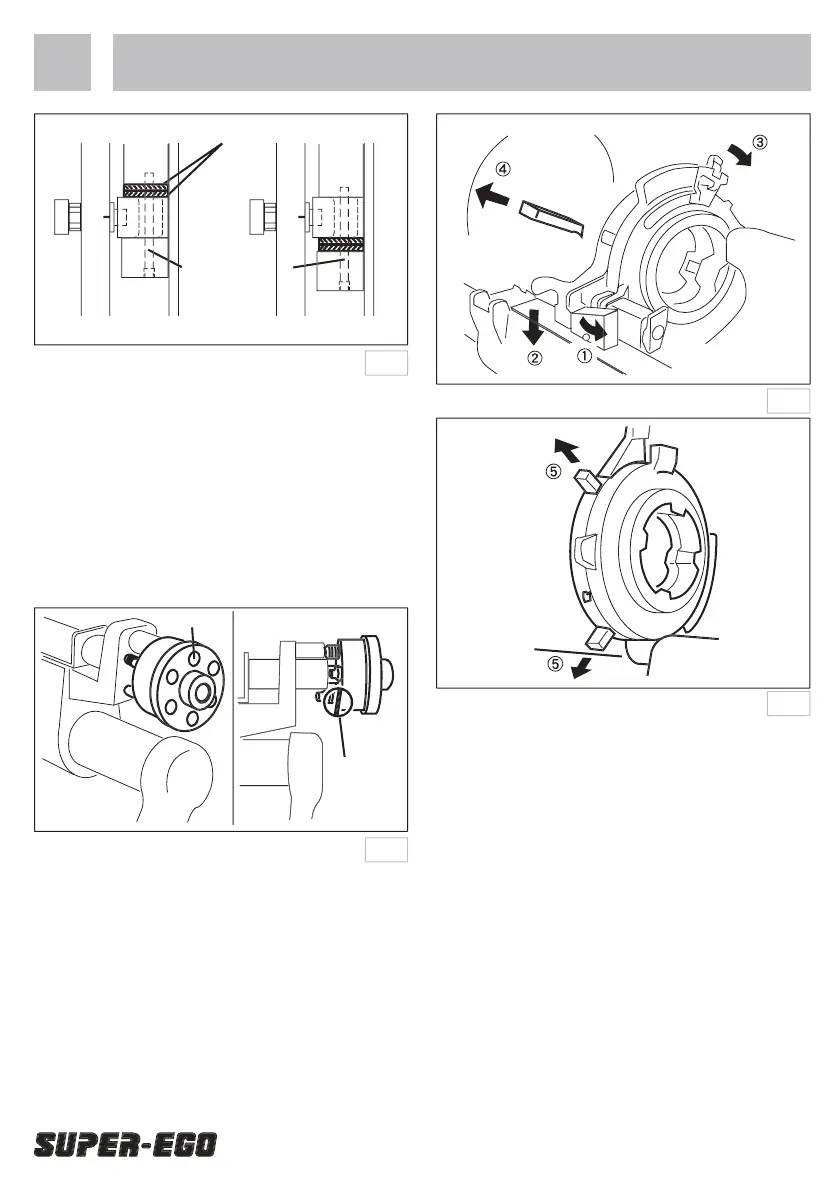
Removal and replacement of the dies
1. Move the profi ling board to the right until the die
head roller touches the profi ling cover.
2. Turn the size setting lever to the right and push it as
far as it will go beyond the 4” setting. Then remove
3. Pull out the die head lock lever and raise the die
head to remove dies No. 3 and No. 4.
1. With the die head in the raised position, pull the
handle on the die head forward and insert dies No.
3 and No. 4 in their corresponding slots, ensuring
that they engage the notch in the die head.
2. Move the profi ling board to the right until the die
head roller touches the profi ling cover. Insert dies
No. 1 and No. 2 into their corresponding slots.
When a die is inserted to the correct depth in
the die holder slot, a detent will engage the detent
notch. The die is then positioned correctly.
Steps 1 and 2 above may be reversed.Puede invertirse
el orden de los pasos 1 y 2 anteriores.
3. Reset the size-setting lever to the required threading
 Loading...