53
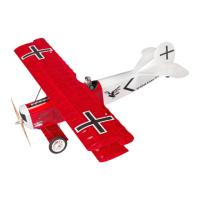
Pull the cotton string from the cable exit
until the extension is out of the main wing.
Use hobby knife to remove the transparent
tape. Fit the servo into the servo tray and
secure it in place with the provided screws
come with the servo. Connect the
extension with the receiver and set the
neutral position.
Attach the clevis onto the horn. Use a
marker; place a mark on the unthreaded
end of the pushrod where it passes the
servo arm. Use Z-bend pliers; make a
z-bend at the marked location. Cut out the
excess rod around 6mm from the z-bend.
Install the z-bend into the outmost hole of
the servo arm. Adjust the aileron toque rod
length by screwing in or out until the
aileron is exactly in the neutral position
when the servo is centered and the clevis
is in the aileron horn. Place a piece of
silicon tube over the clevis for avoiding
accidentally coming open.
Use instant glue to secure 2 pieces of
MW15 into the slots on the center part of
the bottom main wing.
Install the M3x25mm screw with 3x10mm
washer into the rear edge of the bottom
main wing. Place a piece of 5mm silicon
tube on the end for avoiding missing.
54
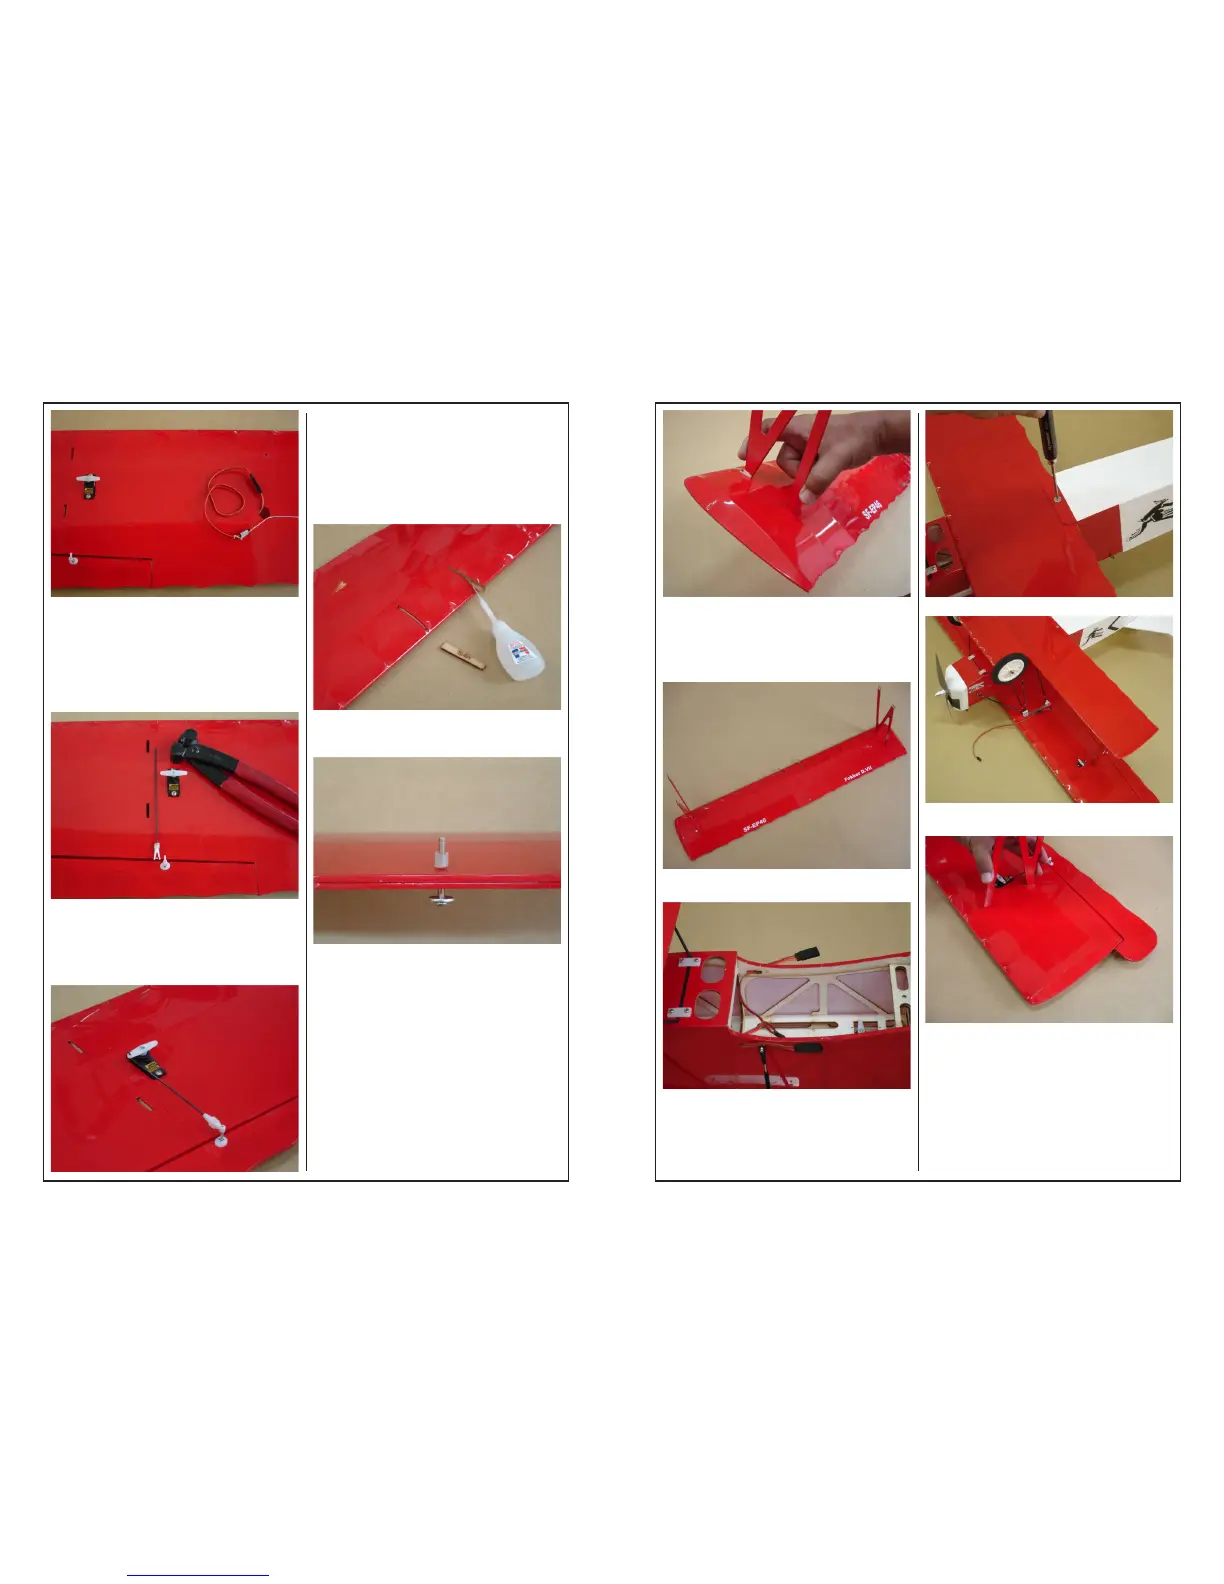
Install the wood strut into the bottom main
wing. Before inserting into the slots;
please use fingers to press both sides of
strut near, then into the slots and release
fingers. The whole wood strut will be stuck
inside the slot.
The completion of installing right and left
wood struts into the bottom wing.
Pull the two ends of the Y-harness out of
the holes on the sides of front fuselage.
Secure the bottom wing onto the fuselage.
Install the wood struts (MW17) into the
long slot on the top wing.
Use the same way to make the struts get
stuck inside the slot.
 Loading...