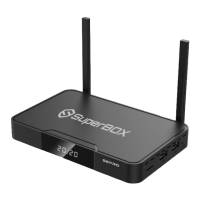
STEP 4B - Select Blue [App Store]
(Press [OK])
STEP 4C - Ten Second Countdown
(Press [OK])
STEP 4D - Arrow Down to Blue Apps & Playback App
(Press [OK] on Blue TV & Blue VOD & Playback)
(Press the [Home] key on the remote to exit back to the
Home Screen)
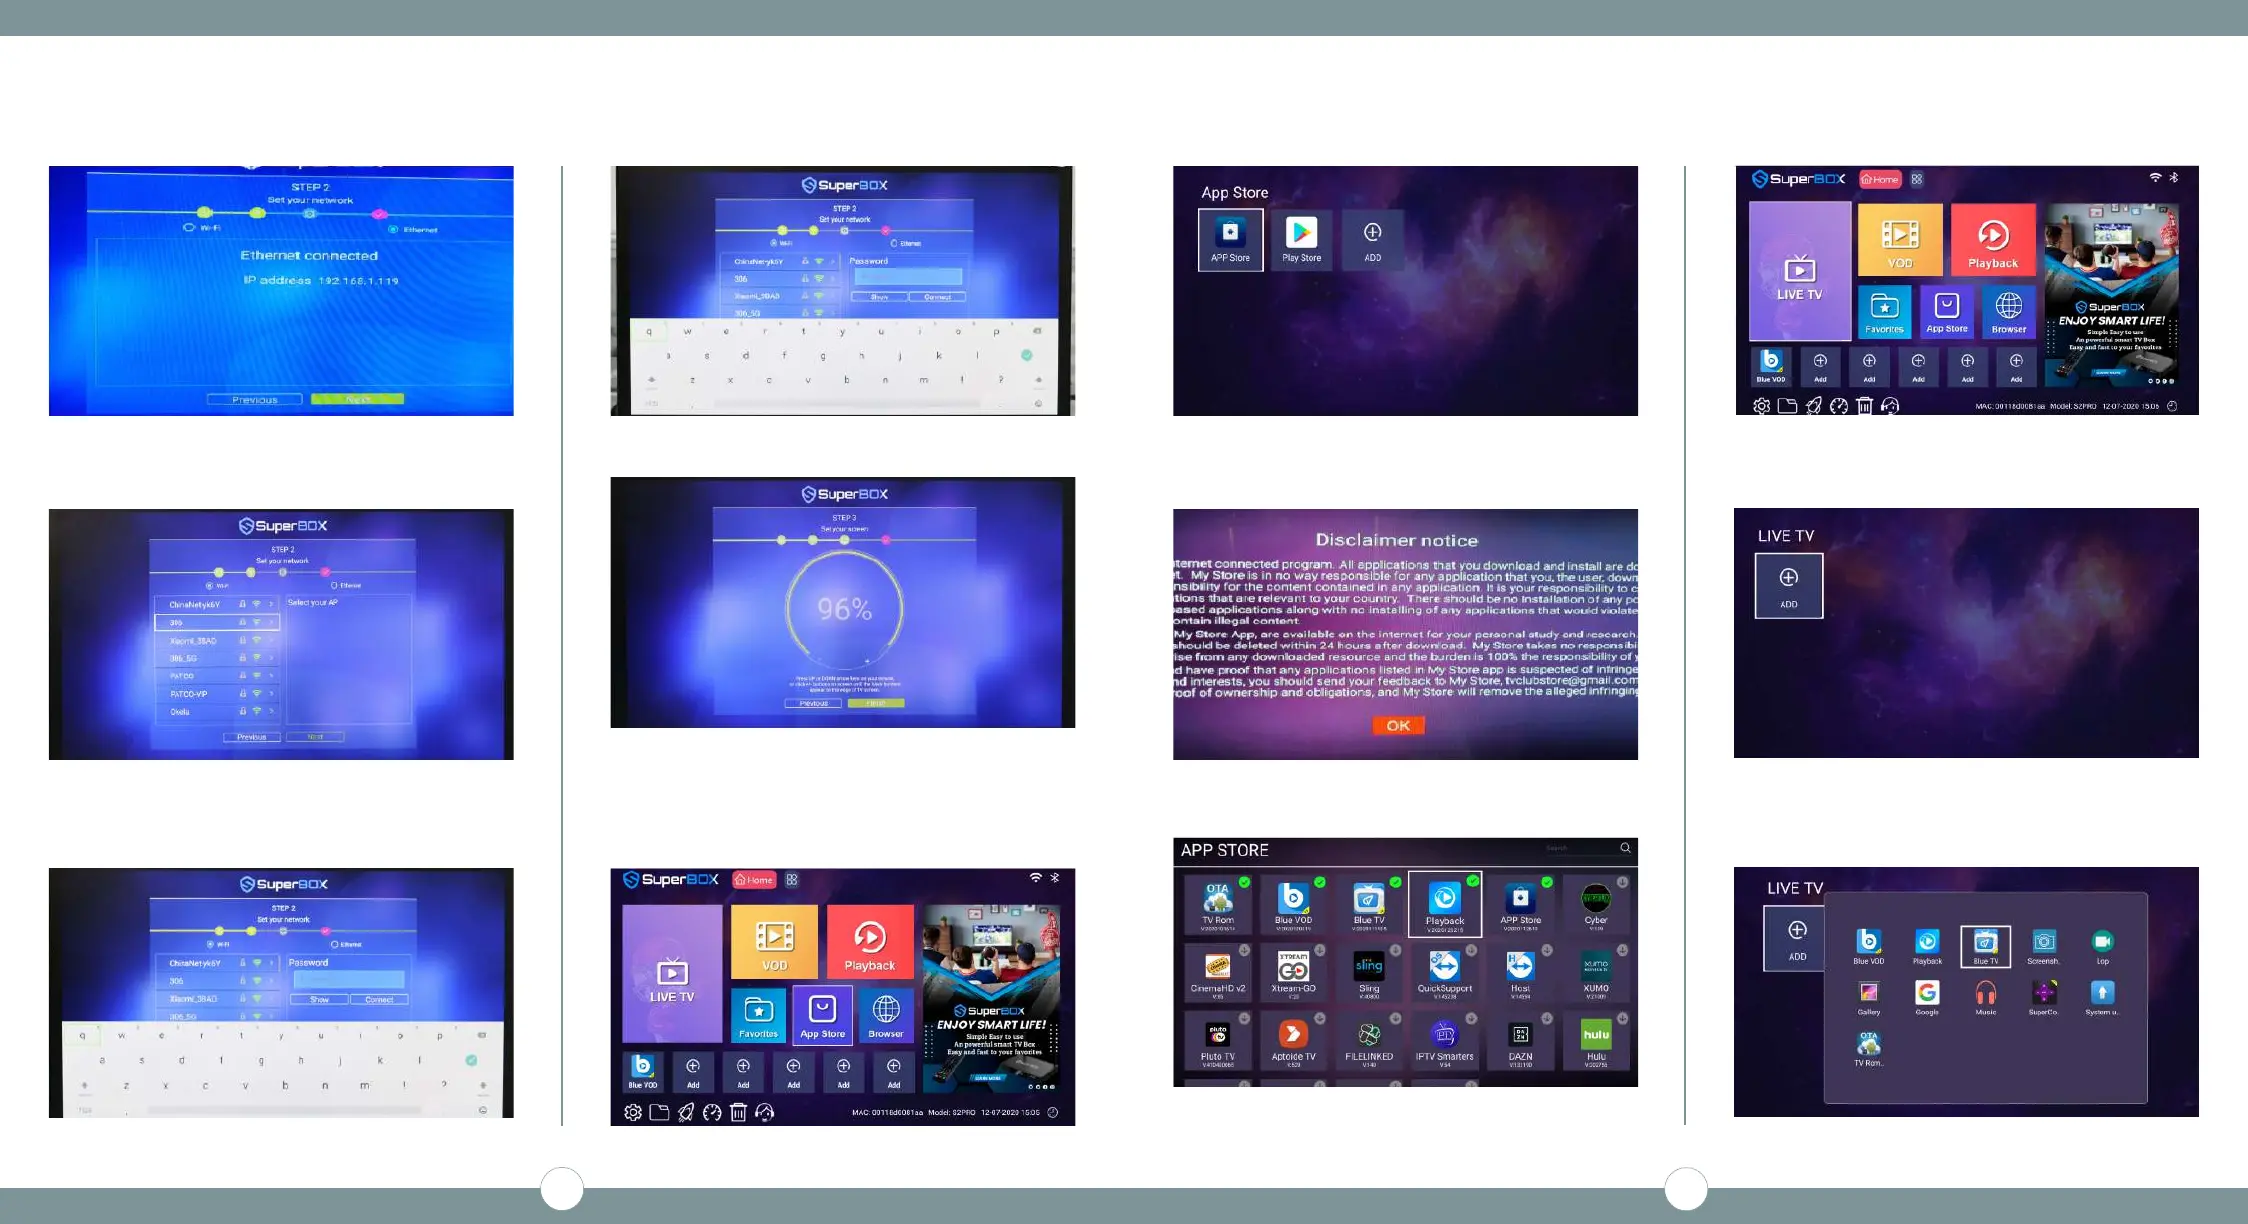
STEP 5 - Setup Live TV
STEP 5A - Arrow over to Live TV
STEP 5B - Need to Add Blue TV
(Press [OK])
STEP 5C - Arrow over to Blue TV
(Press [OK])
(Press [OK] - Press [Return] to Exit)
STEP 1 - Agree to the Disclaimer Notice (Press [OK])
STEP 2 - Select your Internet Connection
(Either Ethernet or WiFi)
STEP 2A - Ethernet Setup - Plug into Router - (Press [OK])
*** (MOVE TO STEP3) ***
STEP 2B - WiFi Setup - Select WiFi Network - (Press [OK])
STEP 2C - Enter Password (Press [OK] on [Check] to Save)
STEP 2D - Arrow to Connect (Press [OK] to Connect)
STEP 2E - Arrow to [Next] (Press [OK] to Finish)
STEP 3 - Adjust Screen to Fit your TV
(Use UP/DOWN Arrows to Adjust - Press [OK] on Finish)
STEP 4 - Download & Install the Blue Apps
STEP 4A - Arrow Over to [App Store]
(Press [OK])
1
2