1
Time Setting
It is used to set the time required for cooking.
2
Temperature Setting
Used to set the cooking temperature.
3
Weight Setting
Used to set the weight of cooking ingredients.
4
Microwave Power Adjustment
Used to adjust the Microwave Power Level
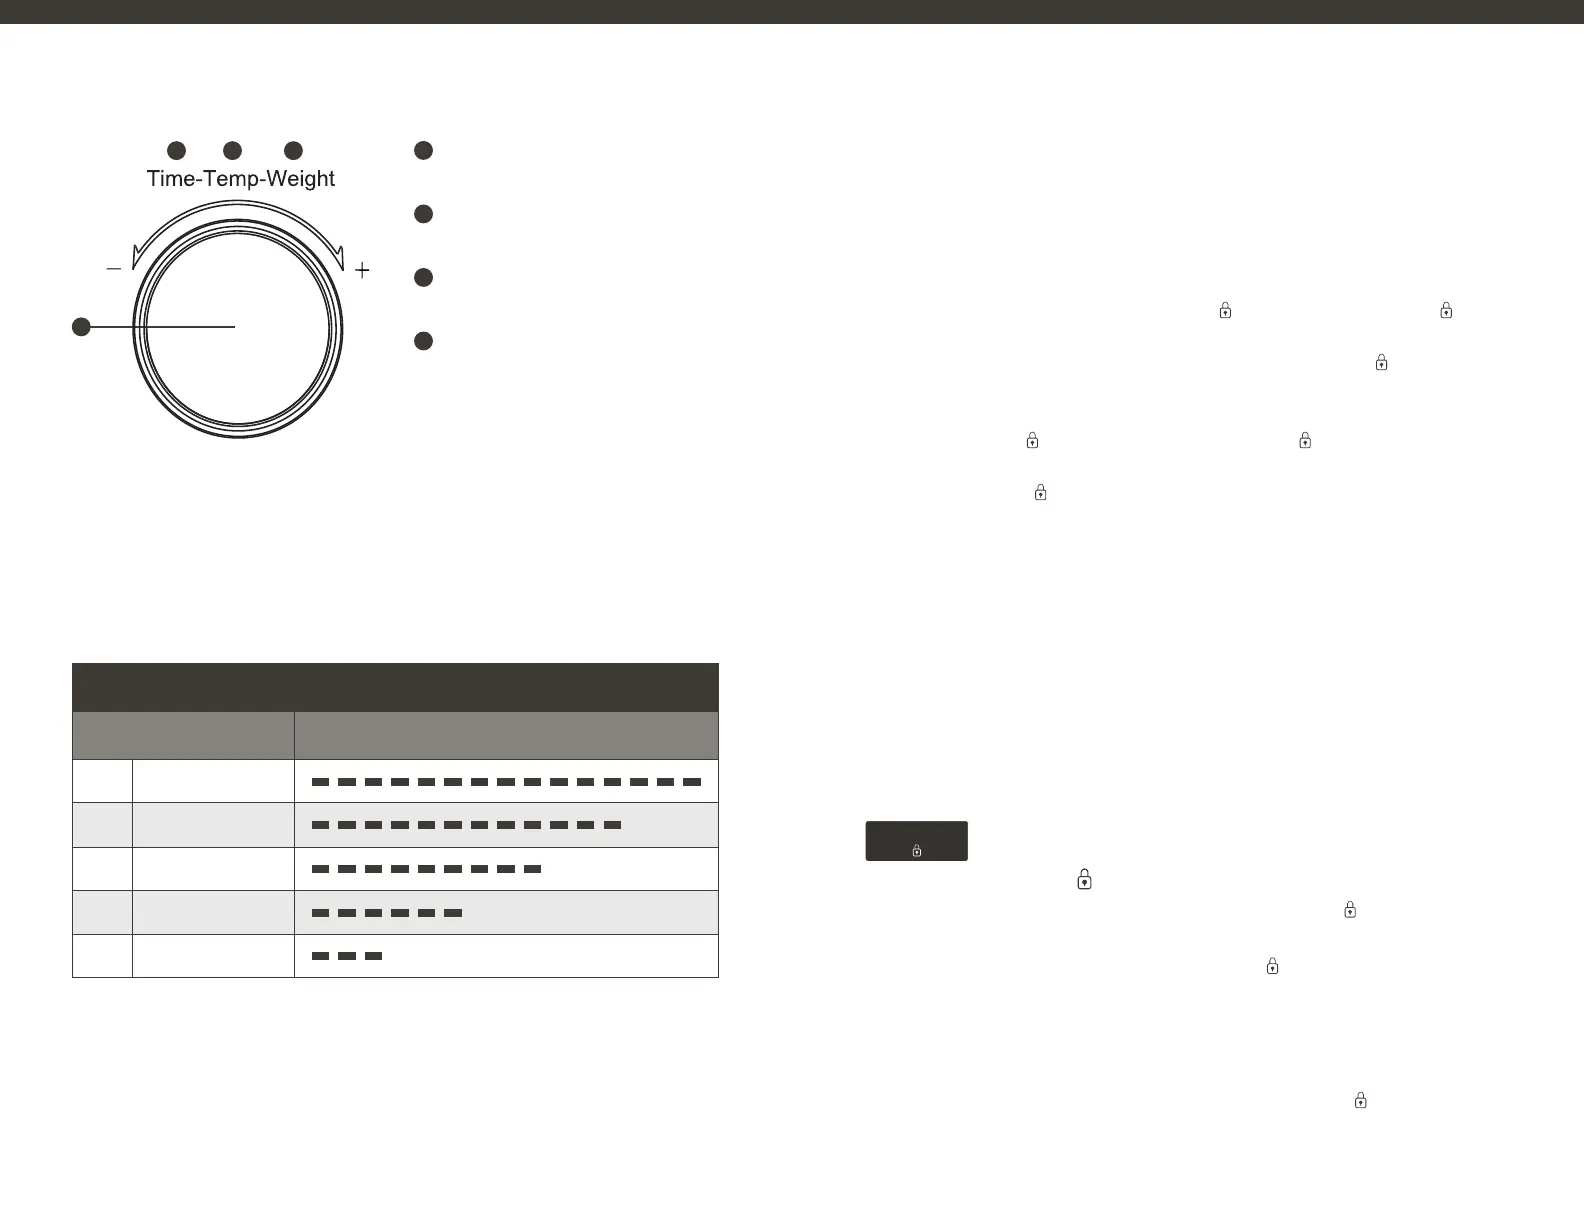
Introduction to the Use of the Knob
Description of Microwave Power Level
1
4
2 3
MICROWAVE POWER LEVEL INDICATOR
MICROWAVE
POWER LEVEL INDICATION
1
P100
2
P80
3
P60
4
P40
5
P20
During the cooking process, the operator can adjust the power of the knob to
microwave as needed.
16
Control Panel Functions
DESCRIPTIONS OF PROCEDURES
AND FUNCTIONS
Initial State
Plug in the power and enter the initial interface of the function menu. The
buzzer will sound, the “Stop/Clear
” will light up, press “Stop/Clear ” and all
functions will light up and be ready for selection. After 1 second, it will enter the
standby state. In the standby state, Press the “Stop/Clear
” key to enter the
initial interface of the function menu.
(If there is no operation within 3 minutes, it will enter the lock screen sleep state,
the “
Screen Lock” icon and the “Stop/Clear ” key will light up, and all other
lights will go out). In the sleep state of the lock screen, press and hold the “Stop/
Clear
” key for two seconds to unlock and enter the initial interface of the
function menu. The initial interface of the function menu: all function lights are
on, and the digital screen displays 00:00.
Light Function
In the initial interface of the cooking and function menu, press the “Light”
button, the indicator light will turn from steady on to fl ashing (return to steady
on after 3 seconds). The light can be turned on and off, and the light will be
automatically turned off after 1 minute from time it was turened on.) The light
is off in the standby and lock screen state; the light will turn off automatically if
the door remains open for more than 1 minute.
NOTE: If the cooking time is less than or equal to 2 minutes, the oven light
is always on. If the cooking time is greater than 2 minutes, the oven light will
always be on 1 minute after the start and 1 minute before the end (the lamp is
off at all other times).
Stop/Clear
Key Function
1. During the setting process, press the “Stop/Clear
” key to cancel the
current setting and return to the initial interface of the menu.
2. When running, press the “Stop/Clear ” key to enter the pause state (the
indicator light fl ashes), press the key again to cancel the running program
and return to the initial interface state of the menu. If there is no operation
within 60 minutes of the pause state, then Exit the function interface and
enter self-locking.
3. In the self-locking state, long press the “Stop/Clear
” key for two seconds
to unlock.
Stop Clear
/
17

 Loading...