12
ASSEMBLY
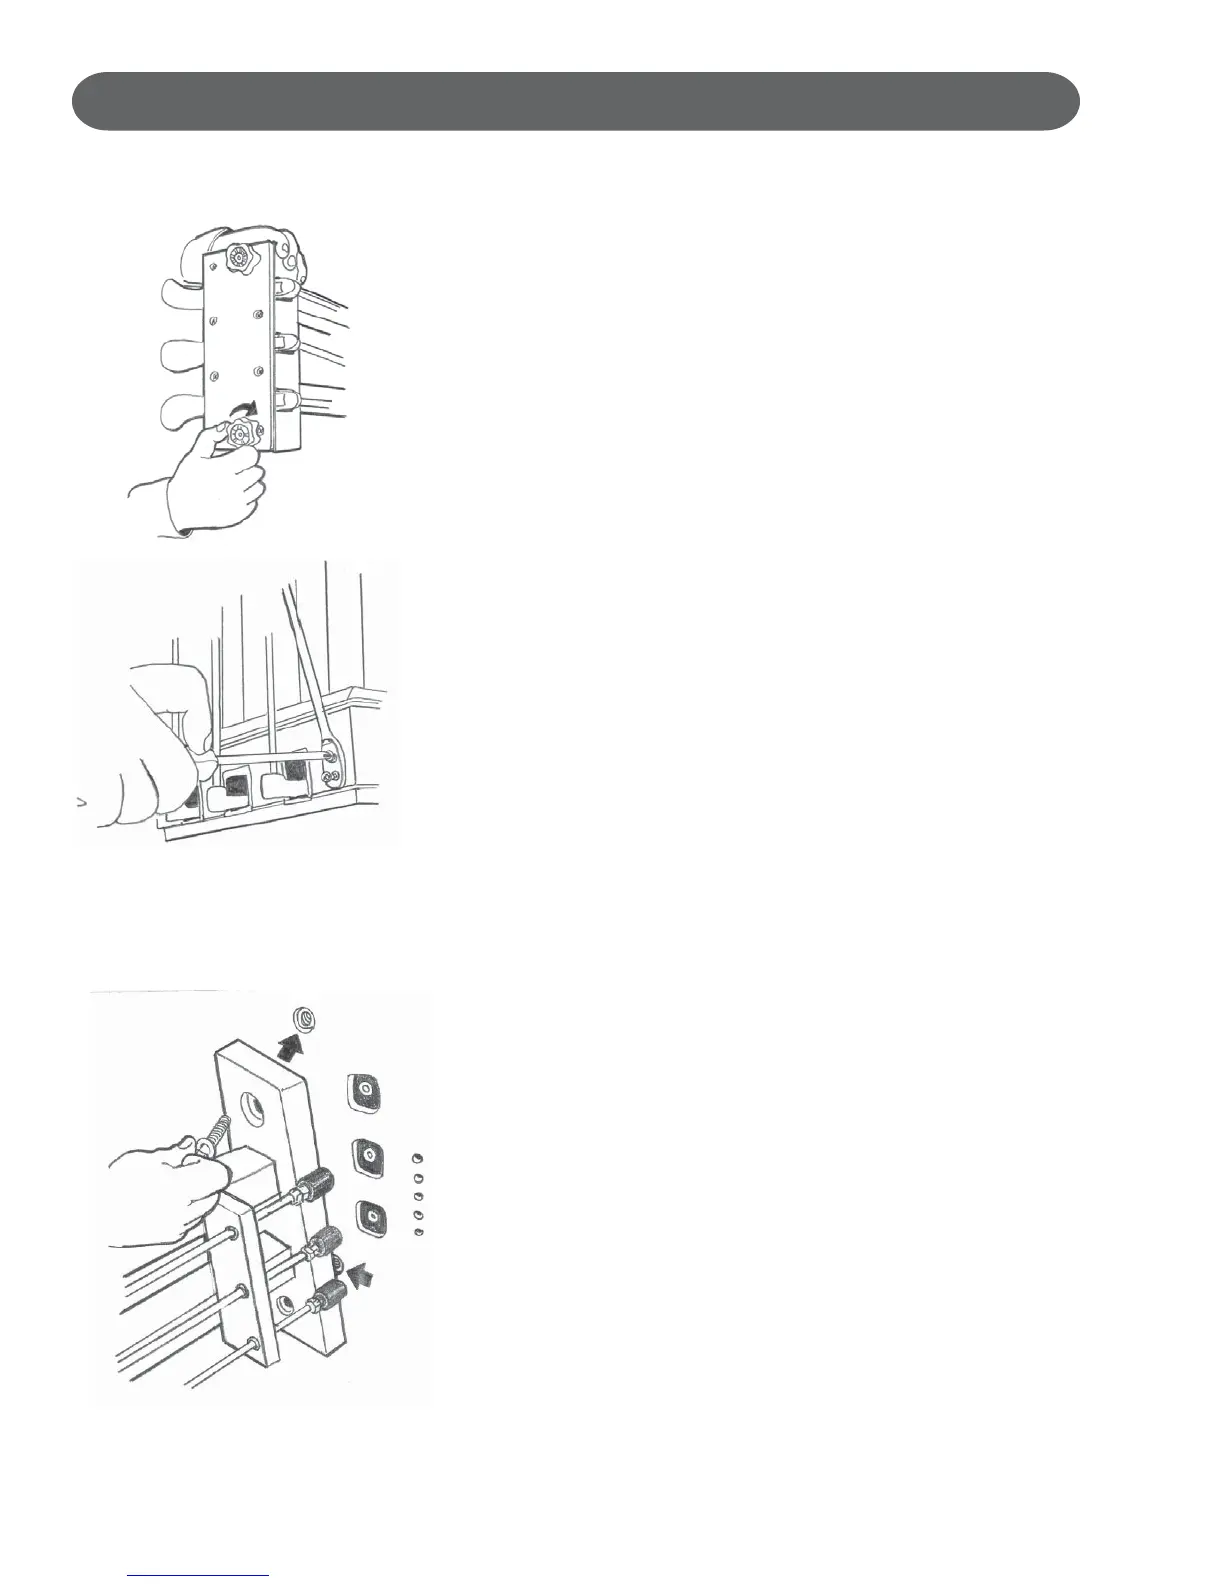
A. Pre-Pedal Assembly.
• Tighten both knobs on the bottom of the pedal assembly
clockwise as shown, until they are as close to the pedal board
as possible.
• After your piano has been placed in its final position, these 2
knobs will be adjusted down to stabilize the pedals.
4. PEDAL ASSEMBLY ATTACHMENT
B. Pedal Assembly Preparation.
• Locate the 2 brass support rods (C).
• The ends of these rods have 2 different angles. One angle is
very gentle, ant other is more sharp.
• Using the gentle angle, attach the 2 supporting rods using the
screws (H) with the screwdriver (D) to the back of the pedal
assembly as shown. Tighten securely.
C. Pedal Assembly Attachment.
• The pedal assembly attaches to the 2 threaded lugs as shown
above. Also pictured are 3 square holes for the pedal rods.
Thread the 2 bolts with washers (H) into the lugs and tighten.
While tightening, make sure the 3 pedal rods are positioned at
the 3 square holes.
• When you have finished tightening the pedal assembly, there
will be a space between the 3 pedal rods and the top of their
3 square position holes. This is normal.
 Loading...