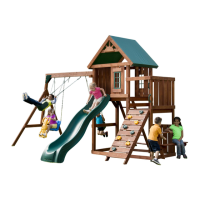
Do you have a question about the Swing-N-Slide PB 9241-1 and is the answer not in the manual?
Step-by-step guide for assembling the playset and its components.
Crucial safety notices and restrictions for proper and safe use of the playset.
A checklist to ensure all safety aspects are covered before and during play.
Important limitations and guidelines for how the playset should be used.
Recommended checks and actions for maintaining the playset over time.
Guidance on choosing appropriate shock-absorbing materials for safety.
Instructions on where and how to install protective surfacing around the playset.
List of tools necessary for assembling the playset.
Advice and hints to facilitate the assembly process.
Detailed list of wooden parts for the tower module.
List of all screws, bolts, and fasteners for the tower module.
Detailed list of wooden parts for the terrace module.
List of fasteners for the terrace module.
Detailed list of wooden parts for the ladder module.
List of fasteners for the ladder module.
Detailed list of wooden parts for the picnic table module.
List of fasteners for the picnic table module.
Step 1: Building the first structural frame for the playset.
Step 2: Building the second structural frame.
Step 3: Connecting support boards to the initial frame.
Step 4: Joining the two main frame structures.
Step 5: Adding the structural supports for the deck.
Step 6: Attaching the first set of deck boards.
Step 7: Continuing the installation of deck boards.
Step 8: Adding more support boards to the structure.
Step 9: Installing a specific deck support board.
Step 10: Building the third structural frame.
Step 11: Installing another deck support board.
Step 12: Adding support boards to Frame C.
Step 13: Connecting Frame C to the main tower structure.
Step 14: Adding deck boards to the new section.
Step 15: Continuing deck board installation.
Step 16: Adding support structures for barriers.
Step 17: Installing boards to fill gaps in the structure.
Step 18: Attaching barrier panels.
Step 19: Continuing barrier panel installation.
Step 20: Building and attaching window components.
Step 21: Mounting the assembled window units.
Step 22: Adding the main support structure for the swing beam.
Step 23: Connecting the swing hangers to the beam.
Step 24: Constructing the triangular A-frame support.
Step 25: Securing the brackets that connect the beam to the frame.
Step 26: Adding a brace for stability to the swing beam assembly.
Step 27: Mounting the main swing beam onto the structure.
Step 28: Final installation of barrier boards.
Step 29: Constructing the angled frames for the roof.
Step 30: Assembling the main roof structure.
Step 31: Adding support boards to the sides of the roof structure.
Step 32: Mounting the completed roof onto the playset tower.
Step 33: Installing the tarp as a roof covering.
Step 34: Constructing the ladder component.
Step 35: Mounting the assembled ladder to the playset.
Step 36: Building the rock climbing wall structure.
Step 37: Mounting the rock climbing wall onto the playset.
Step 38: Installing the climbing rocks onto the wall.
Step 39: Assembling and attaching the picnic table.
Step 40: Finalizing barrier and slide support structures.
Step 41: Mounting the playset slide.
Step 42: Installing safety handles and identification tags.
Instructions for assembling the Wind Rider swing accessory.
Detailed steps for assembling the individual swing seats.
Instructions for securing the playset to the ground using anchor kits.
Details of the limited warranty, coverage, and exclusions.
| Brand | Swing-N-Slide |
|---|---|
| Model | PB 9241-1 |
| Category | Accessories |
| Language | English |