7
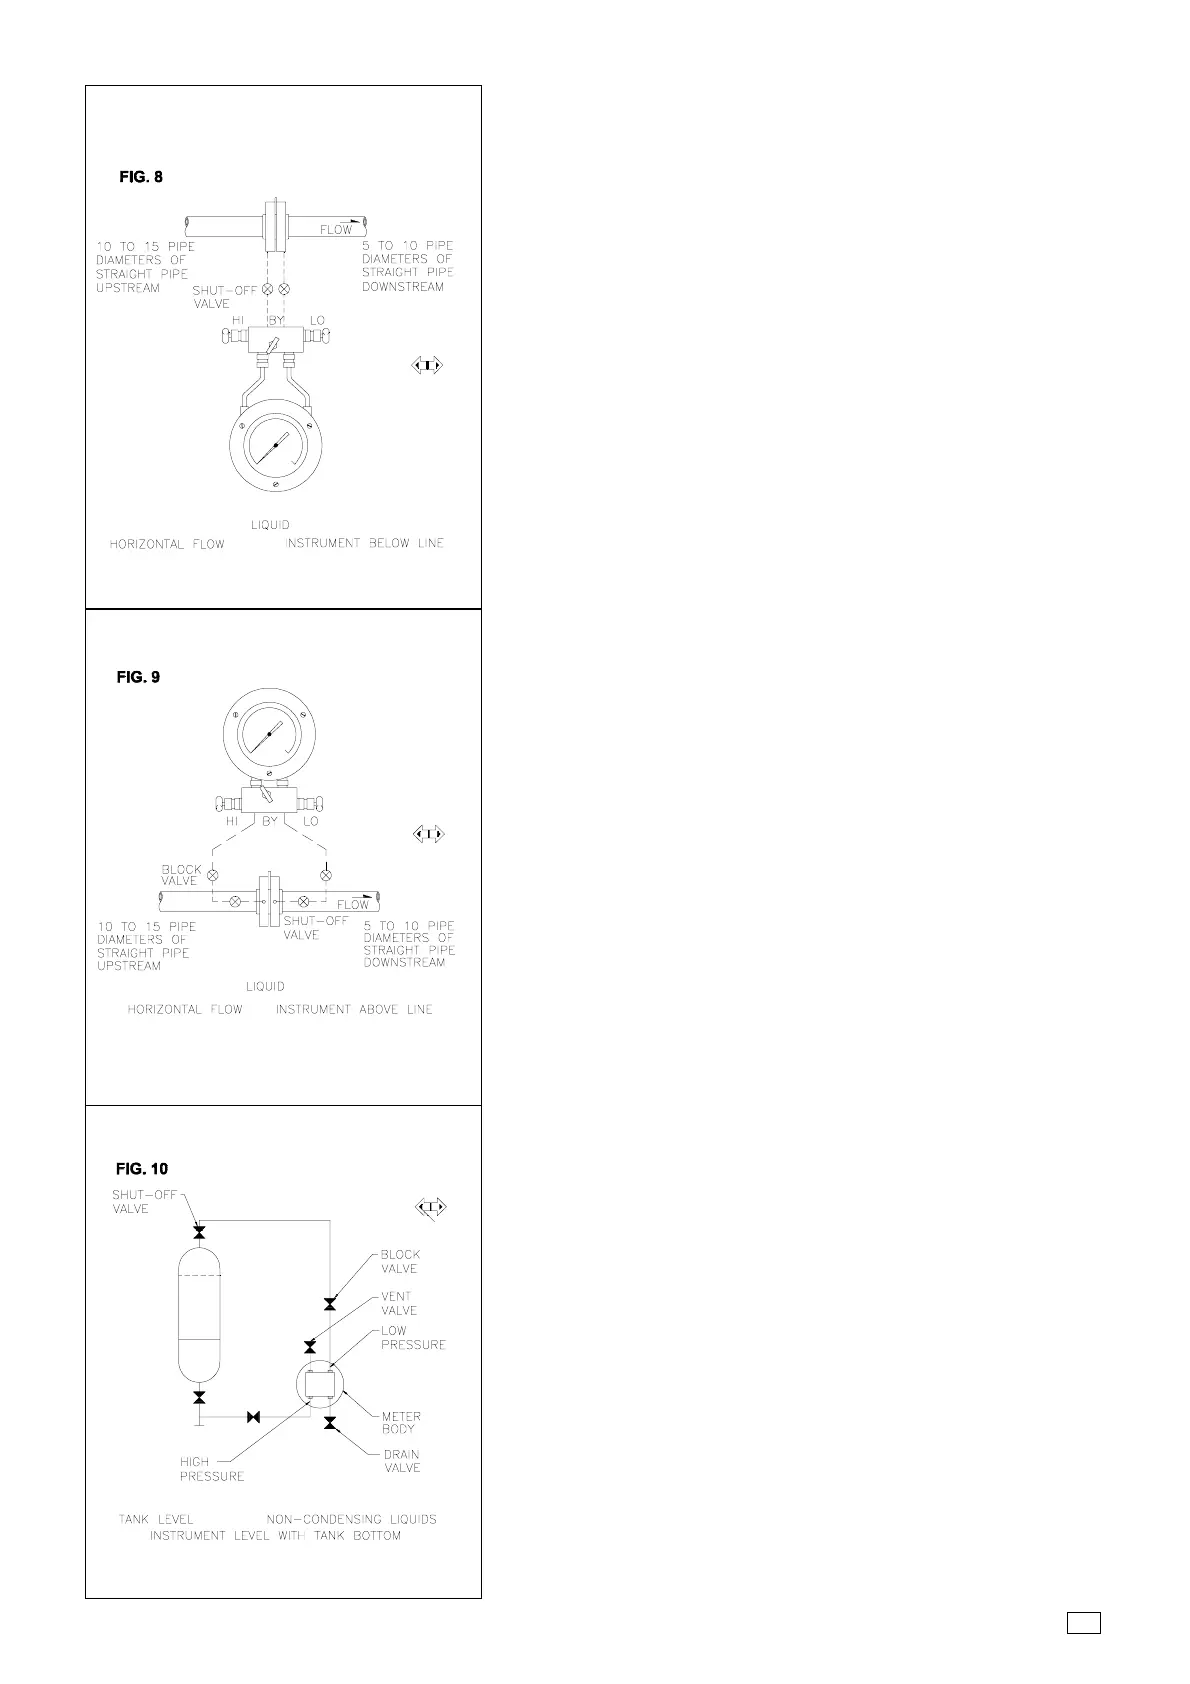
FOR LIQUID SERVICE (FIG.8)
START-UP
Recommended when the flowing medium volatile or gassy liquids.
Make all primary element taps at or near bottom pipe.
CAUTION: Maximum operating temperature permissable 200°F(93°C).
For higher temperature media, follow as explained in clause H. With
hot or gassy fluids, disconnect instrument and fill both Housings and
piping though manifold with process fluid cooled to below 200°F, then
reconnect. Open block valves, bypass valve, and one shutoff valve.
1. Alternately crack drain vales (connected to lower instrument
body ports) until liquid, free of bubbles, spills out both ports.
2. Close both drain valves and shutoff valve.
3. Pointer should indicate zero. If not, and no leaks are detected,
the housings and/or piping are not completely full of bubble-
free liquid. Repeat steps 1 through 4 until pointer remains
stationary at zero.
4. Open both shutoff valves, close bypass valve for D/P reading.
FOR LIQUID SERVICE (FIG.9)
START-UP
Recommended for use when sediments are present or when meter
cannot be mounted below line. Where sediments are NOT present,
make primary element taps at or near bottom of pipe. Periodically
inspect and clean instrument lines.
NOTE : Where process fluid is gasy or system is subject to numerous
no- flow conditions and instrument cannot be mounted below line,
install automatic air bleed fittings in top meter body parts or at high
point of instrument lines.
1. Open both block valves, bypass valve and one shutoff valve.
2. Alternately crack vent valves or loosen plugs from top ports of
instrument body housings until liquid, free of bubbles, spills out
of both upper meter body ports.
3. Close vent valves or replace plugs and close shutoff valve.
4. Pointer should indicate zero. If not, and no leaks are detected,
the housings and/or piping are not completely full of bubble-
free liquid. Repeat steps 1 through 4 until pointer remains
stationary at zero.
5. Open both shutoff valves, close bypass valve for D/P reading.
FOR COOL LIQUID SERVICE (FIG.10)
START-UP
Recommended for use with water, oil, or other media which will
not condense in low pressure piping.
For hot (volatile) liquids, see Fig.11.
Mount instrument centerline level with lower tank reading point. If
instrument is mounted below lower tank reading point, install a
reference leg per Fig.9, a bubbler system per Fig.12, an aspirator bulb.
NOTE : Do not share fill or vapour return lines with instrument piping.
1. Close all valves; open high pressure block valve and crack high
pressure vent valve
2. Slowly open bottom (high pressure) shut-off valve. When bubble
free liquid spills from high pressure vent valve, close vent valve.
Open low pressure block valve slowly open top (low pressure)
Shutoff valve. Crack low pressure drain valve to drain any
condensation and reclose.
 Loading...