5
A
B
C
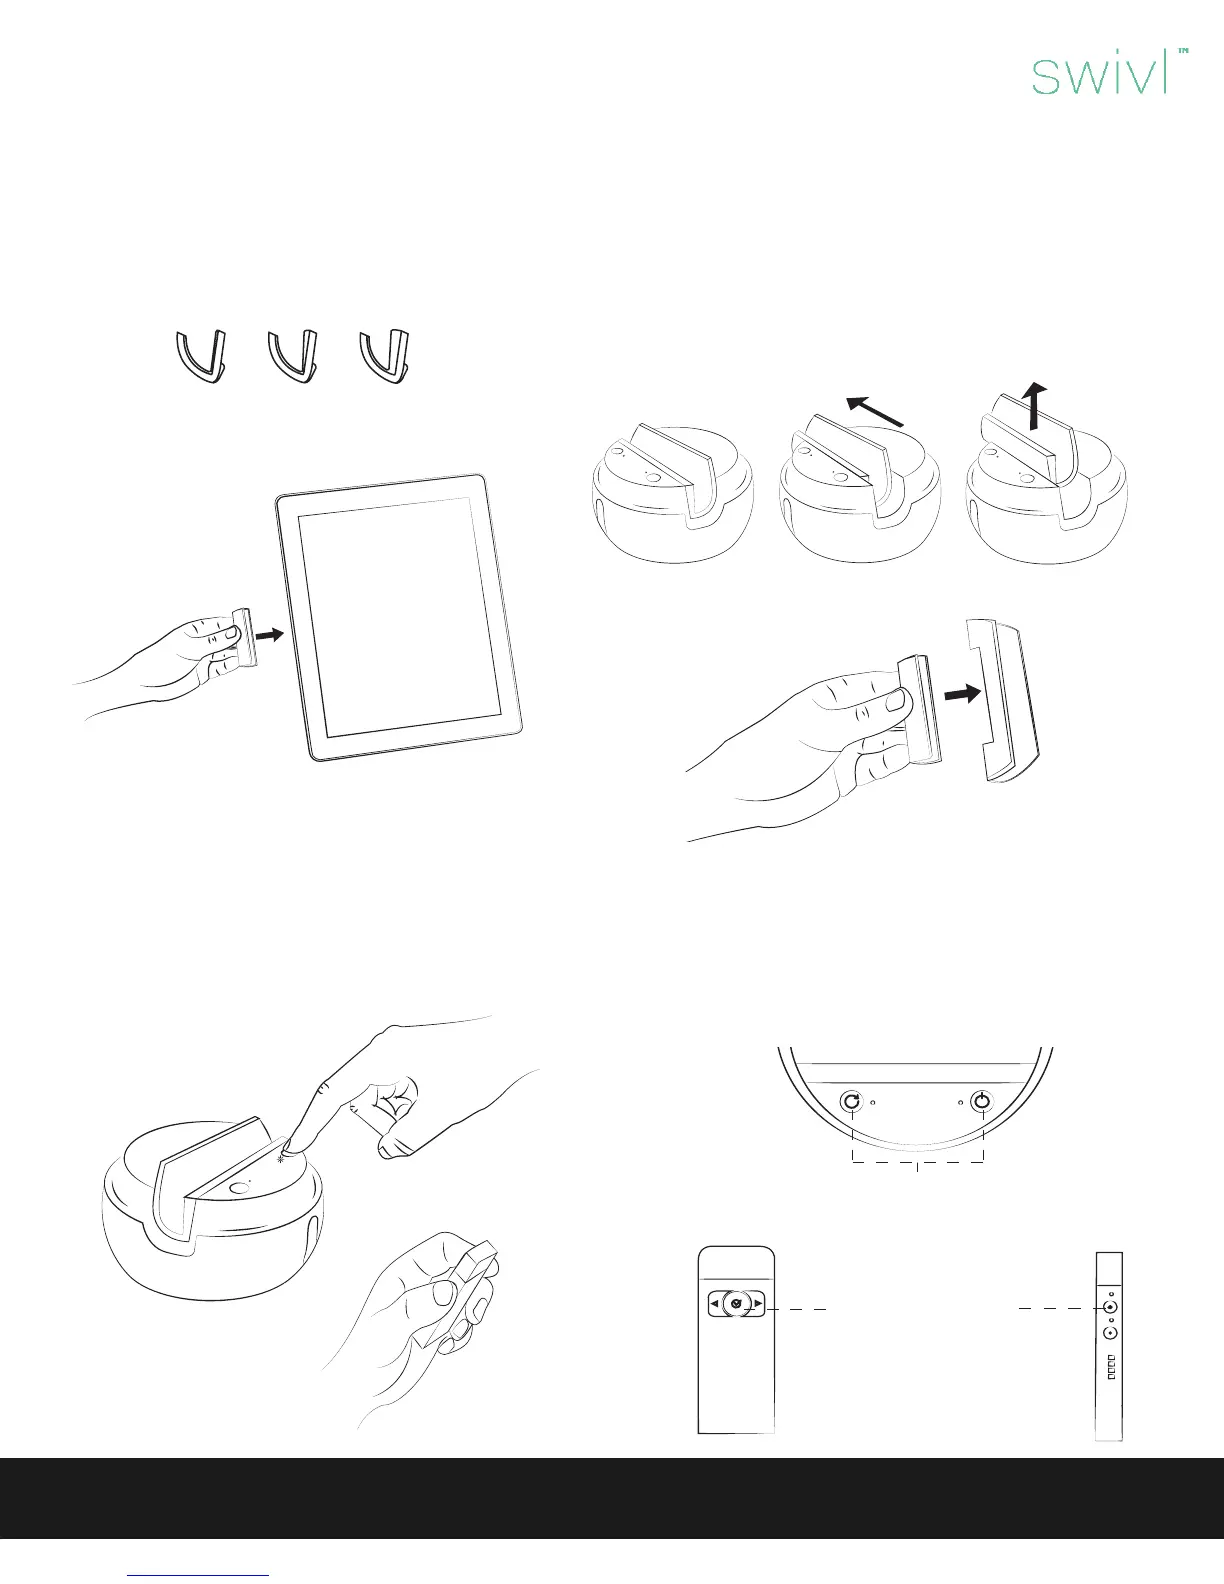
Step 1: Determine which grip best ts your device.
First, determine which shim best ts your device.
Next, push removable grip holder left and lift to remove.
Finally, insert shim into grip holder and place in base.
Step 2: Power on the device.
Swivl User Guide
Getting Started
There are three shims that hold your mobile device. Each shim has a dierent thickness. Select a shim and test on edge of
mobile device. Fit should be snug with no force. (For devices with large cases, a mount anything kit is available for purchase.)
Step 2: Press and hold
both power and check-
mark button simultane-
ously until top LED on
marker ashes green.
Then release. Pairing is
complete.
Step 1: Press and hold both power and sync
button simultaneously until power LED on
base ashes. Then release.
Lift the back ap on the base to remove the marker. Press and hold the power button on base. Then hold the power button on the
marker for 3-4 seconds. Both lights should turn green, meaning paired. If the top light on the marker, and the right light on the base
are both red, you may need to pair your marker with the base.
How to pair a marker:
 Loading...