5
7 Getting started
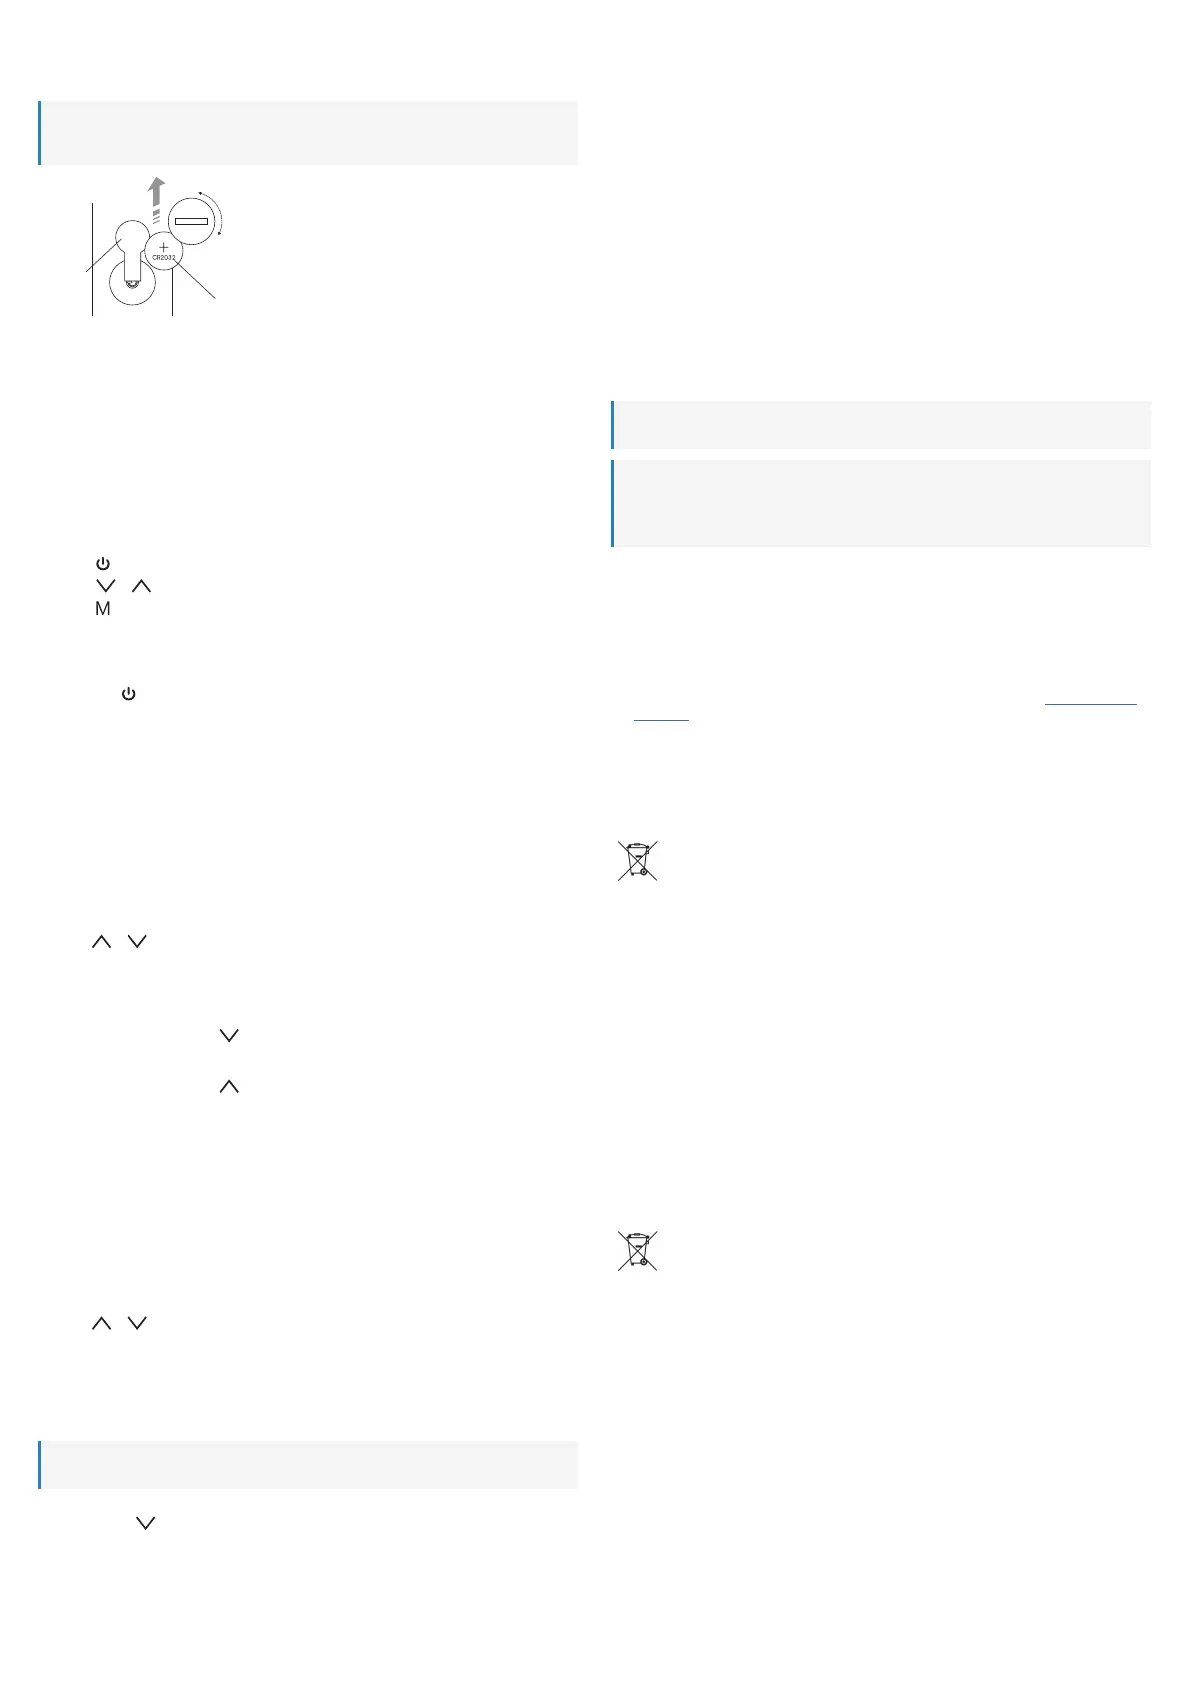
7.1 Remote control battery
Note:
The product ships with battery preinstalled. Remove the battery release tab when using for the first
time.
Close
Open
Insert battery
Battery
release
tab
7.2 Positioning
Place the product on a dry and even surface that can withstand the weight of the product. NOTICE!The
product can leave marks on sensitive surfaces.
Adjust the arm and head as desired.
7.3 Connecting power
Power is supplied via the power adaptor.
1. Connect the round plug of the power adaptor cable to the power supply socket on the product.
2. Connect the power adaptor to a suitable mains socket.
8 Controlling the light
Use the touch panel to control the light.
■
Touch to turn the light ON/OFF.
■
Touch or to adjust the brightness.
■
Touch repeatedly to adjust the colour temperature.
9 Configuring the display
9.1 Display backlight ON/OFF
Touch and hold to switch the backlight ON/IOFF.
9.2 Setting date and time
The display shows the date and time. Set the date and time and select the display format. The weekday is
calculated automatically.
Use the display control panel to adjust parameters.
Adjusting parameters
The display guides you through the menu positions in the following sequence:
Hours → Minutes → Year → Month → Day → (Exit menu)
■
Press M to exit the settings menu anytime.
1. Keep pressing M until the time displays.
2. Press S to enter the settings menu.
3. Press or to adjust.
4. Press S to save and move to the next position.
5. Continue to adjust other positions. After the last position, the display exists the settings menu.
9.3 Selecting temperature units
On the display control panel, press to select a temperature unit (°C or °F).
9.4 Select the time format
On the display control panel, press to select a time format (12/24 hours).
10 Setting alarms
The product has a built-in alarm clock. Set the alarm time, alarm sound, and snoozing (max. 60 min.).
Use the display control panel to adjust parameters.
Setting the alarm and snooze function
The display guides you through the menu positions in the following sequence:
Hours → Minutes → Snooze duration → Alarm sound → (Exit menu)
■
Press M to exit the settings menu anytime.
1. Keep pressing M until the alarm clock symbol shows.
2. Press S to enter the settings menu.
3. Press or to adjust.
4. Press S to save and move to the next position.
5. Continue to adjust other positions. After the last position, the display exists the settings menu.
Activating and stopping alarms
After setting the alarm, activate it. When the alarm sounds, snooze or stop it.
Important:
The alarm does not sound when power is interrupted.
1. Keep pressing M until the alarm clock symbol shows.
2. Keep pressing to activate the alarm with:
- Sound, or
- Sound and snooze
à When the alarm time is reached, the alarm sounds for 60 seconds.
à (If snooze is activated) the alarm snoozes for the set period and sounds again.
3. Press S to stop the alarm.
11 Wireless charging
■
Place a compatible device onto the wireless charging platform.
■
You may need to adjust the positioning for wireless charging to start.
■
The LED on the wireless charging platform will indicate charging is in progress.
■
The device being charged will also indicate that wireless charging is in progress.
12 Powering USB devices
Power and charge compatible devices via the USB power supply port(s).
1. Make sure the device meets the following specifications:
- Voltage: 5 V/DC
- Current consumption: max. 1.5 A
1. Connect the device to the USB port with a suitable USB cable.
à Power is supplied to the connected device.
2. After use, disconnect the USB cable.
13 Cleaning and care
Important:
Replace the batteries at least once a year to prevent leaking.
Important:
– Do not use aggressive cleaning agents, rubbing alcohol or other chemical solutions. They damage
the housing and can cause the product to malfunction.
– Do not immerse the product in water.
1. Disconnect the product from the power supply.
2. Let the product cool down to ambient temperature.
3. Clean the product with a dry, fibre-free cloth.
14 Declaration of Conformity (DOC)
Conrad Electronic SE, Klaus-Conrad-Straße 1, D-92240 Hirschau hereby declares that this product con-
forms to the 2014/53/EU directive.
■
Click on the following link to read the full text of the EU declaration of conformity: www.conrad.com/
downloads
Enter the product item number in the search box. You can then download the EU declaration of conform-
ity in the available languages.
15 Disposal
15.1 Product
This symbol must appear on any electrical and electronic equipment placed on the EU mar-
ket. This symbol indicates that this device should not be disposed of as unsorted municipal
waste at the end of its service life.
Owners of WEEE shall dispose of it separately from unsorted municipal waste. Spent batter-
ies and accumulators, which are not enclosed by the WEEE, as well as lamps that can be re-
moved from the WEEE in a non-destructive manner, must be removed by end users from the
WEEE in a non-destructive manner before it is handed over to a collection point.
Distributors of electrical and electronic equipment are legally obliged to provide free take-back of waste.
Conrad provides the following return options free of charge (more details on our website):
■
in our Conrad offices
■
at the Conrad collection points
■
at the collection points of public waste management authorities or the collection points set up by man-
ufacturers or distributors within the meaning of the ElektroG
End users are responsible for deleting personal data from the WEEE to be disposed of.
It should be noted that different obligations about the return or recycling of WEEE may apply in countries
outside of Germany.
15.2 (Rechargeable) batteries
Remove batteries/rechargeable batteries, if any, and dispose of them separately from the product. Ac-
cording to the Battery Directive, end users are legally obliged to return all spent batteries/rechargeable
batteries; they must not be disposed of in the normal household waste.
Batteries/rechargeable batteries containing hazardous substances are labelled with this sym-
bol to indicate that disposal in household waste is forbidden. The abbreviations for heavy
metals in batteries are: Cd = Cadmium, Hg = Mercury, Pb = Lead (name on (rechargeable)
batteries, e.g. below the trash icon on the left).
Used (rechargeable) batteries can be returned to collection points in your municipality, our stores or
wherever (rechargeable) batteries are sold. You thus fulfil your statutory obligations and contribute to en-
vironmental protection.
Batteries/rechargeable batteries that are disposed of should be protected against short circuit and their
exposed terminals should be covered completely with insulating tape before disposal. Even empty batter-
ies/rechargeable batteries can contain residual energy that may cause them to swell, burst, catch fire or
explode in the event of a short circuit.
 Loading...