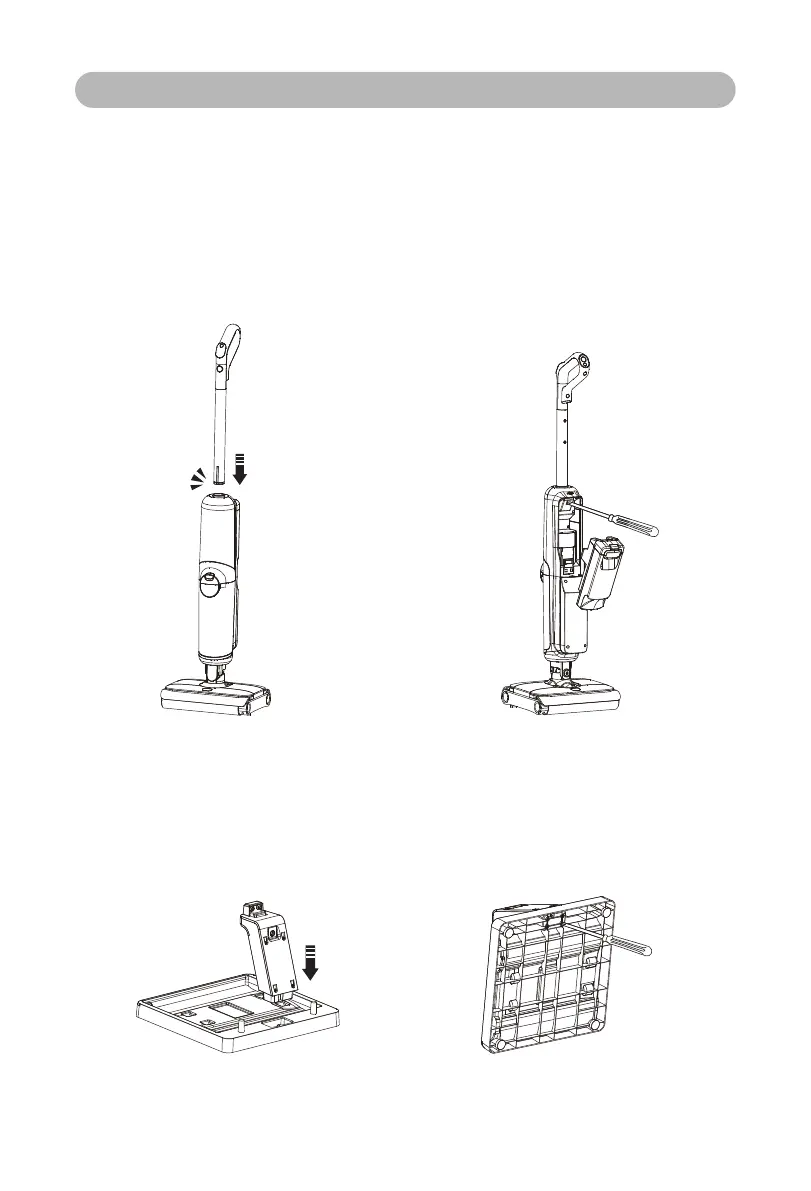
1.Handle installation and disassembly
1.1 Installation:
Insert the end of the handle assembly
vertically into the port on the top of the
body according to the direction shown in
the figure, and the it is successfully.
1.2 Disassembly:
Firstly take down the clean-water tank,
then put a pen-like hard object into the
hole on the back of the body to press
the shrapnel, and pull out the handle of
the main unit upwards at the same.
2. Installation of charging base:
Insert the charging base assembly B into the card slot of the charging base assembly
A, and fix it with 4 screws on the back of the assembly A; if it is needed to disassemble,
please unscrew the screw to separate the upper and lower parts.
4
Product Installation
Click