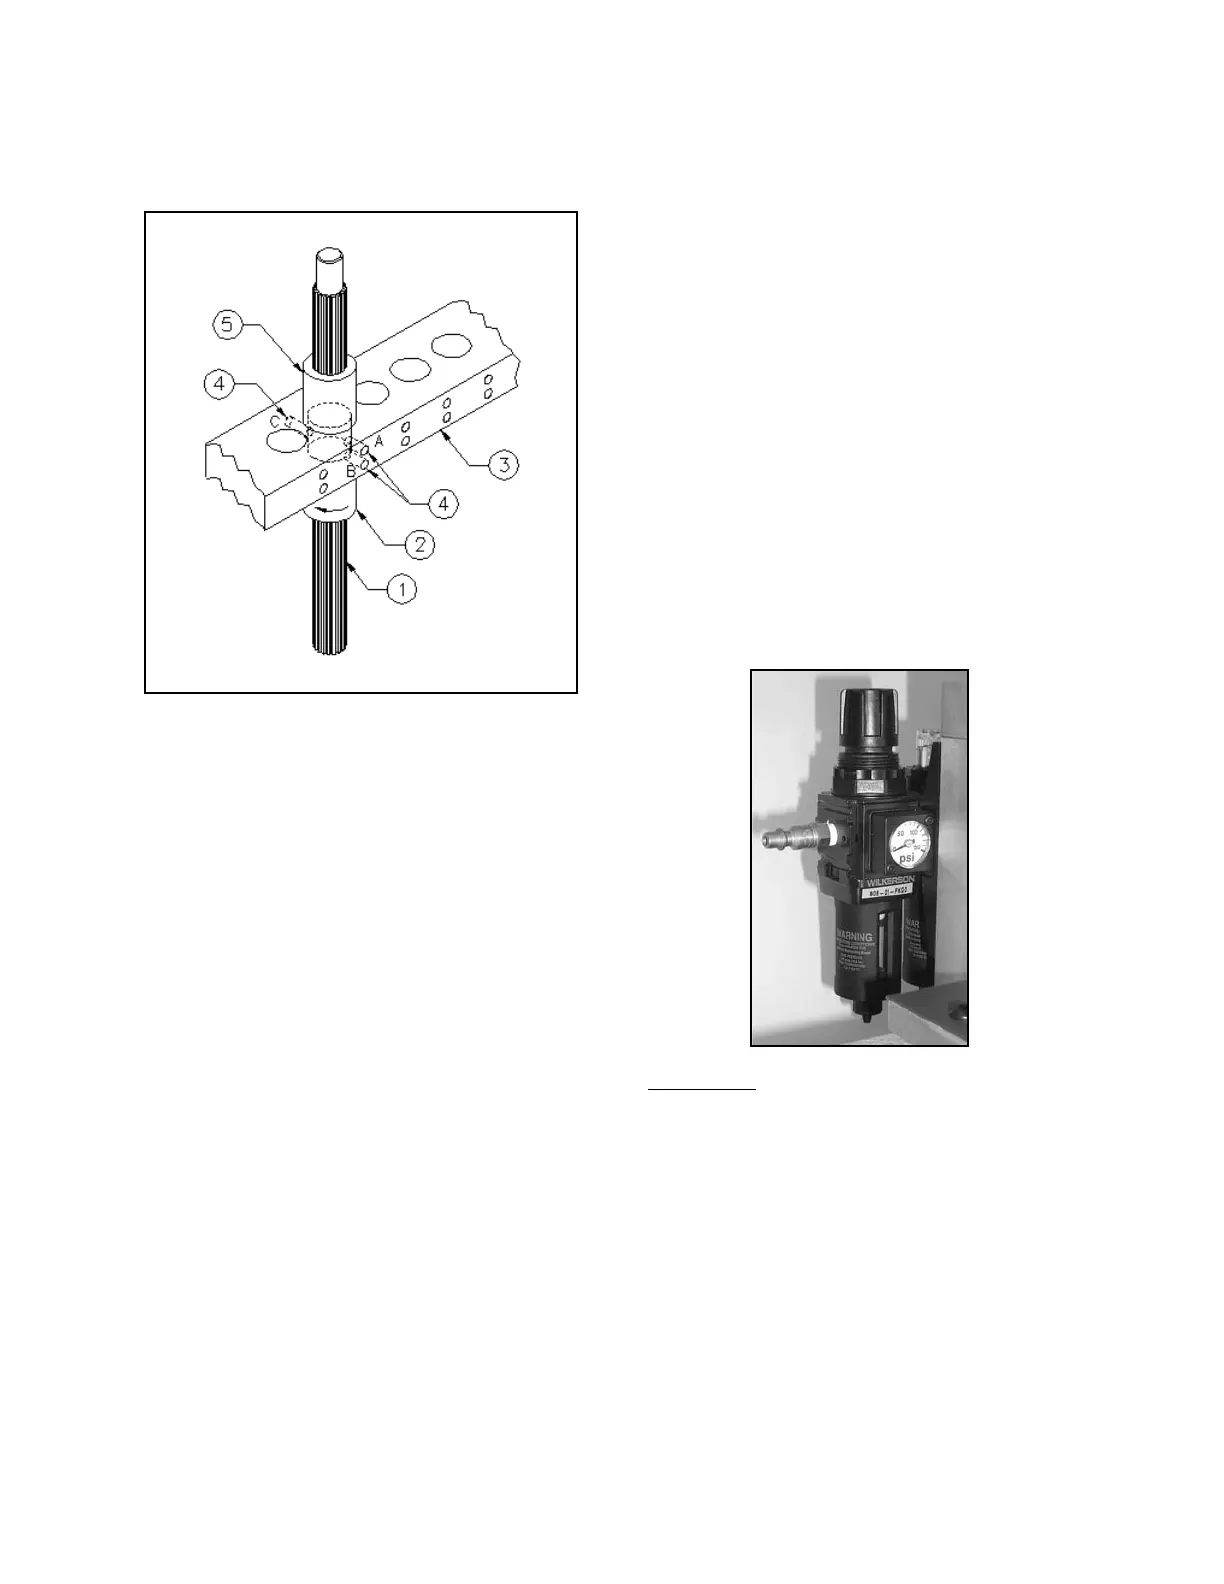
Spline Shaft Finger - Adjustment
The following procedure describes the correct
way to adjust the spline-shaft fingers.
1. Using hex wrench supplied, loosen set screw
and remove weight from spline-shaft finger.
2. If upper bearing (#5) is assembled tightly in
gantry and locked with bottom set screw (#4),
continue with step 3. Otherwise,
a. Remove spline shaft (#1) from bearing
assembly.
b. Hand-tighten upper bearing (#5) and
lock with bottom set screw (#4A).
c. Adjust lower bearing (#2) into beam until
shoulder of bearing is in contact with gantry.
d. Slide spline shaft (#1) into upper bearing
until shaft stops against lower bearing.
Lightly twist lower bearing clockwise until
spline grooves align into lower bearing
and slide freely.
3. Loosen two adjustment set screws (#4B & C)
approximately ½ to ¾ turn.
4. Apply light tension between spline shaft and
lower bearing by slightly twisting lower bear-
ing counter-clockwise.
5. Using hex wrench, apply a light tightening force
to top set screw (#4B) locking lower bearing
into place. WARNING, DO NOT OVER
TIGHTEN SET SCREW. Spline shaft will no
longer move freely through bearings.
6. Tighten set screw (#4C) on the opposite side
of the gantry until spline shaft moves freely.
7. Re-attach weight and tighten set screws.
Load on Specimen Surface
To check the loading forces, measure directly
under the scratch (mar) tip, using a spring bal-
ance or equivalent. If necessary, adjust the
weight(s) to meet the required scratch force(s) on
the surface of the sample.
Lubricator / Regulator
The maximum inlet pressures and temperatures
are as follows:
150 psig (10.3 bar)
125° F (51.7° C)
Given normal operating conditions this unit will
be trouble-free. It is recommended that you serv-
ice the unit at least every six months.
CLEANING:
To clean bowl assembly:
a. Depressurize unit.
b. Remove bowl and bowl guard assembly by
turning counterclockwise.
c. Inspect bowl daily for damaged or deteriorat-
ed seals. Replace with original manufacturers
approved seals and bowls.
d. If bowl becomes dirty, replace it or clean it by
wiping the bowl with a soft dry cloth or a mild
detergent.
e. Before returning to service, ensure that all
seals have been reinstalled or replaced.
6 710 Operating Instructions ver 1.1
 Loading...