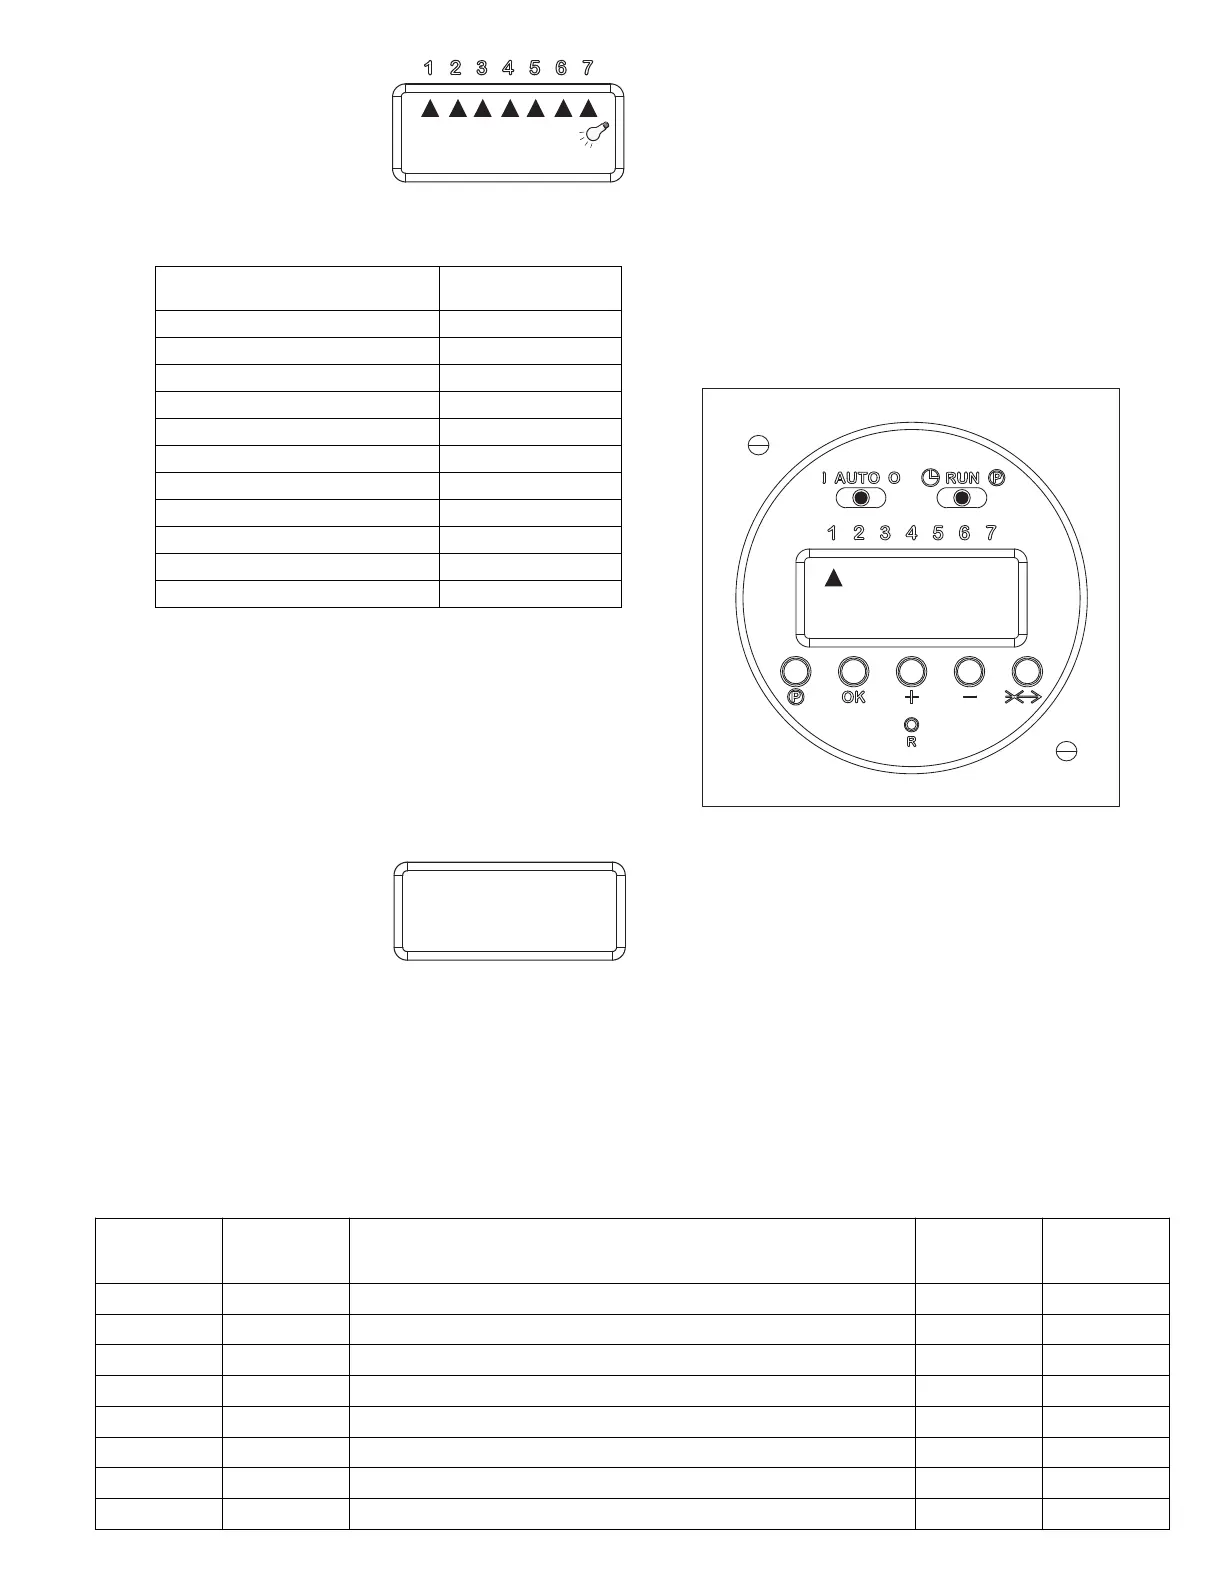
3. Press (+) key. Display will
show a flashing arrow
below the numbers 1-7
(Monday-Sunday), the
time will read “AM
12:00:00” and a light
bulb will appear to the right of the time, signifying
an ON time setting. Press the (+) or ( - ) key to
move the arrow through the DAY selection options:
4. When correct DAY(S) setting is selected, press
(OK), HOUR time will flash.
5. Press (+) or (-) key to set HOUR to the desired time.
Be sure the “AM/PM” symbol is correct. Then press
(OK), MINUTES time will flash.
6. Press (+) or (-) key to set MINUTES to desired time.
Then press (OK), SECONDS will flash.
7. Since SECONDS are not necessary, simply press
(OK). Your first ON time is set.
8. Press (P) Program
Selection key to finish.
Display will show “-02-”.
Timer is now ready for an
OFF timer program.
To program timer for OFF operation
1. Repeat steps 2 thru 8 to complete OFF time set-
ting. For OFF settings, no light bulb will appear on
the clock face.
Repeat the above procedure to program each ON (odd
number) and OFF (even number) desired time setting, in
sequential order. Refer to Timer Schedule below.
To finish and set digital timer to AUTO operation
1. When all programs are completed, move
Programming Switch (P) to RUN position.
2. Move Manual Operation switch to AUTO. Timer will
now operate ON/OFF according to programmed
settings.
PNP Digital Timer Program Schedules (Example)
PROGRAM ON/OFF DAYS HOUR MINUTE
01 ON MON, TUE, WED, THURS, FRI 6 AM 00
02 OFF MON, TUE, WED, THURS, FRI 8 AM 00
03 ON MON, TUE, WED, THURS, FRI 4 PM 30
04 OFF MON, TUE, WED, THURS, FRI 8 PM 00
05 ON SATURDAY and SUNDAY 7 AM 00
06 OFF SATURDAY and SUNDAY 9 AM 00
07 ON SATURDAY and SUNDAY 4 PM 30
08 OFF SATURDAY and SUNDAY 7 PM 30
 Loading...