Digital 7 Day Programmable Timer:
The Plumb n’ Plug (PNP) digital timer features a large LCD
display with user friendly keys for setting time and run pro-
grams. An internal re-chargeable battery holds programmed
settings for up to 4 days during power outages.
Note: Although the Plumb n’ Plug digital timer contains
some degree of spike and electrical noise protection,
as with all electronic devices, these units can be affected
by electrical noise. It is recommended that they be
powered from a voltage source that has no switching
devices or inductive loads connected.
Technical Data:
Programs: 8 ON settings, odd numbered 1-15
8 OFF settings, even numbered 2-16
Daylight time changeover: Manual
Manual 3-way override switch: On-Auto-Off
Reserve Battery Charge: - 4 days
- Full recharge in 48 hours
Input Voltage rating: 125V, 60Hz, 15A
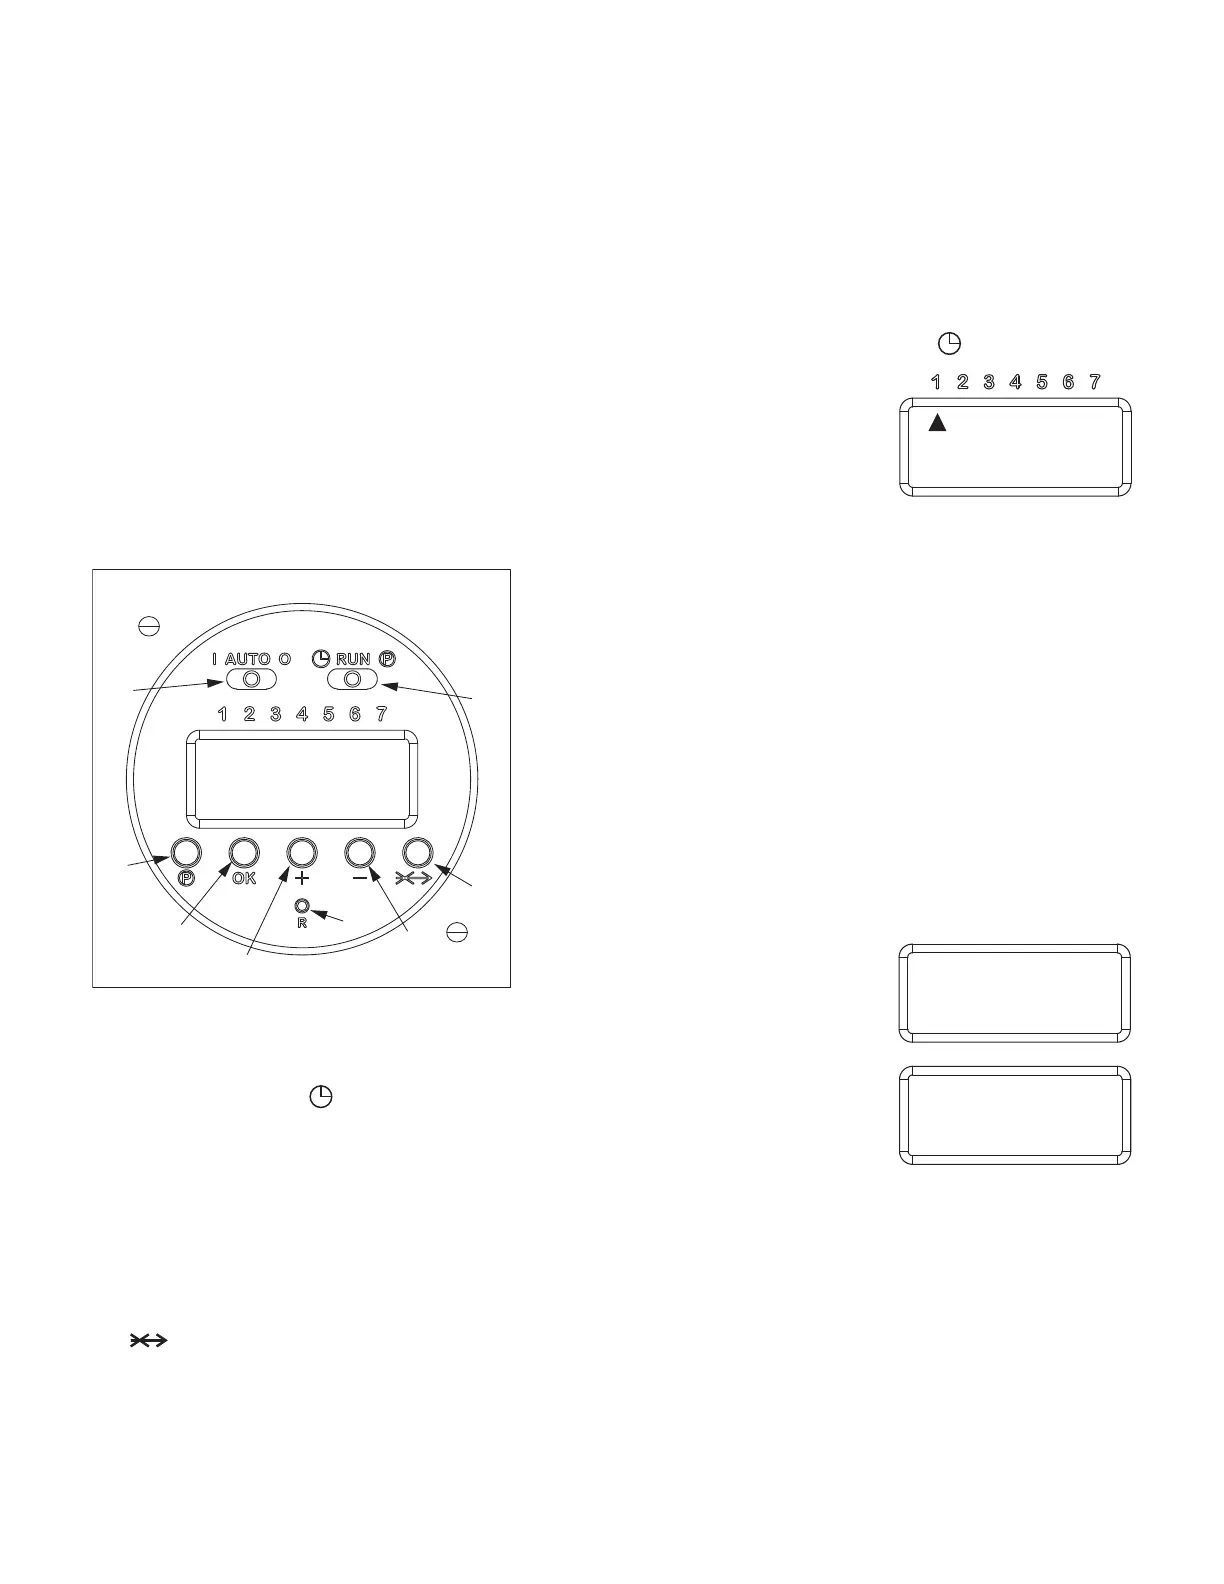
Clock Face Description:
Function Switches:
A. Manual Operation Switch: (I) ON, (AUTO)
Automatic, (O) OFF
B. Programming Switch: to set current time,
(RUN) run mode, (P) to program timer
Key Pad Selectors:
C. (P) Program Selection
D. (OK) to confirm setting and advance to next program
E. (+) Week, Hr, Minute, Second – forward 1 unit at a
time, press & hold to scroll rapidly
F. (-) Week, Hr, Minute, Second – reverse 1 unit at a
time, press & hold to scroll rapidly
G. ( ) Skip key, to change to next screen
H. (R) To RESET timer and erase all programs
Programs:
The PNP digital timer will accept up to 16 programs. A pro-
gram consists of:
1- ON or OFF setting
1- Time of Day setting ( Hour, Minute & Second)
1- Day(s) of Operation setting
Note: Each ON setting must be matched with a corre-
sponding OFF setting.
Programming your Digital Timer:
A. Setting the current time on the LCD display
1. Move Programming Switch to
2. Press the (R) Reset key.
Clock face will display
“AM 12:00”.
3. DAY arrow will flash below the number 1 (Monday).
Press the (+) or (-) key to move arrow to the correct
day (1= Mon, 2= Tues, 7= Sun, etc), then press
(OK). HOUR will flash.
4. Press (+) or (-) to change HOUR to current time, be
sure the AM/PM symbol is correct, then press (OK).
MINUTE will flash.
5. Press(+) or (-) to change MINUTES to correct time,
then press (OK). SECONDS will flash.
6. Since SECONDS will not be used, simply press
(OK). Your current time is set.
7. Move Programming Switch to RUN.
B.Programming the Digital Timer ON/OFF settings
NOTE: It is helpful to write out the program timer
schedules before beginning programming. See last
page for an example.
To program timer for ON operation
1. Move Programming
Switch to (P), display
will show “-01-”. This is
your first ON setting.
2. Press (P) Program
Selection Key. Display
will read “--:--”.

 Loading...