TAÏGA ZONE | TAIGAPOOLS.COM | 12775 RUE BRAULT, MIRABEL, QC, J7J 0C4 2
In order to ensure proper water drainage around the pool, erect a two-
degree slope around the perimeter of the pool (See figure below). The
slope is very important. (figure 1.4). No grass, no mulch around the
perimeter of the pool. River stones suggested.
Table A
Pool Diameter Radius A Depth A
9' (2,74m) 5'-5" (1,65m) 6" (15 cm)
11'-0" (3, 35m) 6'-6" (1,98m) 6" (15 cm)
13'-0" (3,96 m) 7'-0" (2,13 m) 6" (15 cm)
15'-0" (4,57 m) 8'-3" (2,5 m) 6" (15 cm)
18'-0" (5,48 m) 9'-6" (2,9 m) 6" (15 cm)
20'-0" (6,09 m) 10'-9" (3,28 m) 6" (15 cm)
23'-0" (7,01 m) 12'-3" (3,73 m) 6" (15 cm)
26'-0" (7,92 m) 13'-6" (4,11 m) 6" (15 cm)
COVE
CONCRETE BLOCK
WALL
FOAM INSULATION
2 degrees slope for better
water drainage
1.4
The above table indicates the diameter of your pool (A) and the necessary
clearance needed for the crushed stone (B).
Addconcreteblocks(16"x8"x2")onthecrushedstonesothatthewall
issittinginthemiddleoftheblocks(figure1.5).
1.5
9' 11' 13' 15' 18' 20' 23' 26'
A
9'-5"
2,87 m
11'-
5/8
"
3,35 m
12'-8
13/16
"
3,88 m
15'-3
13/16
"
4,66 m
17'-10"
5,44 m
20'-4
7/16
"
6, 21 m
22-11"
7,76 m
25'-5
5/8
"
7,76 m
B 11'-5"
13'-
5/8
"
3,50 m
14'-8
13/16
"
4,29 m
16'-7"
5,07 m
19'-2"
5,84 m
21'-8"
6,62 m
24'-3"
7,39 m
26'-9"
8,17 m
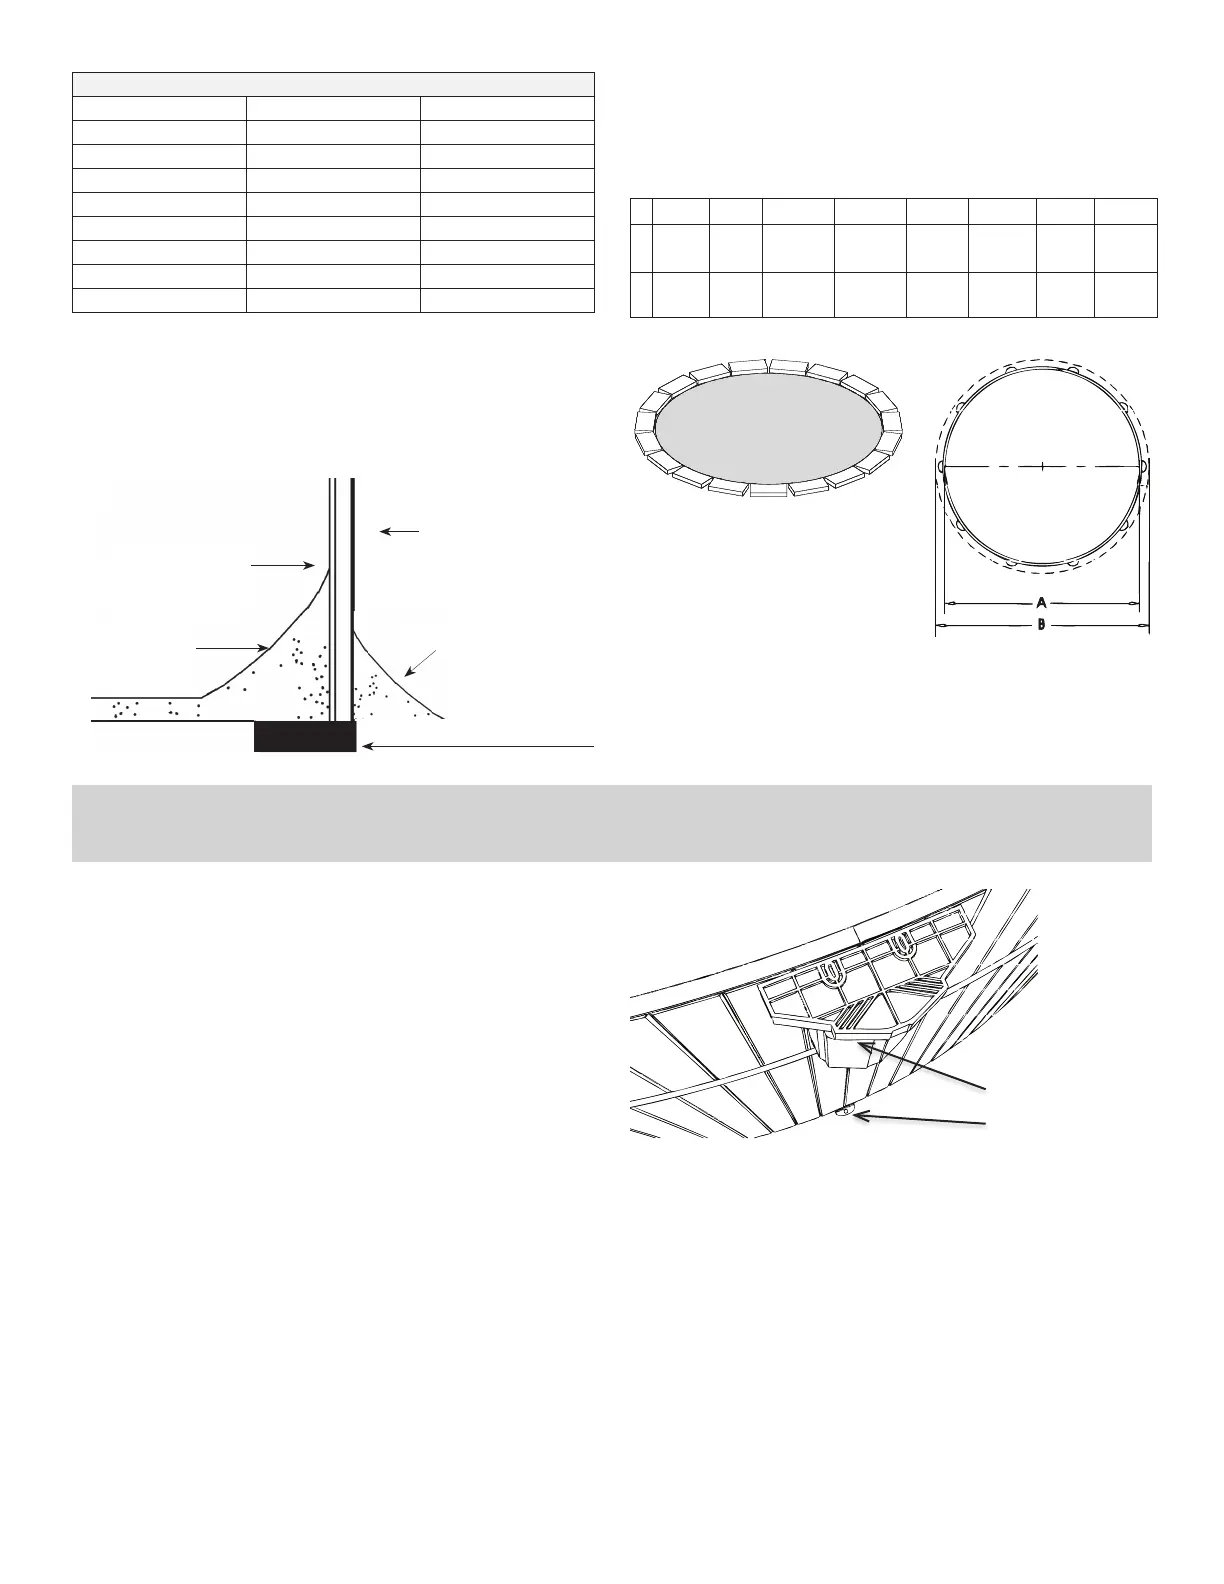
Use the panel clips (R) and screws (V) to tie together the panels at the
base. For the top, attach the columns (CF) with the screws (W). (figure 2.1)
Column screw tightening should be done manually, using a screwdriver.
It is important to plan the location of your filter system ahead of time, and
to install the filter panel in the right place.
(R)
(CF)
2.1
2. ASSEMBLY OF FLEXIBLE PANELS