TAÏGA ZONE | TAIGAPOOLS.COM | 12775 RUE BRAULT, MIRABEL, QC, J7J 0C4 4
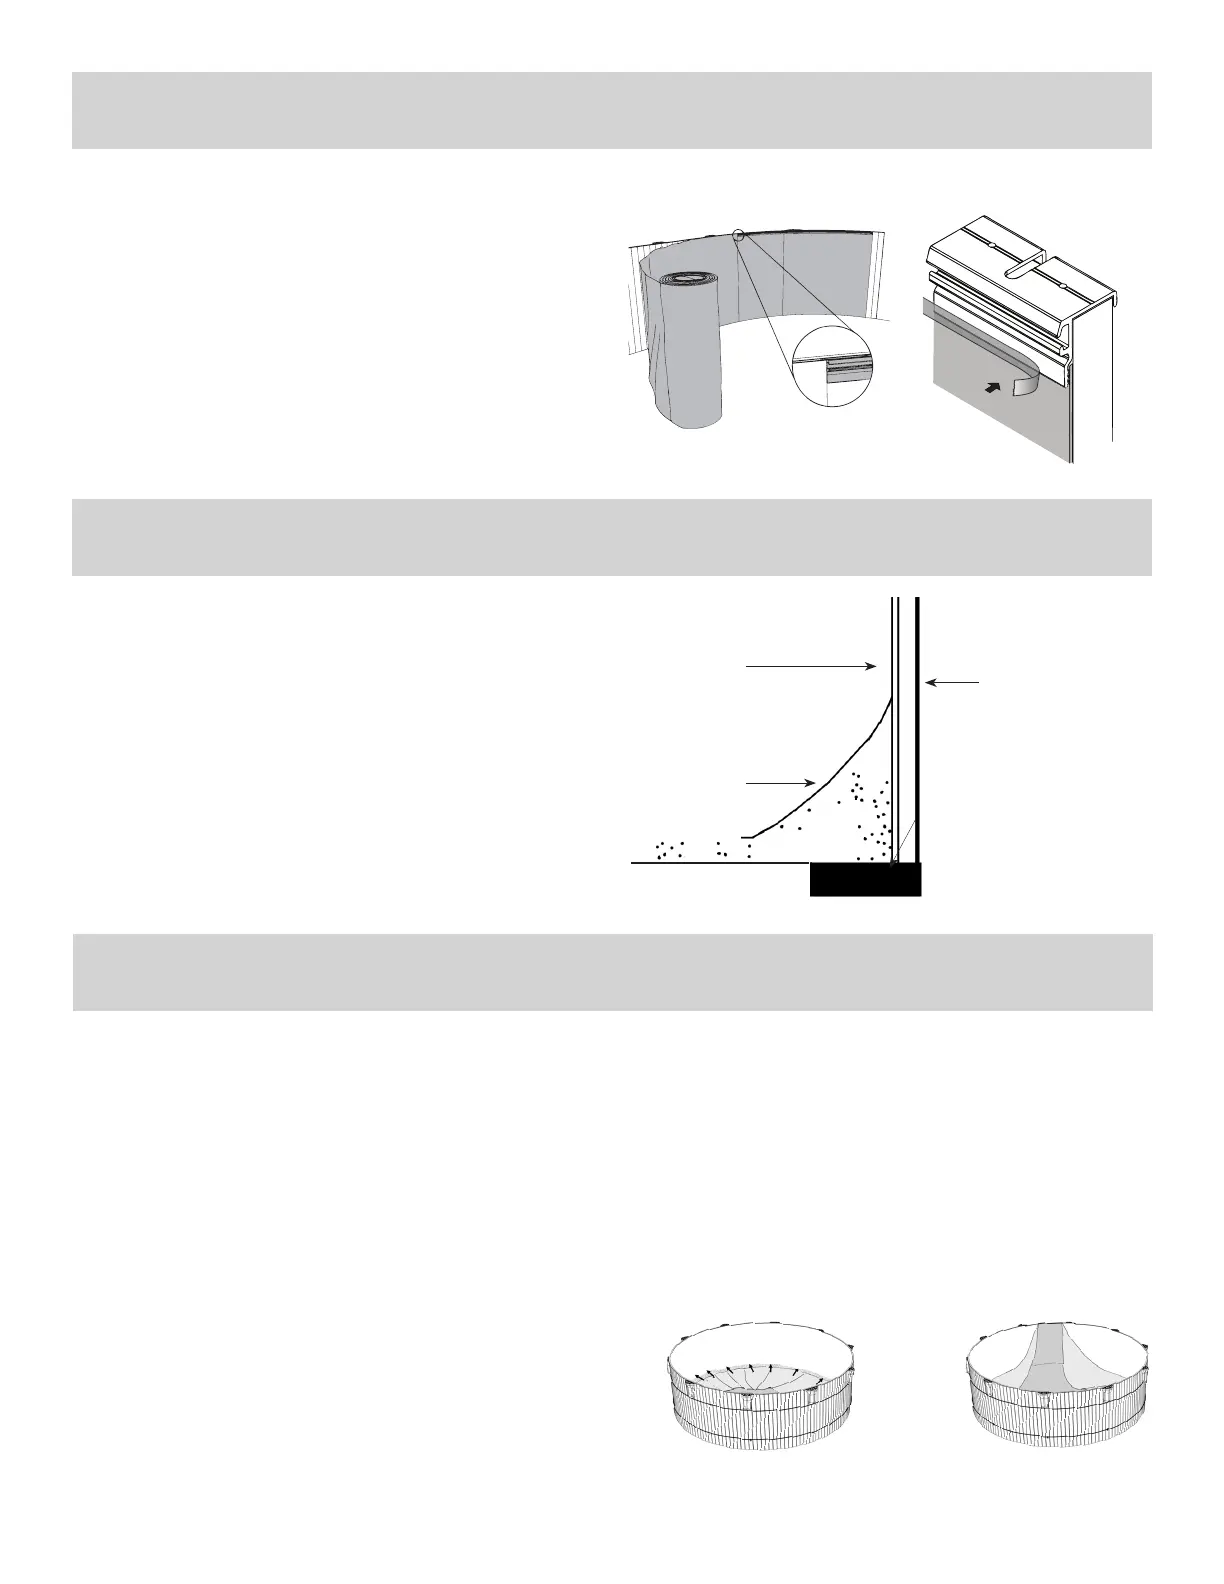
COVE
INSULATING
FOAM
CONCRETE BLOCK
WALL
You may now spread 2-3 in.(7,5 cm) of building sand on the bottom of the
pool and shape a 6 in.(15 cm) cove. Slant at the base of the wall. While
shapingthecove,makesuretocovertheinsulationfoamatthebaseofthe
poolinsuchawayastokeepittaut.DO NOT USE FINE SAND, or any other
product referred to as a pool base, that may damage the vinyl liner.
The cove is very important. THE MANUFACTURER DECLINES ALL LIABILITY
FOR DAMAGES RESULTING FROM FAILURE TO FOLLOW THIS STEP OF
THE PROCEDURE.
6.1
6. SAND BOTTOM PREPARATION
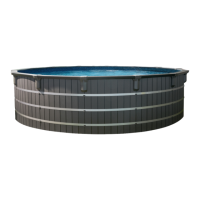
5. FOAM INSTALLATION
As indicated in (figure 5.1), unroll the foam on the wall and position it with the
help of the anchorage fitting. Affix the foam with adhesive tape (figure 5.2).
Once the foam is attached, cut the foam at the skimmer and backflow
whiletakingspecial caretoleave foamcoveringthescrews;coveronce
again with another strip of adhesive tape.
5.25.1
7. LINER INSTALLATION
Place the folded liner at the center of the pool. Remove your shoes to
avoid damaging the liner. Carefully unfold the liner and bring the bottom
seamalongthebaseofthewall(figure7.1).Makesurethepatternedside
is facing upward.
Lift the edges of the liner and insert into the notch of the retaining section
as you go along (figure 7.2).
Insertthehoseofthevacuumcleanerinthebackflowplatehole,between
the wall and the liner. The end of the hole has to be at approximately
12in.(30cm)fromthebottomofthepool.Startthevacuumtosuckthe
air. Before starting to fill the pool, you must:
• Checkthattherearenofolds;
• makesurethattherearenoapparentdefects.
You may begin filling the pool. Remove the vacuum cleaner once the
water is 4 in (10 cm) deep in the shallow part of the pool.
REMEMBER TO :
• Pull the liner firmly but gently;
• Avoid pulling the liner by the sealing joints;
• Avoid damaging the cove or leaving air traped between the liner and
cove;
• Equally distribute any excess liner along the whole circumference
of the wall.
7.1 7.2
 Loading...