-5-
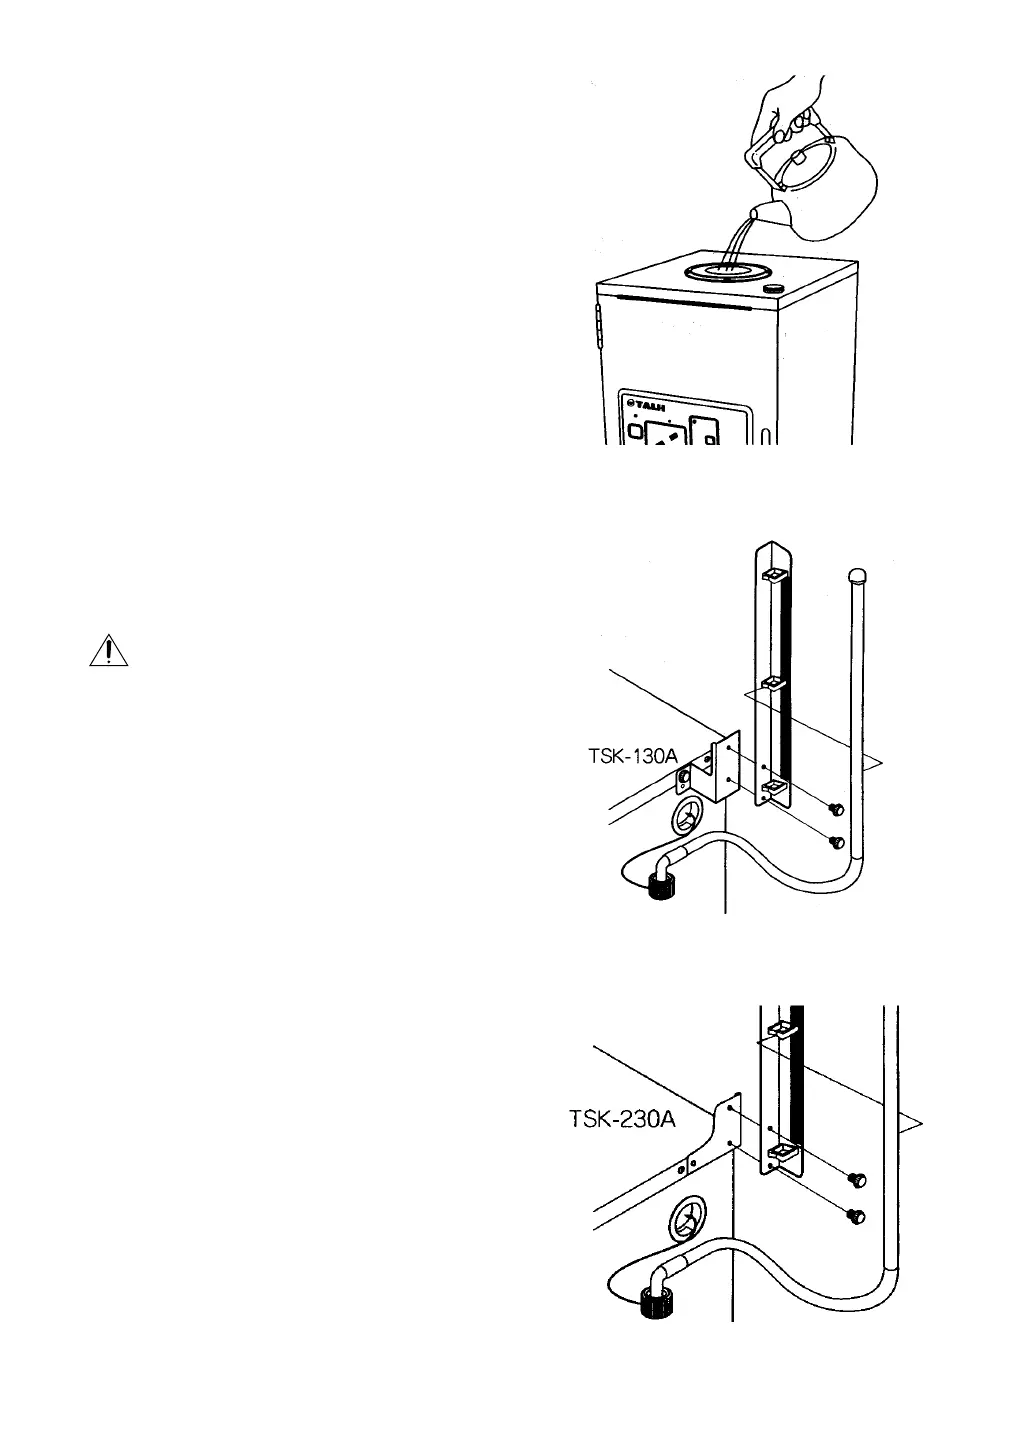
<Fig. 3>
If you have a model TSK-110A, 210A, 220A, or 420A, go
to step 5.
If you have a model TSK-130A, or 230A, go to steps 6
and 7.
5.Clean the sake warmer heat
exchanger pipe. (Fig. 3)
This product is already cleaned inside before
shipment. When you are going to use it for the
first time or after a long period of non-use, clean it
according to the procedures specified below.
1) Push the power cord plug into a wall outlet.
2) Press the power switch to energize the
machine.
3) Take out the bottle holder funnel.
4) Feed water (approx. 70°C) to the bottle holder
to a degree not to cause overflow.
5) Press the manual button and take water from
the nozzle.
Water should be drained completely.
6) Put the bottle holder funnel on the bottle
holder.
Caution
• Hot water comes out of the nozzle while the inside
is cleaned. Pay attention to a possible accident of
scalding, etc.
6.Sake meter setting
• TSK-130A (Fig. 4) (Fig. 6)
1) Fix the accessory sake meter mounting metal to
the main body, using the accessory sake meter
mounting screws.
2) Fix the sake meter fittings to the sake meter
mounting metal, using the accessory sake meter
mounting screws. Then fit the sake meter.
* The sake meter can be mounted either on the
right or left of the main body.
3) Remove the cap that is attached to the sake
meter connection port.
4) Insert the joint part of the sake meter into the hole
located on the side surface of the main body, and
screw it in the sake meter connection port.
Leakage of sake will occur if this screw-in process
is awkwardly followed.
• TSK-230A (Fig. 5) (Fig. 6)
1) Fix the sake meter fittings perpendicularly to the
main body, using the accessory sake meter
mounting screws.
* The sake meter can be mounted either on the
<Fig. 4>
<Fig. 5>