The provided document is an assembly and owner's manual for Takacat LX Series Inflatable Boats, specifically covering models 260LX, 300LX, 340LX, 380LX, 420LX, and 460LX. These boats are inflatable catamarans designed for various recreational activities, offering portability and stability.
Function Description
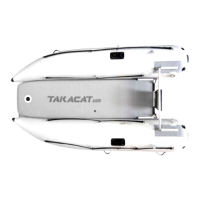
Takacat LX Series Inflatable Boats are designed to be easily assembled, operated, and stored. They function as versatile watercraft, suitable for rowing or motoring with an outboard engine. The catamaran design provides enhanced stability compared to traditional monohull inflatables. Key components include inflatable tubes, an air deck floor, transom bars for engine mounting, and quick-release wheels for easy transport. The boats are intended for use in various water conditions, from calm lakes to coastal areas, and are built to international safety standards.
Important Technical Specifications
The manual provides detailed specifications for each model, including dimensions, weight capacities, and recommended engine power.
General Specifications (common across models where applicable):
- Tube Pressure: 0.2 bar / 3 psi (for inflatable tubes)
- Floor Pressure: 0.7 bar / 10 psi (for air deck floor)
- Shaft Length: S (15") (for outboard engines)
Model-Specific Specifications:
-
T260LX:
- Length/Width: 2.60 x 1.56m
- Draft: 0.1m
- Tube Diameter: 0.48m
- Max. Person: 3
- Max. Loading (including engine): 360kg
- Max. Engine Power: 8HP
- Max. Engine Mass: 30kg
-
T300LX:
- Length/Width: 3.00 x 1.56m
- Draft: 0.1m
- Tube Diameter: 0.48m
- Max. Person: 4
- Max. Loading (including engine): 367kg
- Max. Engine Power: 10HP
- Max. Engine Mass: 40kg
-
T340LX:
- Length/Width: 3.40 x 1.66m
- Draft: 0.1m
- Tube Diameter: 0.48m
- Max. Person: 5
- Max. Loading (including engine): 515kg
- Max. Engine Power: 15HP
- Max. Engine Mass: 50kg
-
T380LX:
- Length/Width: 3.40 x 1.66m
- Draft: 0.1m
- Tube Diameter: 0.48m
- Max. Person: 6
- Max. Loading (including engine): 640kg
- Max. Engine Power: 20HP
- Max. Engine Mass: 60kg
-
T420LX:
- Length/Width: 4.20 x 1.80m
- Draft: 0.15m
- Tube Diameter: 0.55m
- Max. Person: 7
- Max. Loading (including engine): 730kg
- Max. Engine Power: 20HP
- Max. Engine Mass: 60kg
-
T460LX:
- Length/Width: 4.60 x 1.85m
- Draft: 0.15m
- Tube Diameter: 0.55m
- Max. Person: 8
- Max. Loading (including engine): 815kg
- Max. Engine Power: 20HP
- Max. Engine Mass: 60kg
The boats are built to International Standard ISO/6185 and CE tested to 2013/53/EU, ensuring compliance with safety and quality regulations.
Usage Features
Assembly:
The assembly process is designed to be straightforward:
- Unfold Hulls: Lay out the boat hull tubes on a clean, flat surface.
- Inflate Hulls: Locate the inflator valves at the rear of the hulls and inflate to 3 psi using the included hand pump or an optional electric pump. It's crucial to activate the check valve by pressing down and turning it ¼ turn to prevent air escape. The manual notes that pressure should be checked at the heat of the day and that minor valve leaks can be tightened with the provided valve tool.
- Install Transom Bars: Insert the lower transom bar into the lower set of tubes from the rear, ensuring the stainless tab faces up. Then, insert the upper transom bar into the upper set of tubes from the front, with the stainless tab facing down. Soap and water mixture can aid insertion.
- Assemble Motor Mount: Slot the smaller motor mount board inside the tube transom. Create a "sandwich" assembly for the transom using a bolt, SS washer, back board, rubber washer, front board, SS washer, and hand nut. Tighten firmly by hand without tools.
- Install Air Deck Floor: Unroll the inflatable floor and position it, ensuring the rear is flush with the lower transom bar. Lash the D-rings on the bottom of the air deck floor through the fabric slots using the included webbing strap.
- Inflate Floor: Inflate the air deck floor to 10 psi. During inflation, walk on the floor to push it into place. Remember to activate the check valve.
- Inflate Seat: Inflate the inflatable seat to a comfortable pressure. The seat can also serve as a throwable flotation device.
- Assemble Oars: Assemble each oar and install them, attaching retaining nuts to prevent loss.
- Optional Accessories: Install Quick Release Wheels (if opted for) in the down position, ensuring tires face inward to prevent hull damage. These wheels provide sufficient height for a 15" short shaft outboard. Install Quick Release Rod Holders (if opted for) into the upper transom bar.
Operation:
- Pre-Launch Check: After launching, re-check hull pressure (3 psi). Cooler water temperatures can cause air to condense, leading to a pressure drop, so re-inflate if necessary.
- Rowing: Ensure the inflatable seat is properly inflated and installed. Install oars in oar lock pins and attach cap screws. Avoid using oars as levers to prevent breakage.
- Motoring:
- WARNING: Do not overpower the boat or exceed the maximum motor weight.
- Passengers should hold onto the lifeline.
- Sit on one of the hulls when operating.
- Avoid rapid acceleration.
- Regularly check motor attachment screws to prevent loss of the outboard.
- Ensure loads do not chafe or puncture the boat skin.
- Only use a short shaft (15") outboard motor.
- Towing/Anchoring/Mooring: The boat must be empty when towed by another boat and under constant supervision. The towing/anchoring/mooring line should be rigged to the bridle between the two bow D-Rings.
- Beaching: Lift the motor shaft when approaching the beach to prevent damage. Avoid dragging the boat across rough surfaces (rocks, sand, gravel, pavement) to protect the boat skin. If leaving the boat temporarily on a beach, keep part of it in the water to allow internal heat to escape and prevent excessive air pressure buildup from sun exposure.
Safety Considerations:
- Always wear an approved life jacket.
- Avoid contact with sharp objects, corrosive/caustic chemicals, or open flames.
- Never operate under the influence of alcohol or drugs.
- Only operate if proficient in inflatable boat safety.
- Do not allow minors to operate the boat.
- Be a responsible skipper, considering others onboard and around you.
Maintenance Features
Cleaning:
- Rinse the boat with clean fresh water after each use.
- At the end of each season, wash with Takacat Boat wash or a plant-based soapy water, then rinse thoroughly.
- Allow the boat to fully dry before rolling it up and storing it in its bags.
- Store the boat in the provided storage bags in a dry place.
- Important: Do NOT use vinyl preserving agents on fabric surfaces, as these can dry out the fabric and void the warranty.
- For prolonged storage in direct sunlight, cover the boat with a UV Protective Boat Cover (available from local suppliers or www.takacatasia.com).
Repair:
- The repair kit does not include adhesive; PVC boat adhesive must be purchased separately.
- Follow the adhesive packaging instructions or consult online resources (e.g., YouTube) for repair guidance.
- For larger repairs, it is recommended to take the Takacat to a local inflatable boat service center.
- For warranty issues, contact www.takacatasia.com.