• FUEL CAP / FUEL FILTER
NOTE:
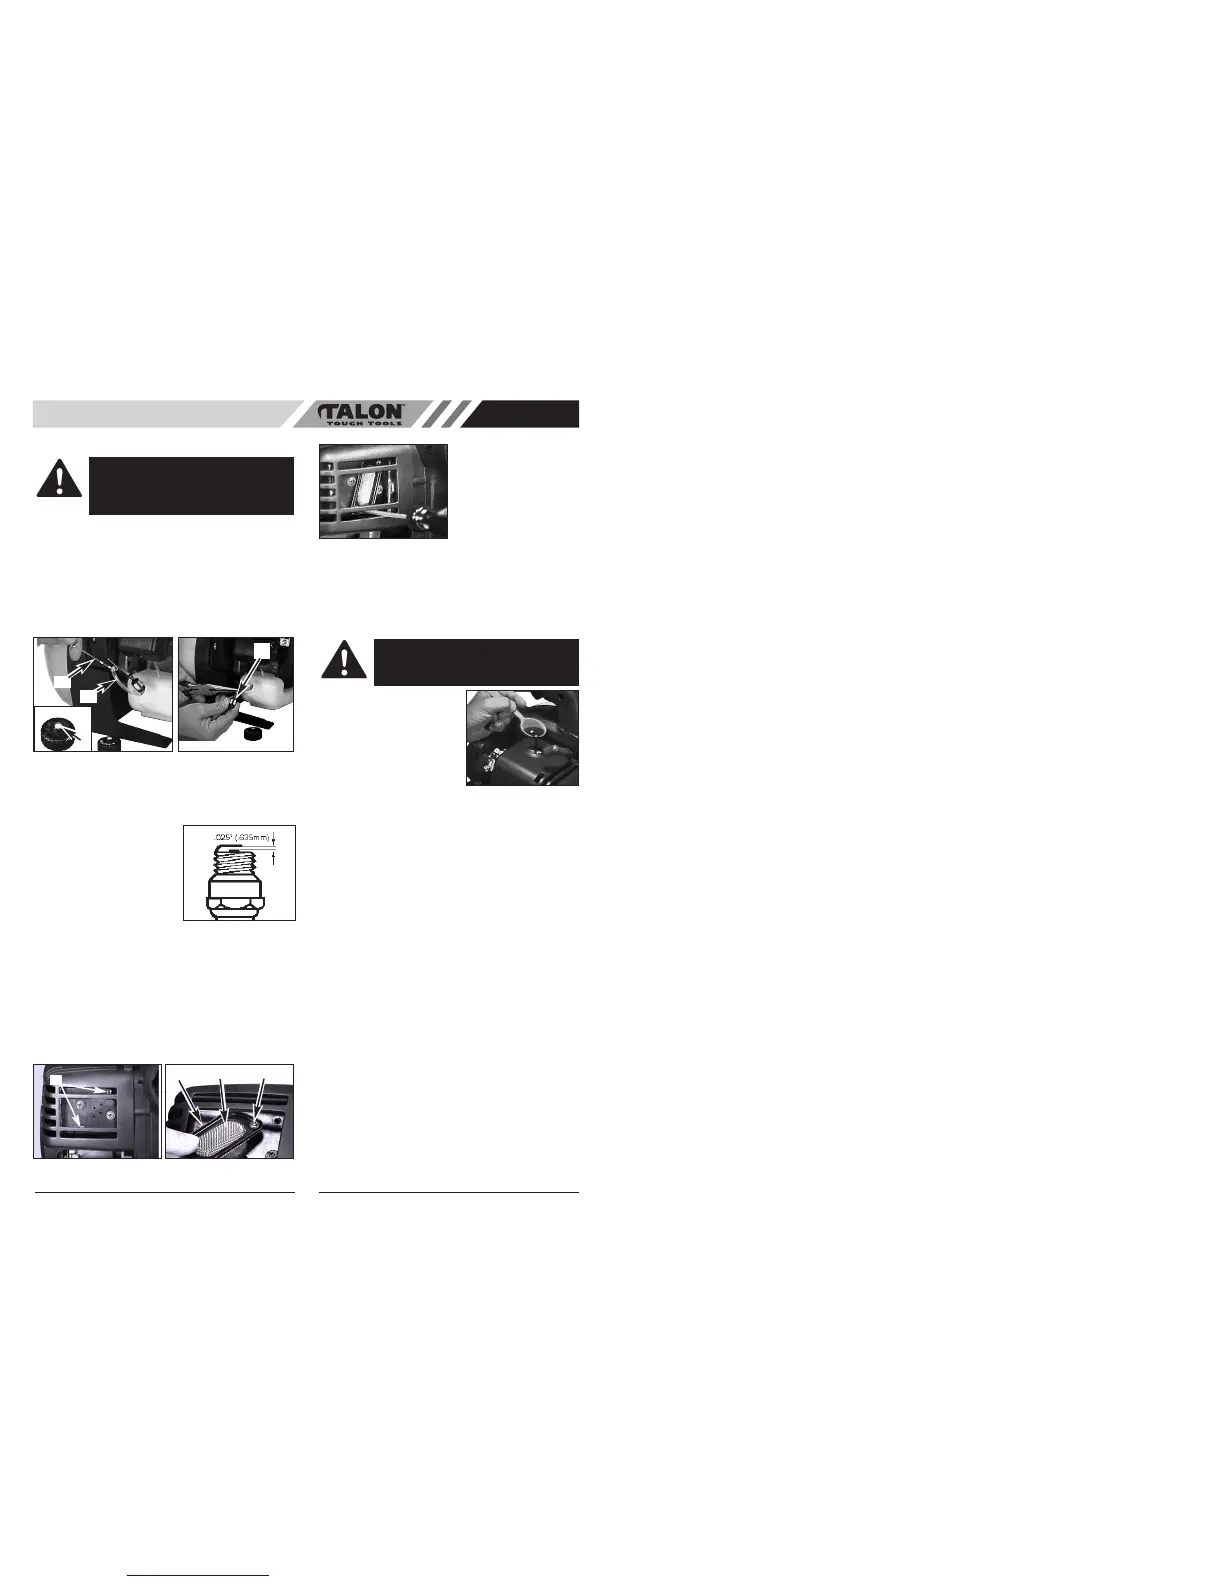
Keep vent (A) on fuel cap clean of debris (Fig. 7A).
Fuel Filter:
1. Lift fuel line (B) out of tank. A steel wire (C) with a
hook or a paper clip works well (Fig. 7B).
2. Pull off fuel filter (D) with a twisting motion (Fig. 7C).
3. Replace fuel filter.
NOTE:
Never operate the blower without the fuel filter.
Internal engine damage could result!
• CARBURETOR ADJUSTMENT
The carburetor was pre-set at the factory for optimum per-
formance. If further adjustments are necessary, please
take your unit to the nearest Authorized Service Center.
• SPARK PLUG
1. Spark plug gap = .025 in.
(.635mm) (Fig. 8).
2. Torque to 105 to 130 inch
pounds (12 to 15 N•m).
Connect spark plug boot.
• SPARK ARRESTER
A spark arrester screen is fitted
to the unit from the factory. A
spare screen is included in your accessory pack.
1. Inspect screen from time to time and clean or replace
as required.
2. To remove spark arrester screen remove the two
small screws in the muffler body and slide screen out
from the muffler shield. (Fig. 9A)
3. To re-install grasp the cover (B) and screen (C), slide
under muffler shield and insert screw (D). (Fig. 9B).
4. Insert other screw as shown. (Fig. 9C)
NOTE: Do not over tighten screws.
• STORING A UNIT
1. Perform all the general maintenance recommended
in the Maintenance Section of your User Manual.
2. Clean outside surface of unit.
3. Drain fuel from the fuel tank.
4. After fuel is drained, start
engine.
5. Run engine at idle until
unit stops. This will purge
the carburetor of fuel.
6. Allow engine to cool
(approx. 5 minutes).
7. Using a spark plug wrench,
remove the spark plug.
8. Pour 1 teaspoon of clean 2-cycle oil into the combus-
tion chamber (Fig. 10). Pull starter rope slowly
several times to coat internal components. Replace
spark plug.
9. Store unit in a cool, dry place away from any source
of ignition such as an oil burner, water heater, etc.
• REMOVING A UNIT FROM STORAGE
1. Remove spark plug.
2. Pull starter rope briskly to clear excess oil from com-
bustion chamber.
3. Clean and gap spark plug or install a new spark plug
with proper gap.
4. Prepare unit for operation.
5. Fill fuel tank with proper fuel / oil mixture. See Fuel
and Lubrication Section.
Fig. 10
AU
8
CAUTION:
Open fuel cap slowly to release
any pressure which may have formed in the
tank. Remove fuel from unit. Store fuel in
approved container before performing this
procedure.
C
D
B
Fig. 8A
Fig. 7B Fig. 7C
A
Fig. 8
WARNING:
Failure to follow these steps may
cause varnish to form in the carburetor and
difficult starting or permanent damage follow-
ing storage.
Fig. 9A Fig. 9B
Fig. 9C
B
A
C
D
 Loading...