TX100 / TX300
How to: Step By Step
> Watch our installation video on YouTube!
> Search for “Tape King TX100” and subscribe.
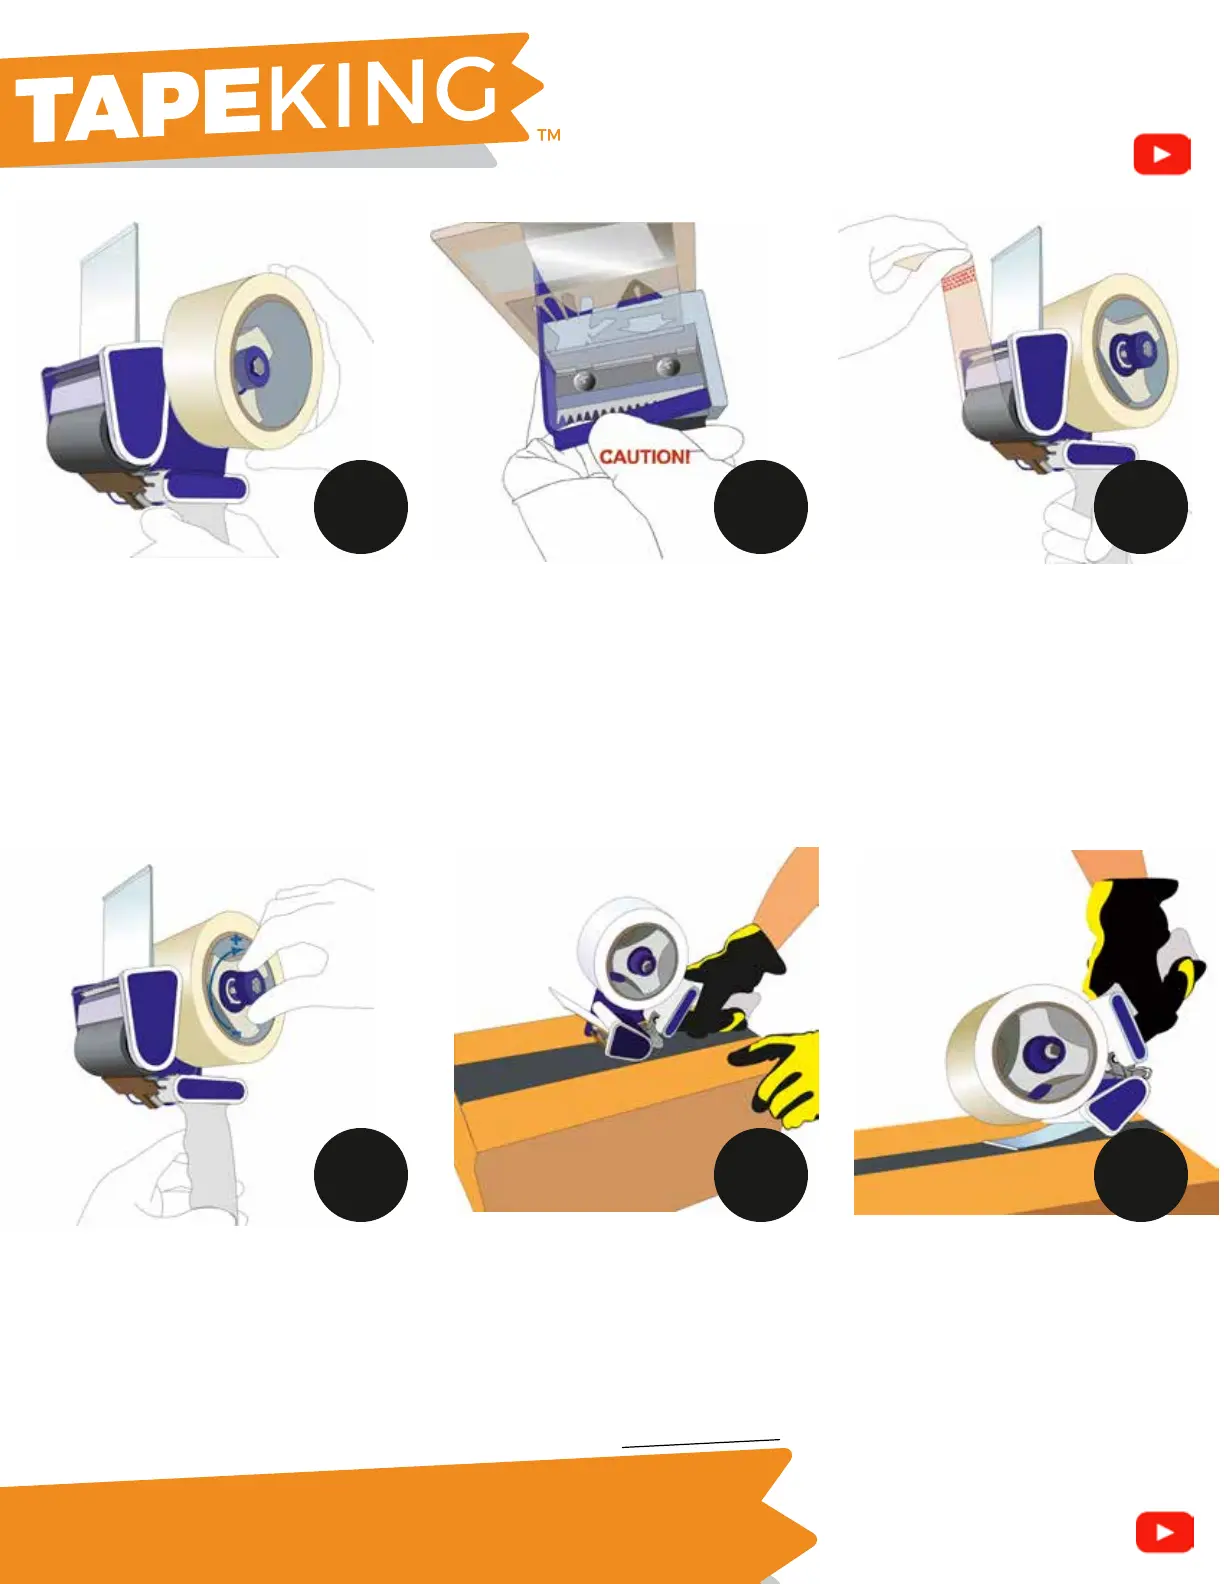
1 2 3
4 5 6
Congratulations on purchasing our
Tape King packing tape gun.
Insert roll of tape into Tape Roll Holder
(H). Make sure adhesive side is facing
down before peeling off tab.
Adjust the blue knob (G) clockwise to
tighten brake tension or counter
clockwise to loosen. We recommend
turning it clockwise a few times but do
NOT overtighten. Adjust to your liking.
This controls the roller speed while
dispensing tape.
Remove the blue plastic blade cover
(B). Be careful and take caution
while removing to avoid cutting
yourself over the sharp blade. Use
your fingers or a small tool to pry it
off if stuck.
If using a new roll, pull tape up and
out and make a cut with the blade
(step 3). Beging taping your box,
carton, etc.
Pull tape out using the starting
guide with arrows. Line tape
between black roller (C) and
metal clasp (D). Make sure sticky
side is facing down. Pull tape out
and use blade to make the first
cut before taping boxes.
TIP: Use the clear rectangular
swiper (A) and tilt forward while
cutting the tape off. Don’t use too
much force or it may break. Use
swiper piece after taping, press
down on the tape in a swiping
motion to create a better seal.
Page 2 of 2
> Watch our installation video on YouTube!
> Search for “Tape King TX100” and subscribe.
Enjoy our hassle free, no questions asked 1-Year warranty! Need help? Please contact us support@tapeking.com

 Loading...