Do you have a question about the Tascam PortaStudio 424 and is the answer not in the manual?
Warning about opening the unit and servicing.
Do not expose the appliance to rain or moisture.
Information for UK customers regarding AC plugs.
A comprehensive list of safety precautions for operating audio equipment.
Instructions for antenna grounding according to electrical code.
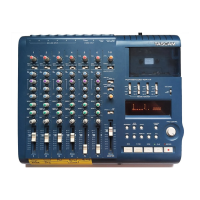
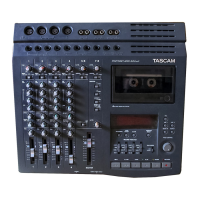
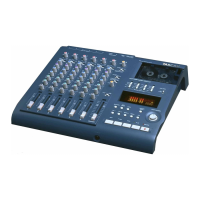
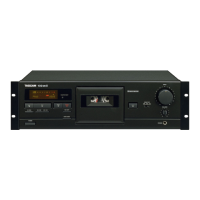
Introduction to the 4-track cassette recorder and mixer workstation.
Explanation of the Portastudio as a complete audio production facility.
Illustrates signal routing for Tracking, Overdubbing, and Mixdown.
Diagram and explanation of the input signal path through the mixer.
How TAPE CUE mix and MONITOR switches control headphone monitoring.
Important notes on using the cassette recorder and tape types.
Details on tape speeds, track format, and head configuration.
Guidelines for playing stereo tapes on the 424.
Guidance on selecting appropriate tape for the Portastudio.
How to protect recorded tracks from accidental erasure.
Advice on choosing cassette lengths and avoiding C-120 tapes.
Instructions for using the correct AC adaptor and power requirements.
Controls for selecting and adjusting input signals for channels 1-4.
Details on connecting and using stereo line inputs.
Controls for headphone monitoring and tape cue playback.
Controls for overall output level and effect send master.
Explanation of TRK LEDs, meters, and METER switch.
Controls for selecting recording source and track readiness.
Details on MEMORY, ZERO RETURN, DBX, and PITCH controls.
Description of SYNC OUT, EFFECT SEND, and LINE OUT jacks.
How the output selector routes signals to rear panel jacks.
Initial setup and connection guide for basic mixer operation.
Pre-operation settings for mixer controls.
Connecting a microphone as an input source.
Steps to power up the Portastudio 424.
Connecting headphones for monitoring.
Setting the input source for a channel.
Steps for inserting tape and setting the tape counter.
Choosing tracks and adjusting input/record levels.
How to start, record, and stop the recording process.
Securing a recorded track to prevent accidental overwriting.
Positioning tape and selecting monitor sources for playback.
Setting playback levels and stopping the tape.
Adjusting channel levels and pan for recording new tracks.
Steps for recording additional tracks while monitoring existing ones.
Securing the overdubbed track.
Procedure for recording on tracks 3 and 4.
Mixing multiple inputs onto one track.
Capturing stereo mixes to two tracks.
Using DIRECT mode for multi-track recording.
Setting up connections to an external mixdown deck.
Adjusting faders and monitor switches for mixdown.
Fine-tuning individual track balances for the final stereo image.
General steps for recording over small sections of tape.
How to use the optional footswitch for punch-ins.
Choosing clear points for musical and technical punch-ins.
Performing punch-ins using the main RECORD button.
Using the RC-30P for convenient punch-in operations.
Combining tracks onto an empty track for more recording space.
Adding live sources during a track bounce.
Incorporating stereo channels into the bouncing process.
Different methods for applying effects to audio signals.
Adjusting signal strength to external effect devices.
Configuring output levels of effects units for optimal signal.
Adjusting the wet/dry mix on effect devices.
Illustrates patching effects via STEREO INPUTS.
Alternative method of connecting effects to MIC/LINE inputs.
Using ZERO RETURN and MEMORY for creating repeatable tape loops.
Connecting and using an MTS-30 for MIDI synchronization.
Details on connecting sync devices via SYNC IN/OUT jacks.
Power connection and main power control for the unit.
MIC/LINE IN, TRIM, and INPUT switch for channel signal management.
Adjusting high/low frequencies and stereo balance for channels.
Controls for channel level and routing to effects.
Section for routing signals to external effect processors.
Master control for effects and the output jack for external devices.
Details on using stereo inputs for effect returns or line sources.
Controls for overall stereo mix level and line outputs.
Controls for headphone monitoring and tape playback.
Overview of cassette loading, dbx system, and tape path.
Adjusting stereo line input levels and assigning to mix or cue.
Final mix level control and stereo line outputs.
Detailed explanation of monitor selection and TAPE CUE controls.
Headphone volume control and connection jack.
Jacks for tape cue output and the versatile output selector switch.
Operation of the dbx noise reduction system.
Controls for tape speed, rewind, fast forward, stop, play, and pause.
How to initiate recording and adjust tape pitch.
RECORD FUNCTION switches and track indicators.
Meters, tape counter, ZERO RETURN, and MEMORY functions.
Connecting FSK sync signals from devices like the MTS-30.
Outputting FSK sync tones recorded on track 4.
Importance of regular cleaning for optimal performance.
Procedures for cleaning critical tape path components.
Routine cleaning of the pinch roller for proper tape movement.
Maintenance of the capstan shaft for smooth tape transport.
Process for removing residual magnetism from tape heads.
Explanation of the dbx noise reduction and compression system.
Addressing potential interference and subsonic frequency problems.
Answers to common questions about recording and track bleeding.
Troubleshooting headphone monitoring and stereo input issues.
List of available accessories like footswitches and cleaning kits.
Physical dimensions, weight, motor, and tape speed details.
Input/output levels, impedance, and frequency response data.
Details on track format, noise reduction, and signal-to-noise ratio.
Power requirements and overall power consumption of the unit.
Visual representation of the internal signal paths and connections.
Diagram illustrating signal levels throughout the unit.
| Type | 4-track cassette recorder |
|---|---|
| Tracks | 4 |
| Noise Reduction | dbx Type II |
| Tape Speed | 3.75 ips (9.5 cm/s) |
| EQ | 3-band EQ |
| Outputs | Headphone Out |
| Power Supply | 12V DC |