English
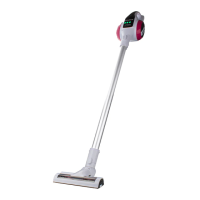
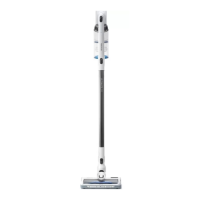
Stick vacuum cleaner
Ideal Lithium
Cross Id All-Over
USE AND CARE:
- Do not use the appliance if its lter(s) are not
correctly in place.
- Do not use the appliance if its accessories are
not properly tted.
- Do not use the appliance to vacuum up water
or any other type of liquid.
- Do not use the appliance if the on/off switch
does not work.
- Respect the MAX level indicator. (Fig. 1).
- Store this appliance out of reach of children
and/or those with reduced physical, sensorial
or mental abilities or who are unfamiliar with
its use
- Do not operate on areas which contain metal
objects such as nails and/or screws.
- Never vacuum hot or sharp objects (cigarette
butts, ash, nails, etc.).
- Do not open the battery/ies under any circum-
stances whatsoever.
- When the battery/ies is not in use, keep it away
from other metal objects like paper clips, coins,
keys, screws ... that could connect a terminal
to another.
- Do not short-circuit the battery terminals as
this may cause an explosion or re.
- The battery/ies should be stored at a tempera-
ture of below 40ºC.
- Use the appliance only for dry working tasks.
- Never leave the appliance connected and un-
attended if is not in use. This saves energy and
prolongs the life of the appliance.
- Do not use the appliance on any part of the
body of a person or animal.
- Recharge the battery/ies only with the charger
supplied by the manufacturer. A charger that
is suitable for one typ of battery may cause
explosion or re hazard when used with other
battery
- Use the device only with the battery/ies for
which has been specically designed. The use
of any other battery/ies s can cause an explo-
sion or re hazard.
DESCRIPTION
A 2-in-1 Accessory:
-A-1 Upholstery brush
-A-2 Crevice lance
B Long lance accessory
C Wall bracket, also for accessories
D Wall bracket rear cover
E Extension tube
F Vacuum cleaner base
G Rotating brush base
H Brush release button
I HEPA Filter
J HEPA lter protector
K Metal lter
L Accessory release button
M Extension tube/accessory couple
N ON/OFF button.
O Vacuum cleaner body
P Dust box
Q Lithium batteries
R Power source
S Power indicator
T Tank release button
U Screws and plugs for wall bracket
INSTALLATION
- Be sure to remove all packaging material from
inside the appliance.
- Make sure the battery is ttted correctly.(Fig. 2)
ASSEMBLING THE WALL BRACKET:
- The appliance comes with a wall bracket (C),
so it can be hung on the wall
- The product can be charged without using the
wall bracket To do this, unscrew the rear cover
on the wall bracket (D) and extract the charger
cable, which can be connected directly into the
vacuum cleaner body.
- Fix the wall support as you think appropriate,
using wall plugs, screws, adhesive...
- Make sure that the bracket is rmly xed; it
should be able to support twice the weight of
the appliance.

 Loading...