14 CLARITY M/CLARITY M STEREO User Manual
8. Library
Presets are composed of parameters found on the Edit page. Both RTA and Radar
parameters are stored in a preset. Press the 4th button to access the Library
menu. Scroll through the available folders with the rotary knob to select the most
appropriate category.
Saving a Preset
The rst 5 presets in each folder are locked and cannot be overwritten. To save a
new preset, select a slot with the arrow buttons and then press the 3rd button
to store. Conrm the save with the 5th button, or cancel with the 4th button. If
connected to a computer, eject the Clarity M before saving. Once conrmed, a
new name such as Auto #06 will appear in that slot. Preset names can be changed
by connecting to a computer and accessing the Presets folder. On the Radar page,
an unedited preset will appear as Preset: Name. If changes are made in the Edit
Menu, this text will read Edited: Name.
Loading Presets
To load a new preset, navigate to the folder where the preset is stored using
the rotary knob, then use the arrow buttons to select the preset. Press the 2nd
button (Recall) to automatically load the settings stored in that preset. The Radar
page will conrm that the new preset has been loaded.
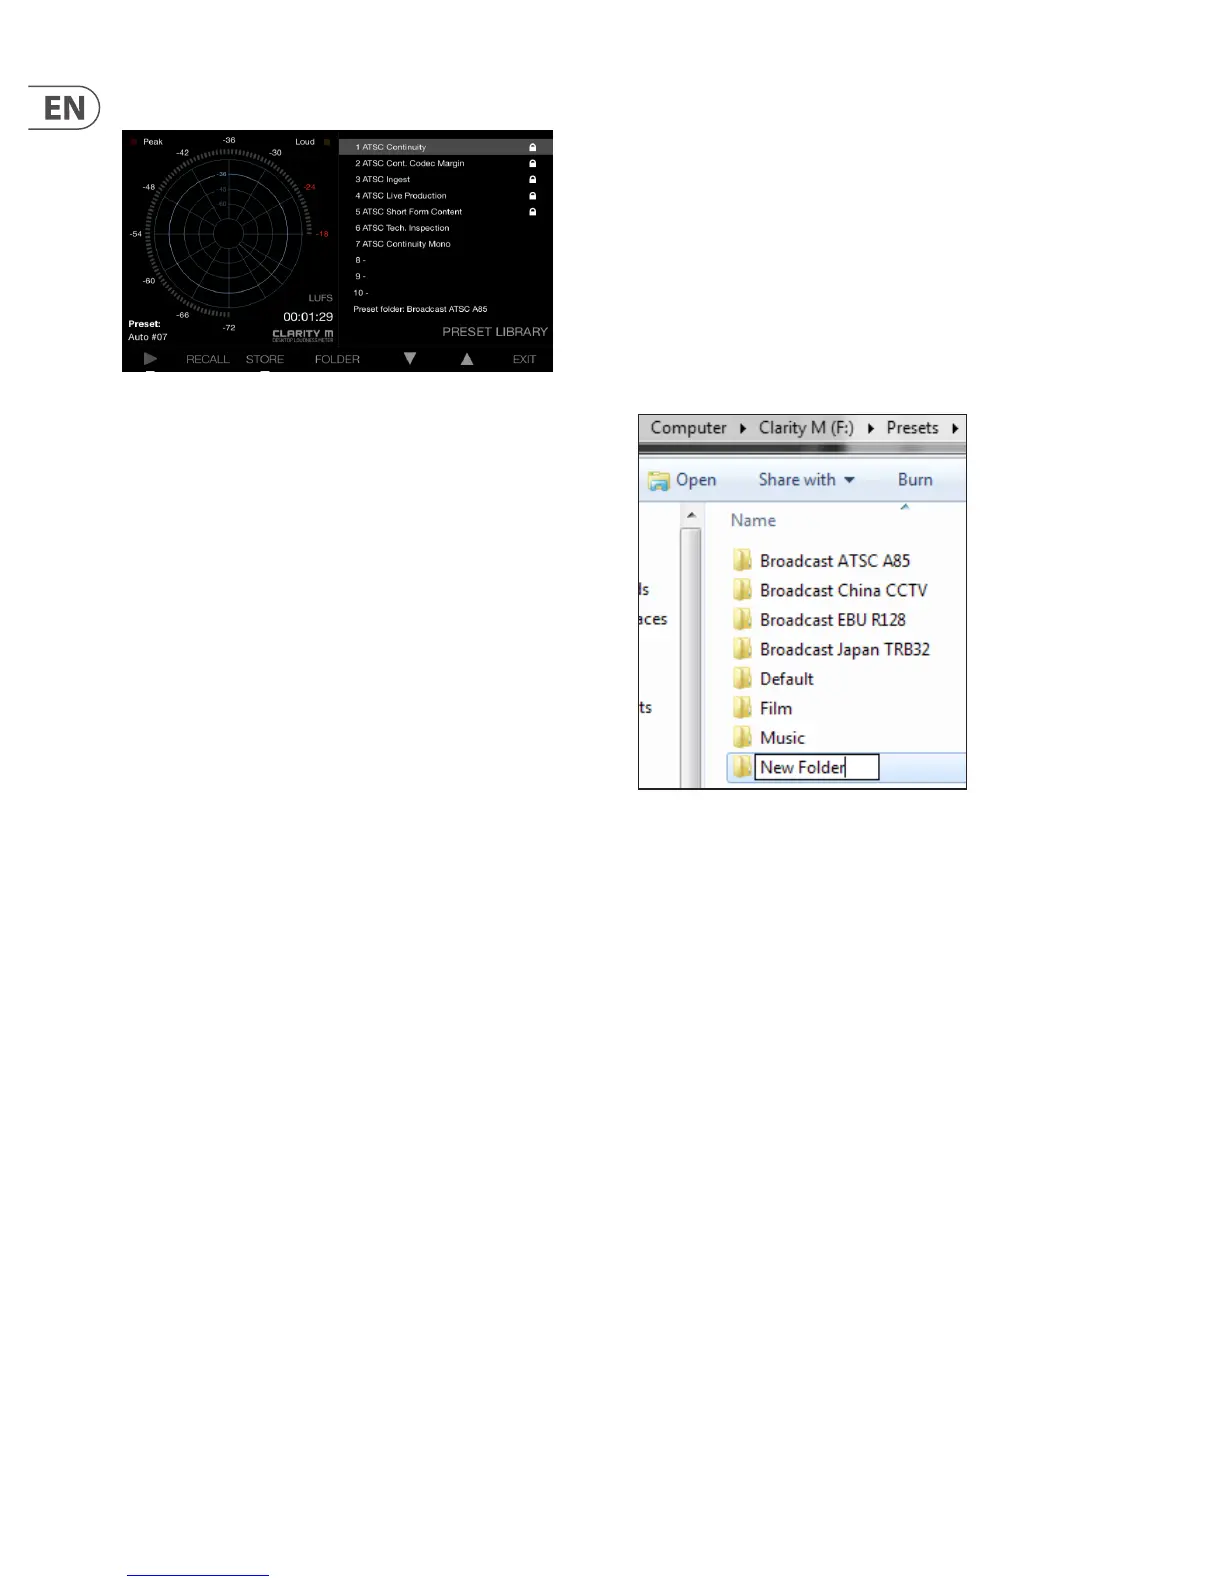
Accessing Folders and Preset Management
Saved presets can be renamed by connecting to a computer and accessing the
Presets folder. Only FAT16 characters are accepted. In order for the les to be
viewed on a computer, the USB Mode must be set to Disk Drive in the System
(SYS) menu. A new hard drive will appear called “Clarity M”, and within this you
will nd folders for Firmware, Logo, Presets, Compliance, and if any screenshots
have been taken, a dedicated folder will appear for those les.
Preset names have the following structure:
##_NAME
## indicates 2 digits, such as 06 for preset #6, and an underscore must be placed
between the number and name with no spaces. The actual name, such as MY
PRESET, can have a space in the middle, but not after the name.
Presets can also be dragged from one folder to another if you want to change the
location, just as you would change the location on your local hard drive.
Likewise, les can be deleted by right clicking and selecting “delete”.
Factory presets 1-5, which normally cannot be altered from Clarity M itself, can
be edited, moved or deleted when connected to a computer.
Note – if the factory presets are accidentally deleted, they can be
downloaded from the product page on tcelectronic.com. The factory preset
collection is regularly updated, so it is always a good idea to check out
tcelectronic.com/p/P0C7T/Downloads for updated presets.
Adding Folders
While connected to a computer, navigate to the Presets folder where you will see
a list of the existing folders (Default, Film, Music, etc.)
Simply create a new folder and give it a name, and this will appear in Clarity M.
Logo
A custom logo can be loaded into Clarity M, appearing on the Radar screen in the
bottom right corner. To do this:
- Place a .png image le in the Logo folder while connected to a computer
- The .png le can have any name. If more .png les are placed in the logo folder,
the top one alphabetically will be chosen.
- If you are placing a logo for the rst time, you can toggle RTA/Radar to load the
logo on the radar page.
- In case you need to replace the logo, you'll need to reboot the unit.
Requirements for the logo:
- .png with or without transparency
- Native resolution is 164x35
- If the image is larger than this resolution, it will be reduced while keeping the
aspect ratio. It will always be aligned at the bottom right.
 Loading...