2 Copyright 2016 Thermoplastic Comfort Systems, Inc.
Operating Instructions: TCS Digital Furnace
www.tcsdentalinc.com / 866-426-2970
I092514 Rev B
Eective Date: 11/01/16
WATLOW
FUSE
POWER
Digital Furnace
o
I
EZ-ZONE
550
550
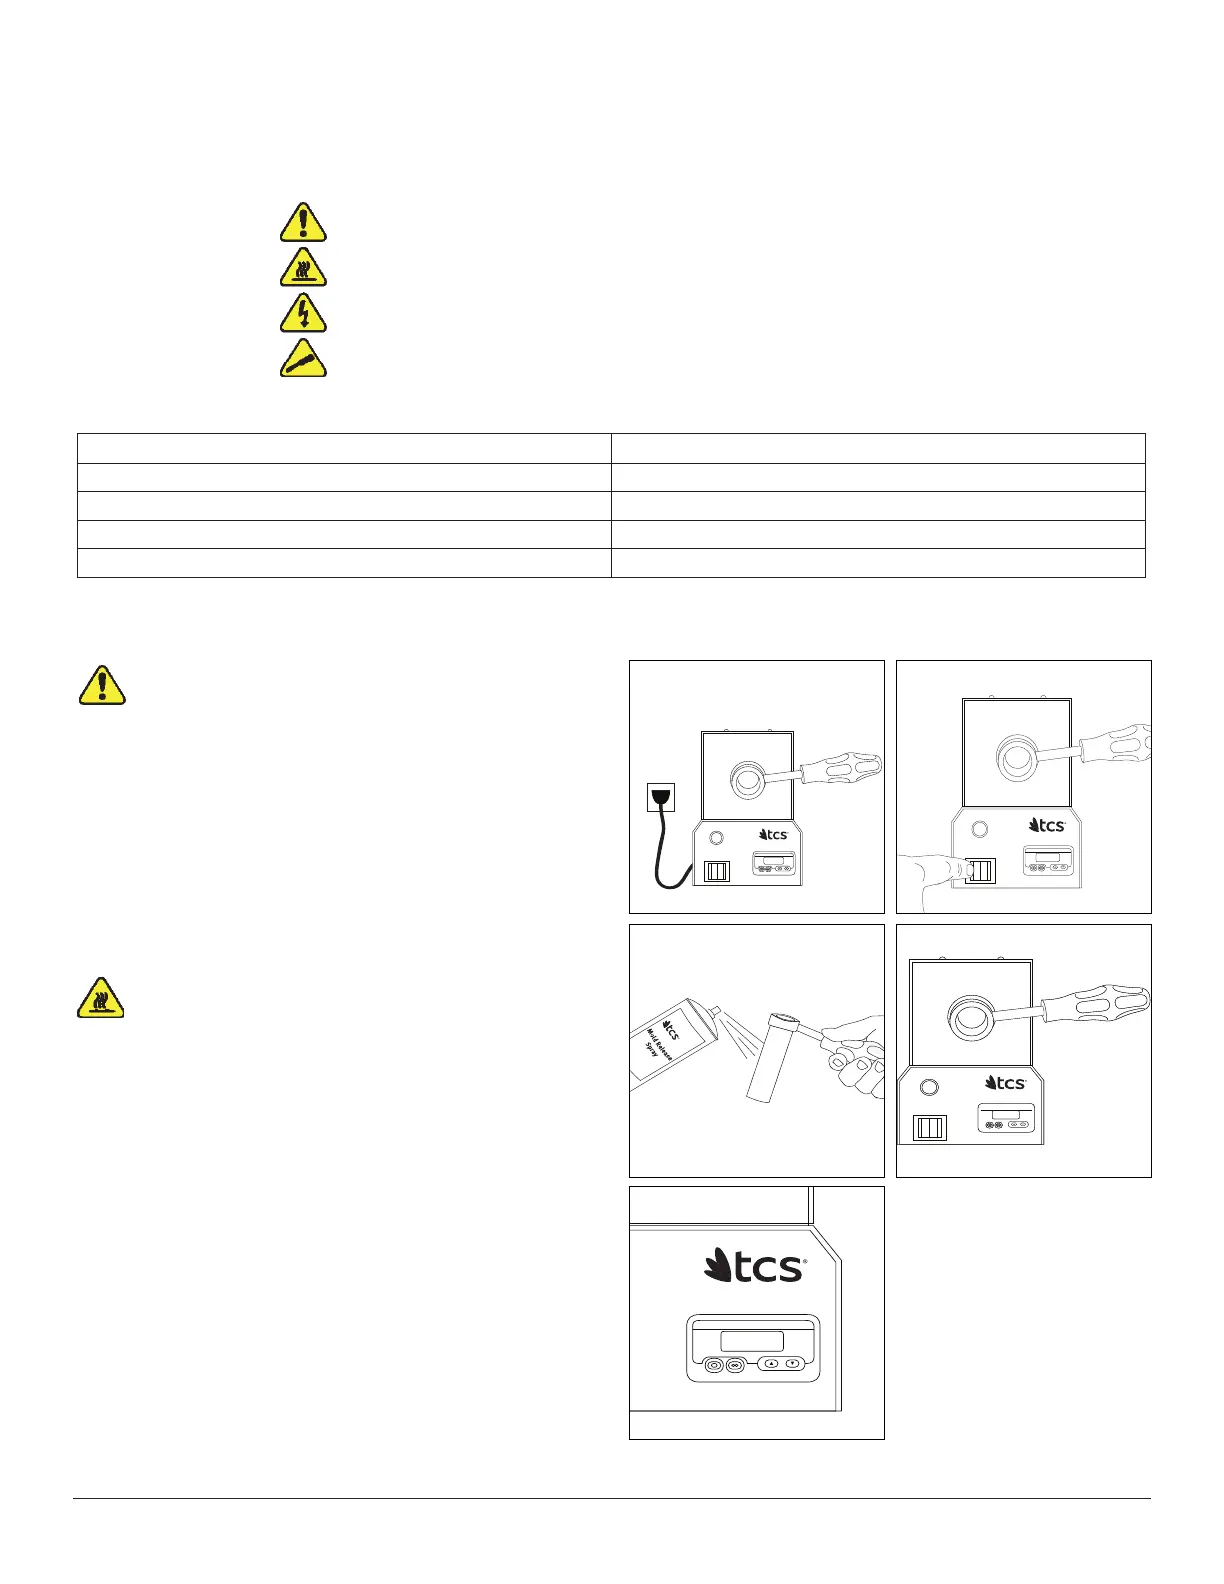
1. Select a place near the injector to place the furnace. The furnace
should be close enough to the injector to allow easy transfer of the
molten resin to the injector.
2. Plug the furnace power plug into a grounded, three-pronged outlet.
This furnace is manufactured in 110V and 220V, make sure the line
power matches the voltage and the frequency rating listed on the
power cord. FIG 1
WATLOW
FUSE
POWER
Digital Furnace
EZ-ZONE
o
I
WATLOW
FUSE
POWER
Digital Furnace
EZ-ZONE
o
I
FIG 1 FIG 2
FIG 3
FIG 5
FIG 4
1. Turn on the furnace by pushing ON/OFF switch to the “I” position.
FIG 2
Note: The furnace is pre-calibrated to 550°F (ideal temperature
for Unbreakable™). Please refer to product (resin) label for time and
temperature for iFlex™ and Karadent™. Refer to page 3, “if change in
temperature is needed”.
2. Lightly spray the cylinder with TCS Mold Release Spray inside and
out. FIG 3 Insert the cylinder into the furnace so that it begins to heat
as well. It is important that the cylinder heats up with the furnace.
FIG 4
Note: The cylinder needs to be heated up with the furnace, otherwise
it will not be at the proper temperature when the cartridge is inserted.
3. Wait until the furnace temperature reads 550°F. This can take up to
10 minutes. The green and red digits should match for at least 30
minutes prior to use. FIG 5
Note: It is important to wait approx. 30 minutes once the furnace
reaches desired temperature in order to allow the entire unit to stabilize.
WATLOW
FUSE
POWER
Digital Furnace
EZ-ZONE
o
I
WATLOW
FUSE
POWER
Digital Furnace
EZ-ZONE
o
I
Caution: Some of the components of the furnace get very hot!
Always use protective gloves, clothing and eye protection.
Caution: High voltages are present. The line power connections
must have a functioning ground connection and over voltage
protection in the form of a fuse or circuit breaker.
** DO NOT DEFEAT THE GROUND WIRE ON POWER PLUG
** TURN OFF FURNACE BEFORE CONNECTING OR DISCONNECTING
ELECTRICAL PLUGS.
General Safety Hazard: Refer to the instructions for details on the specific hazard.
Caution: Hot surface warning
Caution: Electrical shock hazard
Technical Symbol: All operations marked with this symbol are to be performed by qualified maintenance
personnel only.
Your safety and the safety of others are very important. We have provided important safety messages in this manual. Please read these messag-
es carefully. A safety message alerts you to potential hazards that could hurt you or others. Each safety message is associated with a safety alert
symbol. The definition of these symbols are described below:
2. Unpacking and Safety
Ventilation Clearance:
AREA MINIMUM REQUIRED CLEARANCE
Back of the unit 10 cm / 4 inches
Sides of the unit 20 cm / 8 inches
Above 30 cm / 12 inches
Below N/A
3. Getting Started
4. Operating the Furnace
 Loading...